Searching for a local web design agency sounds simple. Open Google, type “web design company near me,” check a few websites, look at star ratings, compare prices, then choose one. The problem starts when an attractive portfolio, a cheap quote, and a confident sales pitch hide weak development, poor performance, unclear ownership, or no plan for getting customers after launch. A website can look excellent in a screenshot and still be slow on mobile, hard to update, invisible in search, inaccessible to users, or impossible to maintain without going back to the same developer every time something breaks.
Recent 2026 guidance from web design agencies and industry directories puts more emphasis on business goals, relevant proof, ownership, accessibility, performance, SEO, project scope, and post-launch support rather than visual portfolio alone.
That changes how you should evaluate web designers. You are not really buying pages, colors, buttons, animations, or a WordPress installation. You are buying a business asset that should help people understand what you sell, trust your company, find you through search, contact you, book you, buy from you, or take another action that matters.
A good agency should be able to explain how its design and development decisions support those outcomes. A weak agency often talks mostly about how modern the website will look. Before paying deposit, you need to know what is being built, who owns it, how it will perform, how search engines will understand it, who maintains it, and what happens when project ends. This guide gives you practical way to check those things before signing.
Start With Business Goal, Not Website Design
First question should not be, “What will my homepage look like?” First question should be, “What must website help business accomplish?” This sounds obvious, but many website projects start backward. A business owner collects three websites they like, sends screenshots to designer, asks for something similar, gets quote, approves design, and discovers months later that nobody defined lead flow, conversion goals, SEO requirements, analytics, content ownership, or customer journey.
A website can copy visual style perfectly and still fail because business problem was never defined.
A serious web design partner should ask about customers, services, locations, competitors, sales process, current traffic, existing leads, and conversion problems. Those goals should influence page structure, calls to action, navigation, forms, content, analytics, and technical setup. A website that looks great but converts poorly is still a business problem.
Write simple project brief before speaking to agencies. You do not need 30-page specification. One page is enough. List what website sells, who it serves, locations covered, important pages, required integrations, desired actions, current problems, existing technology, deadline, budget range, and what success should look like after launch. If current site exists, include problems you already know: slow mobile performance, poor rankings, outdated design, broken forms, difficult editing, low conversion rate, security issues, or poor ecommerce experience.
This makes agency comparison much easier because every candidate receives same basic problem. One agency might recommend complete rebuild. Another might recommend targeted modernization. Another might push expensive custom development that you do not need. You can compare reasoning instead of comparing colorful proposals. If agency ignores business goal and immediately talks about theme, animations, sliders, or homepage design, ask why those things solve your stated problem. Design matters, but design should serve business purpose, not replace it.
Local Does Not Always Mean Better
“Local” is useful filter, not guarantee of quality. A local agency may understand regional customers, competitors, language, service areas, business environment, and common local marketing channels. It may also offer easier meetings and faster communication. But geography alone does not prove technical skill, project management ability, SEO knowledge, or quality of finished work. A nearby agency can deliver poor website just as easily as remote agency can deliver excellent one.
Remote work also changes meaning of local service. A business owner can now work with specialist located elsewhere through video calls, shared project tools, staging sites, documentation, and remote support. One 2026 local web design guide makes same distinction: local can matter because of relevant market understanding and accessibility, but geography itself should not be treated as only qualification. The right question is therefore not simply “Are you located near me?” Ask, “Have you built websites for businesses like mine, and can you prove what happened after launch?”
When Local Expertise Matters
Local knowledge becomes more valuable when website depends heavily on geography. A dentist targeting one city needs location signals, service pages, local content, accurate business information, appointment pathways, and strong local search presence. A restaurant needs location, opening hours, menu, reservations, directions, photos, and mobile-friendly contact options. A home service company may need multiple service areas, location-specific landing pages, quote forms, phone tracking, and clear service coverage.
Google supports LocalBusiness structured data for helping Google understand information such as business details, hours, departments, and other local information. But schema alone does not create local rankings. Website content, Google Business Profile, relevance, prominence, reviews, technical SEO, links, and user experience all belong in broader local strategy.
Check Live Websites, Not Portfolio Screenshots
Portfolio screenshots are weak evidence. Screenshot can show attractive visual design while hiding slow loading, broken mobile layout, poor accessibility, bloated code, weak SEO, or an abandoned project. Ask for three to five live websites the agency built or substantially developed. Open each one yourself.
Test website on phone. Resize browser. Open service pages. Click forms. Try navigation. Check whether content loads properly. Visit important pages. Look for obvious errors. If agency says website is recent, ask what work it performed. Some agencies showcase websites where they only designed logo or supplied content while another developer built entire site. You need know exactly what agency contributed.
Current industry guidance also recommends evaluating live work, relevant case studies, and measurable outcomes instead of relying on portfolio screenshots alone. A serious agency should not become defensive when you ask for evidence. It should be able to explain project scope, challenges, technology, timeline, and result.
Test Mobile Performance Before Hiring
A website can look fast on agency laptop and feel terrible on mobile. This happens because desktop connection and hardware can hide problems caused by oversized images, excessive JavaScript, web fonts, third-party scripts, page builders, video backgrounds, and poor hosting. Your customers may not experience website under same conditions as designer. Before hiring any agency, run their live work through PageSpeed Insights and read our full breakdown of why mobile speed kills lead generation, it explains exactly what LCP, INP, and CLS mean for real business outcomes, not just laboratory scores.
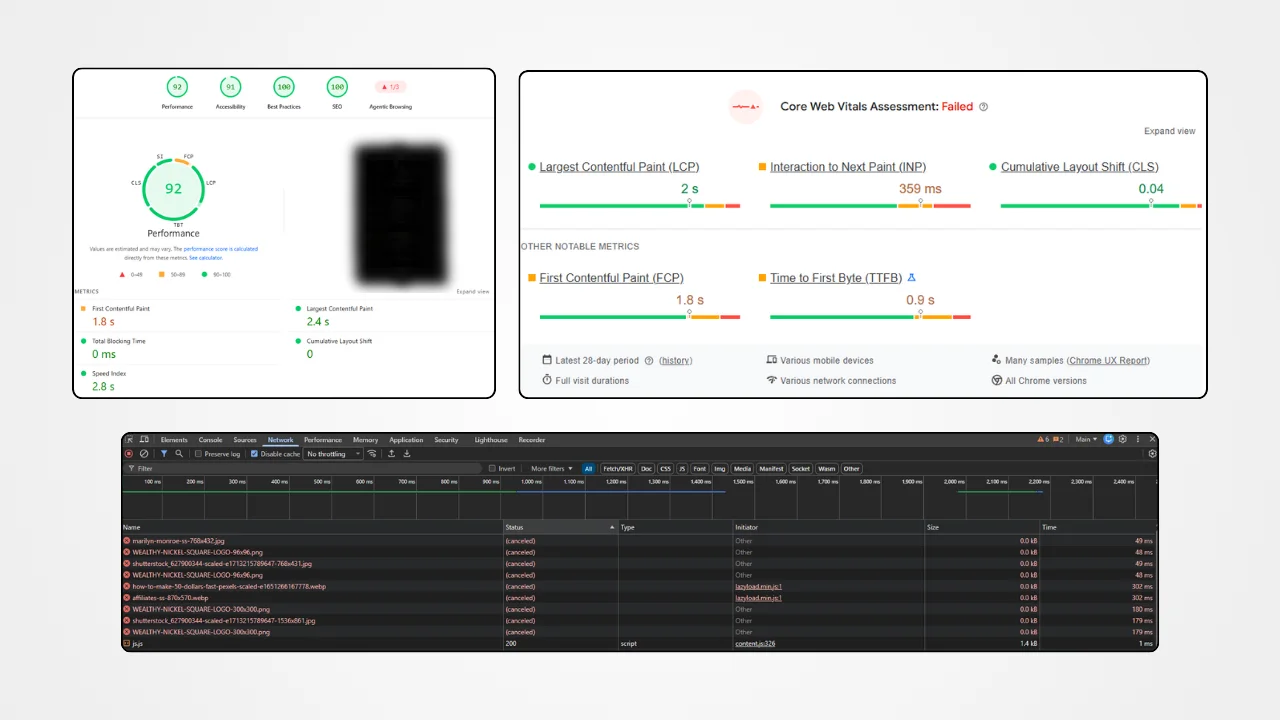
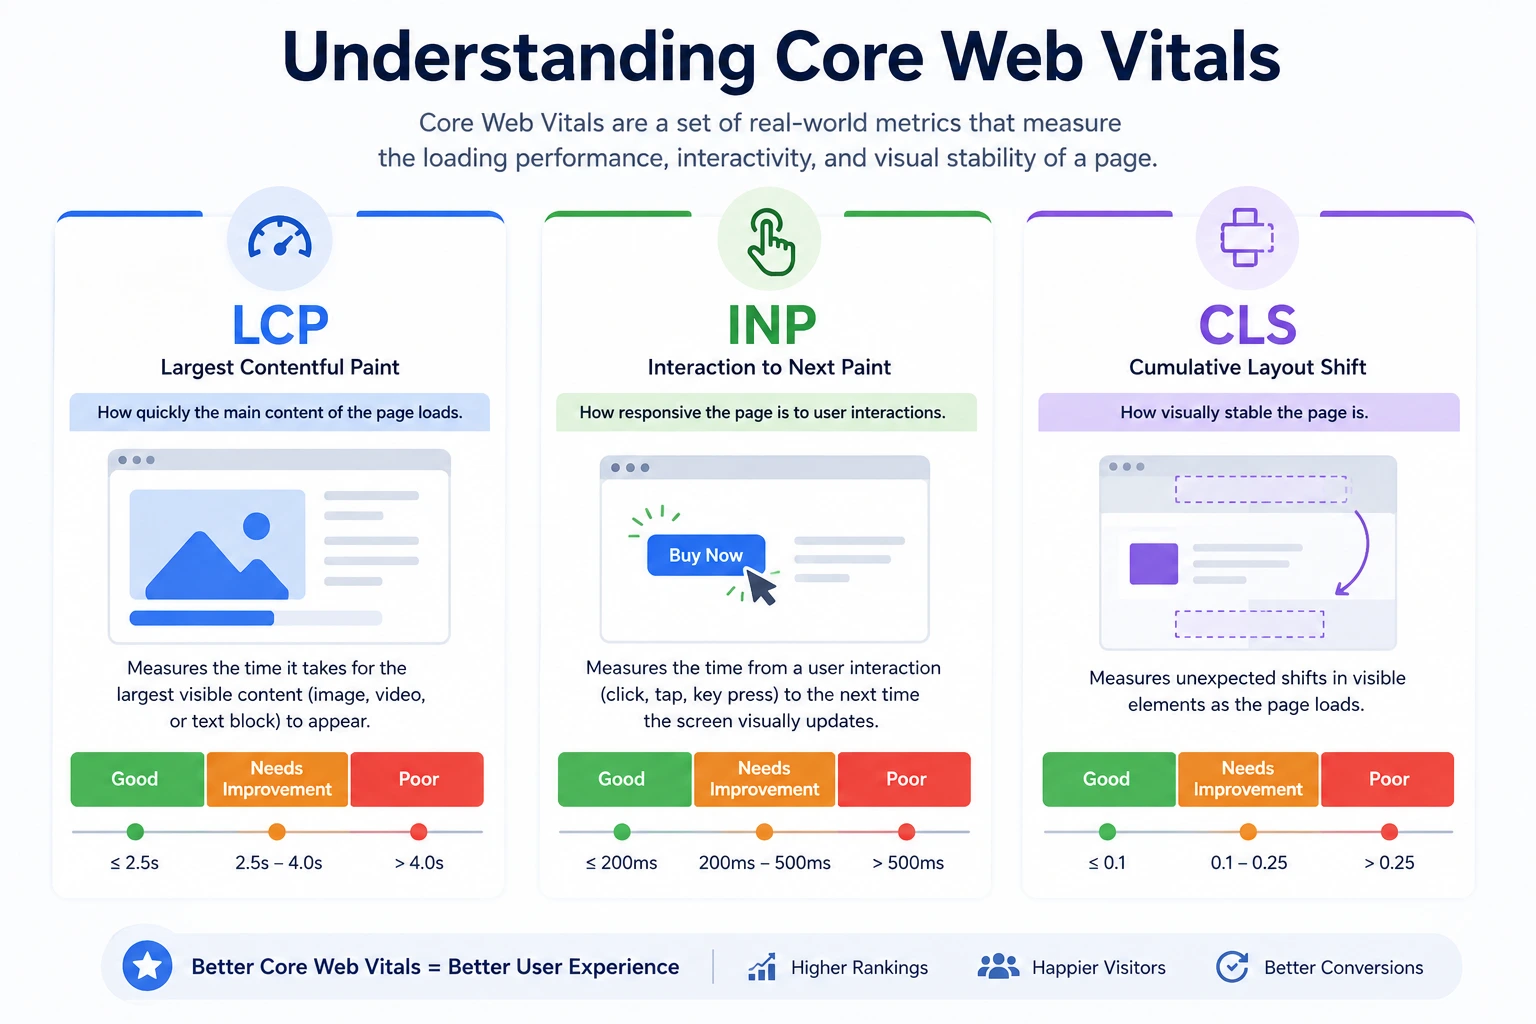
Run representative pages through Google’s PageSpeed Insights. Check both lab results and available field data. Do not obsess over one score, but investigate serious problems. Google identifies Core Web Vitals as user-experience metrics covering loading performance, responsiveness, and visual stability. Current Google guidance for AI search also recommends good page experience alongside foundational SEO practices.
Look at LCP, INP, and CLS. LCP helps measure loading of main content. INP measures responsiveness to user interactions. CLS measures unexpected layout movement. These metrics do not tell whole story, but they expose common performance problems. If agency talks only about hitting a specific PageSpeed number, that is already a warning sign.
Ask prospective agency one simple question: “How do you handle performance during development?” Good answer should include image optimization, responsive assets, CSS and JavaScript management, caching, font strategy, third-party scripts, hosting considerations, and real-user monitoring where appropriate. Bad answer is “We install a speed plugin after launch.”
Performance should be considered while building site, not sprayed on afterward like air freshener.
Ask About SEO Before Project Starts
Do not wait until website is finished to mention SEO. Website architecture directly affects SEO. URL structure, navigation, headings, internal links, templates, content structure, indexability, canonical URLs, redirects, structured data, image handling, and page performance can all be affected by development choices.
Google’s current documentation says AI search features continue to rely on foundational SEO practices. Important content should be crawlable, internal links should help discovery, pages should provide useful content, and structured data should accurately match visible information. If agency has no plan for this, visibility gaps will appear quickly. For a full picture of how AI search is changing what websites need to do, read our guide on what GEO is and why your website needs it.
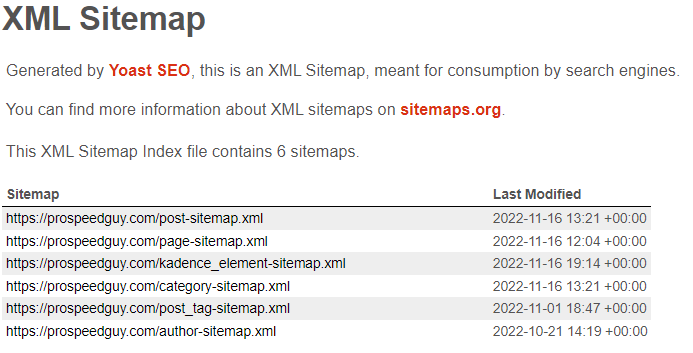
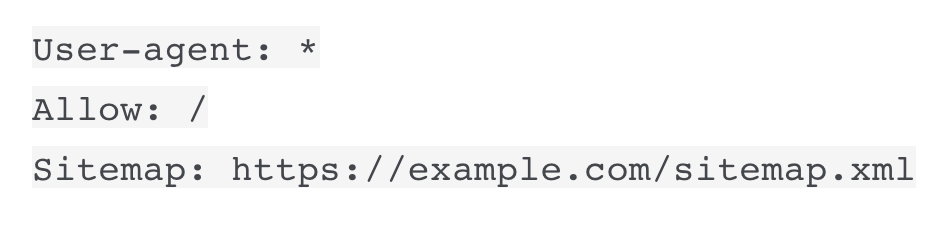
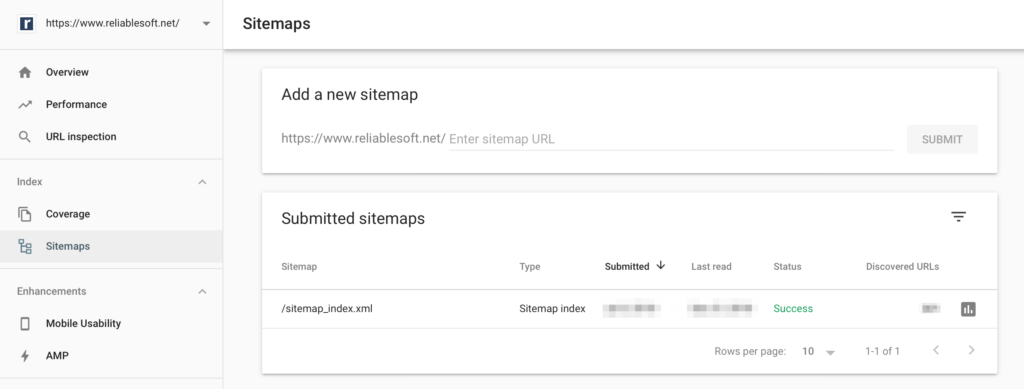
Ask agency whether basic technical SEO is included. Ask how it handles redirects during redesign. Ask whether existing URLs remain unchanged when possible. Ask whether old URLs are mapped to new URLs. Ask who submits sitemap, verifies Search Console, checks indexability, and monitors errors after launch.
A redesign that looks beautiful but destroys existing organic traffic is not successful.
Check Agency’s Technical Experience
“WordPress developer” can mean very different things. One person may know how to install theme and edit blocks. Another may work comfortably with custom PHP, APIs, JavaScript, CSS architecture, databases, caching, WooCommerce, server configuration, migrations, security, and performance optimization.
Same applies to Shopify, Webflow, Drupal, custom frameworks, and ecommerce platforms.
WordPress, Shopify, WooCommerce and Custom Builds
Match platform to actual project.
Simple brochure website may work well with WordPress. Ecommerce store may need WooCommerce or Shopify depending on business requirements. Custom application may need different stack. Do not hire agency because it says it can build “anything.”
Ask for projects using same technology and similar complexity. If website needs WooCommerce, ask for WooCommerce examples. If website needs Elementor, Kadence, custom blocks, multilingual setup, booking integration, CRM connection, or membership system, ask for relevant proof.
You want evidence of solving your kind of technical problem, not generic evidence that agency knows how to make websites.
Look for Proof, Not Promises
Words are cheap. Evidence costs effort.
Agency may say “SEO optimized,” “lightning fast,” “conversion focused,” “mobile first,” “AI ready,” or “Google friendly.” Ask what each phrase means.
“SEO optimized” should lead to specific actions. “Fast” should lead to measurements. “Conversion focused” should lead to customer journey, CTA strategy, forms, analytics, and testing. “AI ready” should lead to crawlability, structured content, original information, technical accessibility, and measurement rather than magic claims.
Be especially careful with guaranteed rankings. No legitimate agency can control Google’s exact ranking outcome. Search systems change, competition changes, queries change, and Google does not guarantee specific organic positions. Same logic applies to AI search citations.
Ask for case studies with numbers where confidentiality permits. Traffic growth. Lead growth. Conversion changes. Performance improvements. Search visibility. Plugin reduction. Page-load improvements. Revenue changes.
Numbers are not automatically proof either, but they are better starting point than adjectives.
Read Reviews With Context
Reviews matter, but five-star rating alone tells you little. Look at review volume, recency, project type, reviewer identity, and what review actually discusses. A restaurant owner reviewing an agency for logo design is not strong evidence for a complex WooCommerce rebuild. A client praising “great communication” tells you something different from client describing successful migration, performance improvements, SEO recovery, and post-launch support.
Third-party platforms can help you compare agencies using reviews, case studies, services, location, technology, and other filters. Clutch’s September 2026 directory, for example, lists web design companies and advises buyers to examine verified reviews, case studies, relevant proof, project process, scope, ownership, and support.
Do not ignore negative reviews either. Look for patterns. One unhappy client may be unusual. Repeated complaints about missed deadlines, poor communication, hidden charges, broken sites, or disappearing after payment deserve attention.
Understand What Website Quote Includes
Never compare proposals based only on total price. Two agencies can quote wildly different amounts because they are selling different scopes.
One quote may include strategy, UX, design, development, copy migration, SEO, analytics, testing, accessibility, training, hosting setup, redirects, and support. Another may include only design and development. Both can call it “website.”
Watch for Missing Services
Read quote line by line.
Check whether it includes:
Discovery and planning
UX structure
Design
Development
Content migration
Copywriting
Image preparation
SEO setup
Analytics
Search Console
Redirects
Forms
Integrations
Ecommerce setup
Testing
Accessibility checks
Performance optimization
Security setup
Training
Launch support
Maintenance
Also check revision limits. “Unlimited revisions” sounds attractive but can hide messy process. A clear number of design rounds and defined approval points can be healthier.
Current agency-selection guidance recommends comparing scope, team, process, content responsibilities, measurement, ownership, change management, security, warranty, and support instead of headline quote alone.
Make Sure You Own Website
This is one of biggest questions.
Domain should be under your control. Hosting should be accessible to you. Analytics should belong to your business. Google Search Console should not be controlled exclusively by agency. Website administrator access should exist. If custom code is created specifically for your project, contract should clearly explain intellectual-property ownership and licensing.
You do not want website held hostage by developer.
Ask before project starts:
Who owns domain?
Who owns hosting account?
Who owns website content?
Who owns design files?
Who owns custom code?
Can another developer take over later?
Will I receive administrator access?
What happens if contract ends?
A current 2026 Pakistan web-development hiring guide similarly recommends making ownership of code, designs, content, hosting, and related assets clear before signing.
If answer sounds vague, pause.
Ask About Security and Maintenance
Website launch is not finish line.
WordPress core updates. Plugins update. Themes update. PHP versions change. Vulnerabilities appear. Backups can fail. Forms stop working. APIs change. SSL certificates expire. Ask what happens after launch and whether caching and performance maintenance is included. If agency installs a cache plugin and leaves it unconfigured, that is not optimization.
Is maintenance included for 30 days? Three months? One year? Is security monitoring included? Are backups tested? Who handles emergency fixes? How much do extra changes cost?
Also ask whether agency uses staging environment before major updates. For business-critical website, ability to test changes before production can reduce risk.
Do not assume monthly maintenance is automatically necessary forever. Ask what maintenance actually includes. A vague “maintenance package” is less useful than specific deliverables.
Check Accessibility and Usability
Website should work for real people, including people using keyboards, screen readers, zoom, reduced motion, or different devices. Accessibility is not decoration. It affects whether users can navigate, understand content, complete forms, and interact with controls.
Ask agency how it approaches accessibility. Look at keyboard navigation. Check color contrast. Check heading structure. Check form labels. Check button names. Check focus states. Check image alternatives. Check whether menus and dialogs work without mouse.
Accessibility also improves general usability. Clear navigation helps everyone. Proper labels help everyone. Readable text helps everyone. Stable layouts help everyone.
Do not accept “website is accessible because theme says WCAG” as complete answer. Ask what agency actually tests.
Understand Content Responsibilities
Content can become hidden project killer.
Who writes page copy? Who supplies images? Who creates service descriptions? Who enters products? Who migrates blog posts? Who optimizes titles? Who writes meta descriptions? Who checks old URLs? Who creates new location pages?
If proposal says “client provides content,” understand exact requirement. If agency says copywriting is included, check number of pages and revision rounds.
Bad content creates bad website even when development is excellent.
A local business website should explain what company does, where it operates, who it serves, why customers should trust it, what action visitors should take, and how to contact business.
Generic filler copy does not solve that.
Ask How Agency Handles Revisions
Every website project has changes. Question is whether changes happen through controlled process or endless WhatsApp messages.
Ask how feedback is collected. Ask who approves designs. Ask how revisions are counted. Ask what happens when new functionality appears halfway through project.
Good process makes scope visible.
If client asks for five new integrations after development starts, that is not ordinary revision. It is scope change. Serious agency should explain cost and timeline impact before doing work.
This protects both sides.
You avoid surprise invoices. Agency avoids unpaid work.
Avoid Guaranteed Google Rankings
“Guaranteed #1 ranking” should trigger caution.
SEO depends on competition, query intent, site quality, links, content, location, search features, algorithm changes, and many other variables. Agency can control work. It cannot control Google’s final decision.
Same principle applies to AI search.
Google’s current documentation says AI Overviews and AI Mode use existing Search systems and that there are no special technical requirements or special schema needed for eligibility.
So if agency promises “guaranteed ChatGPT citation” or “secret AI ranking method,” ask for evidence and precise explanation.
A good provider talks about improving probability through better technical foundations, useful content, authority, relevance, and user experience.
Not guarantees.
Compare Agency, Freelancer and In-House Developer
There is no universal winner.
Freelancer can make sense for small project, focused customization, maintenance, or clearly defined technical task. Agency can make sense when project needs multiple disciplines such as strategy, UX, design, development, SEO, content, analytics, and ongoing support. In-house developer can make sense when company has enough continuous technical workload to justify permanent role.
Compare responsibility, not labels.
Ask who will personally do work. If agency sells project through senior strategist but hands development to junior contractor, you should know. If freelancer handles everything alone, ask about backup when unavailable. If in-house hire has no design or SEO support, account for those gaps.
Current agency-selection guidance recommends evaluating team composition and relevant project experience instead of choosing purely by company size.
Red Flags Before Signing Contract
Some warning signs appear before project begins.
Agency avoids showing live websites. Proposal has no clear scope. Price is dramatically lower than every comparable quote without explanation. Agency asks for complete payment before work. Nobody discusses ownership. Nobody asks about business goals. SEO appears as vague checkbox. Performance is never mentioned. Accessibility is ignored. Agency promises guaranteed Google rankings. Timeline sounds impossibly short for project complexity.
Another warning sign: agency cannot explain its own technology choices.
If website needs WooCommerce, ask why WooCommerce. If agency recommends custom code, ask why custom code. If it recommends Elementor, ask why. If it recommends Shopify, ask why Shopify fits business.
You do not need to be developer.
You need provider able to explain trade-offs in plain English.
Local SEO Features Your Website Should Have
For local business, website should clearly communicate business identity and service area. Name, address where applicable, phone, hours, services, locations, and contact paths should be consistent and easy to find. Google supports LocalBusiness structured data for communicating relevant business details to Search.
Create useful location pages only when each location has genuine value. Do not create dozens of near-identical pages with city names swapped.
Add relevant service pages. Connect service pages with location pages where useful. Make contact details easy to access on mobile. Connect website with Google Business Profile. Add real reviews where appropriate and follow Google’s review and structured-data rules.
Local search is not about repeating city name 50 times.
It is about proving relevance to people in that area.
Questions to Ask Before Hiring
Before signing, ask agency these questions:
Show me three live websites similar to mine. What did you personally build?
What is your process from discovery to launch?
What exactly is included in quote?
Who writes and uploads content?
How will you protect existing SEO during redesign?
How will you handle redirects?
How will you test mobile performance?
How do you approach Core Web Vitals?
What accessibility checks do you perform?
Who owns domain, hosting, website, content, and custom code?
Will I have administrator access?
What happens after launch?
What does maintenance include?
How are revisions handled?
How are additional features priced?
How do you measure website success?
What analytics and tracking will be installed?
What happens if I want another developer later?
Who will actually work on my project?
What do you need from me before starting?
Good agency should answer these without making conversation complicated.
If answer is “we handle everything,” ask for specifics.
If answer is “SEO comes later,” ask why.
If answer is “performance is automatic,” ask how it will be measured.
If answer is “you own everything,” ask where ownership is documented.
That is how you turn sales talk into evidence.
Conclusion
Choosing local web design agency should not feel like picking prettiest restaurant from Google Maps. Website is business infrastructure. It can generate leads, sell products, support sales, build trust, capture search traffic, help customers book appointments, and become central part of marketing. It can also become expensive technical debt if built without clear scope, ownership, SEO, performance, accessibility, security, and maintenance planning.
Start with business outcome. Review live websites. Test mobile experience. Ask about Core Web Vitals. Verify technical skills. Check relevant case studies. Read reviews with context. Compare complete scope rather than headline price. Put ownership in writing. Understand maintenance. Ask how agency protects SEO during redesign. Avoid guaranteed rankings and vague AI-search promises.
Local knowledge can help, especially for businesses serving specific geographic markets. But “local” should be one factor, not complete hiring strategy. A nearby agency with weak technical process is still weak fit. A remote specialist with strong relevant experience, transparent communication, proven results, and proper documentation may be better fit for specific project.
Best question is not:
“Who has nicest portfolio?”
Better question:
“Who can show evidence they have solved problem I need solved, and can explain exactly how they will do it?”
That question cuts through much of noise.
And before signing anything, remember simple rule: do not buy website. Buy outcome, ownership, process, and proof.
FAQs
1. Should I hire local web design agency or remote freelancer?
Depends on project. Local agency can offer market familiarity and easier face-to-face communication. Remote freelancer can offer specialized technical expertise and lower overhead. Compare relevant experience, communication, process, ownership, scope, performance, SEO, and support rather than location alone.
2. How much should I pay for professional website?
No universal price exists. Scope changes cost dramatically. A simple brochure website, WooCommerce store, enterprise site, and custom application are completely different projects. Current 2026 agency directories show wide price ranges based on project complexity, platform, services, and agency type. Ask for line-item scope rather than comparing price alone.
3. Should web design agency include SEO?
Basic technical SEO should be considered during development, even if ongoing SEO is separate service. Website architecture, URLs, internal linking, headings, indexability, redirects, structured data, content, and performance can affect search visibility. Google recommends foundational SEO practices for its AI search experiences too.
4. What should I check before hiring WordPress developer?
Check live WordPress websites, relevant project experience, mobile performance, Core Web Vitals, security process, plugin/theme experience, custom development ability, SEO understanding, ownership, backups, maintenance, and post-launch support. Ask developer to explain why specific theme, plugins, page builder, hosting, and performance approach are being recommended.
5. Can a web design agency guarantee Google rankings?
No agency controls Google’s ranking systems. Be cautious with guaranteed #1 rankings or guaranteed AI search citations. A professional provider can improve technical SEO, content, relevance, usability, performance, and other factors that influence search visibility, but cannot guarantee a specific Google ranking.
Case StudyInfrastructure ModernizedWordPress + Kadence Pro
From 71 to 15 —
Legacy WordPress, modernized underneath.
HerBusiness ran on 71 active plugins and legacy PHP that turned
every update into a coin flip — and every layout change into a
24–48 hour developer ticket. The fix wasn’t a redesign. It was
a foundation: +60% faster loads, 98/100 SEO health, 100% of the
visual identity preserved.
A long-running national network and publishing platform for
women in business — daily articles, an extensive podcast
archive, and member resources serving thousands of readers
every week. The content operation outgrew the codebase years
ago; nobody could afford the downtime to fix it.
The site had accumulated years of custom development:
71 active plugins, hardcoded templates,
legacy widgets, and PHP written for a different decade. Routine
WordPress or server updates could crash individual sections —
so updates simply stopped happening, and the risk compounded.
The tax of technical debt. When a simple layout change
costs your team 24–48 hours via a developer — and a plugin update rolls
dice with the production site — marketing isn’t slow. The infrastructure is.
Project Snapshot
Client
HerBusiness
Industry
Membership & Publishing
Platform
Kadence Pro + Gutenberg + ACF
Plugins
71 → 15
Page Load
+60% improvement
SEO Health
98/100
Result
Infrastructure Modernized
The Problem
A Thriving Business. A coin-flip website.
Nothing about the front-end looked broken — that was the danger.
Underneath, years of plugin sprawl and legacy PHP had made the
site’s own maintenance its biggest operational risk.
wp-admin/plugins.php — 71 active · status: roulette
STATE: FRAGILE
Area
Before
Why It Mattered
Status
Active Plugins
71
Overlapping deps, update roulette
Critical
Layout & Content Edits
24–48 hrs
Developer required for every change
Critical
PHP Environment
Legacy deps
Deprecated hooks blocked PHP 8.x
Failing
Templates
Hardcoded
Layouts & author info baked into PHP
Poor
SEO Structure
Drifted
Weak semantics, messy URLs
Poor
Data Health
Legacy data
No safe path to clean or migrate
Risky
Findings from the full pre-project infrastructure audit — plugins, hooks, templates, database and URL structure.
The Diagnosis
5 Structural Faults. Systematically fixed.
Below the visible design
Fault 01 — Plugin Sprawl
71 Plugins, Enormous Functional Overlap
Single-purpose plugins had accumulated over years: three SEO helpers, two social sharers, four slider libraries, abandoned components untouched for updates. Every dependency increased the blast radius of every update — so updates stopped, and the debt compounded.
71 active · 56 removable
Fault 02 — Hardcoded Content Architecture
Layouts, Author Info & Widgets Baked Into PHP
Page layouts, profile blocks, and custom components lived in legacy templates and widgets — invisible to the editor. Marketing staff could not modify them at all; a headline move or layout tweak became a developer ticket with a 24–48 hour turnaround.
24–48h per edit
Fault 03 — Deprecated PHP & Hooks
Legacy Code Blocking PHP 8.x
Custom PHP relied on deprecated hooks and outdated dependencies. The environment couldn’t safely move to modern PHP, which meant the hosting stack itself was becoming a ceiling — and every passing WordPress core release widened the gap.
PHP 8.x blocked
Fault 04 — No Data Migration Path
Legacy Data Structures With No Safe Tooling
Years of podcast metadata, profile records, legacy content fields and external media had no cleanup path. One-shot migration scripts on a production-scale database meant timeouts and risk — the kind of job that simply never gets scheduled.
timeouts + DB risk
Fault 05 — URL & SEO Drift
Messy URLs, Pagination Strings & Weak Semantics
Author content lived under legacy /author/ URLs while a new /profile/ structure was needed. Pagination polluted visible URLs with query strings — ?pg=2, ?paged=2 — and heading semantics had drifted, quietly undermining how search engines understood the site’s structure.
URL debt
The Solution
Four Phases. One Rule: don’t touch the design.
Modernize the infrastructure, reduce the technical debt, hand the
keys to the internal team — while visitors never notice a pixel
change on the front end.
Phase 1
Foundation — Plugin Consolidation 71 → 15
Full audit of all 71 plugins — needed, overlapping, abandoned
Site rebuilt around WordPress + Kadence + Gutenberg
Hardcoded PHP layouts rebuilt as native editable blocks
56 plugins removed or consolidated; duplicates eliminated
Staged environment for every change — production never touched
Phase 2
Architecture Rebuild & Custom Functionality Suite
Legacy PHP refactored; custom templates reworked for modern WordPress
Semantic HTML cleaned up across templates
One dedicated suite replacing scattered plugins: audio player, search & filtering, social sharing, AJAX interactions, pagination handling
Layout and content changes no longer queue behind a developer’s diary. Staff edit, rearrange and publish natively in Gutenberg — work that used to take 24–48 hours now ships the same morning.
24–48h → minutes
Updates Are Boring Again
Fifteen clean plugins, modern hooks and PHP 8.x compatibility turned maintenance from project-risk into routine hygiene. Core, plugin and server updates now happen on schedule — not after a recovery plan.
maintenance: routine
+60% Faster — Same Visual Identity
Removing plugin overhead and cleaning the frontend structure delivered a substantial page-load improvement — with zero redesign. The brand their audience knows is untouched; it simply arrives faster.
+60% page load
URL Equity Preserved, SEO Structured
Profile URLs were remapped /author/ → /profile/ via permanent redirects, keeping years of backlinks working. Cleaner semantics, headings and metadata delivered a 98/100 technical SEO health score.
98/100 · /author/ → /profile/
Client Testimonial
In Their Own Words
Requested: personal experience at delivery
“Sometimes in Business you come across a supplier that does everything they say they will. On budget, on time and with a level of professionalism and skill you wish was the standard! Thank you pro team for the amazing work you did on our website. We are grateful and could not recommend you highly enough.”
HBPeter JohnstonrterDirector:
HerBusiness
What Was Included
Services Used in This Project
10 Deliverables
WordPress Infrastructure Audit & Modernization
Plugin Consolidation — 71 to 15
Kadence Pro + Gutenberg Rebuild
Legacy PHP Refactoring — PHP 8.x Ready
Custom Functionality Suite Build
Batch-Safe Data Migration Utilities
ACF Structured Content Migration
Technical SEO & Semantic HTML Cleanup
Redirect Strategy & URL Equity Preservation
Infinite-Scroll & History API Pagination Control
Get Started
Is Your WordPress Site Hiding Technical Debt?
We’ll audit your plugin stack, PHP environment and content architecture —
and show you exactly what’s fragile, what it’s costing, and how to fix it
without a redesign. No pitch. Just data.
Search is changing fast. People no longer type every question into Google, scan ten blue links, open five tabs, and compare answers themselves. They increasingly ask systems such as ChatGPT, Google AI Overviews, AI Mode, Gemini, and Perplexity to find information, compare options, explain problems, and recommend next steps. These systems can search web sources, retrieve information, synthesize multiple pages, and show links supporting their answers.
That creates new visibility problem for website owners. Ranking in traditional search still matters, but getting mentioned, cited, or used as source inside AI-generated answers is becoming another part of search visibility. This is where Generative Engine Optimization, commonly called GEO, enters picture. GEO focuses on making website content easier for generative search systems to discover, understand, retrieve, trust, and potentially cite.
But there is big misconception here. GEO does not mean adding magic AI markup, stuffing pages with keywords, creating hundreds of AI-written articles, or putting an llms.txt file on website and expecting ChatGPT to send traffic. Google says its existing SEO fundamentals remain foundation for AI search, and specifically says there are no special technical requirements or special schema needed to appear in AI Overviews or AI Mode.
So what should website owners do in 2026? Build website that works well for humans, search engines, and retrieval systems. That means strong technical SEO, useful original content, clear structure, trustworthy information, good internal linking, crawlability, strong page experience, and evidence that goes beyond generic information found on hundreds of competing pages.
What GEO Means
Generative Engine Optimization is broad term for improving website visibility within AI-powered search and answer experiences. Traditional SEO mainly focuses on helping search engines understand page relevance and quality so page can appear for search queries. GEO adds another objective: make information useful and extractable when an AI system retrieves web sources and creates an answer for user.
Think of traditional SEO like getting your shop onto busy street. GEO is making sure, when someone asks guide standing outside street, “Where should I go for this problem?”, guide knows your shop exists, understands what you sell, and has enough trustworthy information to mention it. You still need street, address, signage, reputation, and useful products. GEO does not replace those things.
Research around GEO is still developing. Recent academic work describes generative search visibility as multi-stage process involving discovery, retrieval, reranking, citation, prominence, factual use, and downstream user behavior. That matters because nobody can honestly promise that one optimization trick will make page appear in ChatGPT or another AI engine. Evidence remains more mature for improving retrievability and source quality than for claiming guaranteed long-term traffic gains.
GEO vs Traditional SEO
SEO and GEO overlap heavily. This is important because some marketers present them as completely separate disciplines. They are not.
Google’s current documentation says websites should continue using foundational SEO practices for generative AI features. Pages need to be crawlable, indexable, useful, technically accessible, and eligible for normal Search visibility. Google also recommends making important content available in text, maintaining strong internal linking, providing good page experience, and ensuring structured data matches visible page content.
GEO adds another layer of thinking. Instead of asking only, “Can this page rank for keyword X?” ask questions like:
Can AI system identify exact answer on page?
Does page contain original evidence?
Is information organized around real user questions?
Does page clearly establish who produced information?
Are claims supported by data, examples, documentation, or first-hand experience?
Can search systems understand relationships between pages?
Does page provide something competitors simply copied from other pages do not?
That shift is small in wording but big in strategy.
Why AI Search Changes Website Visibility
Traditional search gives user list of pages. Generative search can give user synthesized answer before user visits any page. That changes value of being visible.
Suppose someone searches, “How can I improve WordPress LCP without replacing my theme?” Traditional results may show optimization guides, plugin documentation, agency articles, and technical discussions. An AI search system can retrieve several sources, combine their information, explain likely causes, and provide citations.
OpenAI describes ChatGPT search as a way for ChatGPT to retrieve timely web information and provide links to relevant sources. Google describes AI Overviews and AI Mode similarly as systems that can surface links from web sources while helping users explore complicated questions. Google says its AI features can use query fan-out, meaning system may perform multiple related searches across subtopics and sources while building response.
That means one webpage can potentially become relevant for multiple related questions, not only exact keyword it was written around. It also means shallow keyword targeting can become less useful. If page answers one narrow keyword but gives little context, another page with stronger evidence, clearer explanations, and better topical coverage may provide more useful source material.
How AI Overviews Find Website Content
Google says AI Overviews and AI Mode are grounded in Google’s Search systems. Pages need to be indexed and eligible for normal Search snippets to be eligible as supporting links. There are no additional technical requirements specifically required for AI Overviews.
This creates straightforward lesson: do not abandon SEO while chasing GEO.
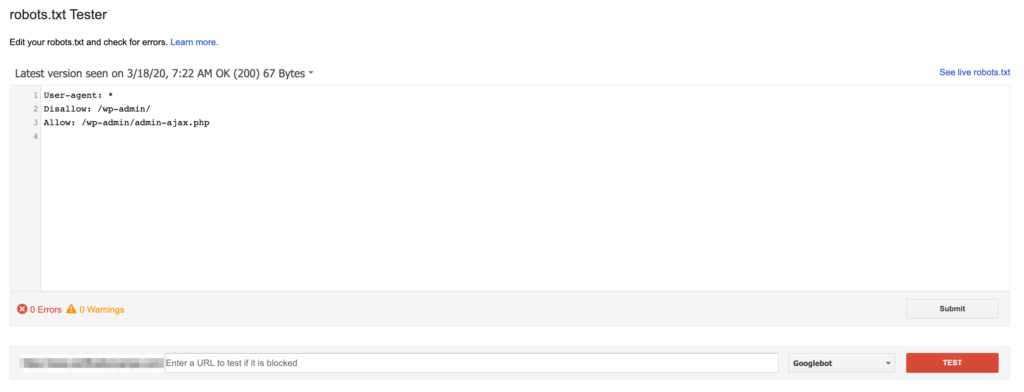
If robots.txt blocks important resources, canonical tags are wrong, internal links are weak, important content is hidden behind inaccessible interactions, or pages are not indexed, AI visibility becomes harder. Fancy GEO copy cannot rescue broken technical foundations.
Google’s 2026 guidance also emphasizes crawlability, semantic clarity, page experience, unique content, and reducing unnecessary duplicate content.
How ChatGPT Search Uses Web Sources
ChatGPT Search can retrieve current information from web and provide cited links. That means web visibility can matter when user asks question requiring current or niche information.
But there is no reliable shortcut that forces ChatGPT to cite particular domain. Search systems decide which sources to retrieve and use based on query, relevance, available information, and system behavior.
For website owners, practical goal should therefore be simple: become useful source worth retrieving.
Write specific explanations. Publish original findings. Show real examples. Explain technical processes. Add measurements. Document experiments. Answer questions competitors avoid. Keep facts current. Make important claims easy to verify.
Why Traditional SEO Still Matters
GEO does not kill SEO. Google says this directly. Its current guidance says SEO best practices remain relevant because generative AI features are rooted in Google’s core Search ranking and quality systems.
If you are building this foundation from scratch and are not sure where to start, our SEO tips for beginners walk through the fundamental signals Google uses to evaluate pages, including technical health, content relevance, and user experience.
This matters for WordPress businesses especially. Many site owners hear “AI search” and immediately start looking for GEO plugins. That can become distraction. Before worrying about AI citations, check whether site has basic technical health.
Technical SEO Comes First
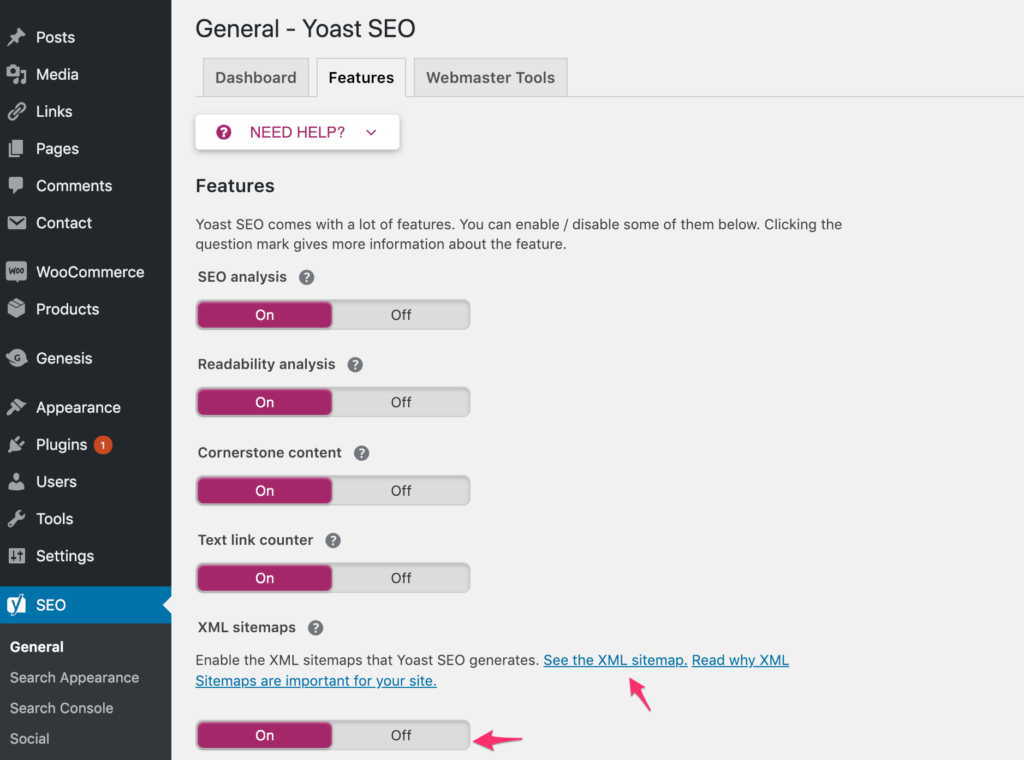
Start with crawling and indexing. Check robots.txt. Check XML sitemap. Check canonical URLs. Check indexability. Review redirects. Remove accidental noindex directives. Verify important pages can be reached through internal links. Check JavaScript-dependent content. Review duplicate URLs.
Then look at page experience. Mobile layout should work properly. Main content should load quickly. Images should not be unnecessarily large. JavaScript should not block critical rendering. But none of that matters if server response is already slow. A poor hosting environment can undermine everything else.
If you are unsure whether your host is contributing to the problem, our best WordPress hosting reviews compare options based on real performance metrics.
Google’s current AI guidance specifically recommends crawlability, internal linking, good page experience, textual availability of important content, and accurate structured data.
This is where Core Web Vitals still matter. Fast pages do not automatically earn AI citations, but slow, unstable, difficult-to-use websites create poor experience and can also make crawling, rendering, and user engagement harder.
What Makes Content Visible to AI Search
AI systems need information they can retrieve and use. Generic content creates weak signals because thousands of websites may say same thing.
Imagine two articles about WordPress speed. Article A says, “Use caching, optimize images, minify CSS, and use CDN.” Article B documents actual optimization process, including before-and-after LCP, image payload reduction, render-blocking resources, cache configuration, server response time, plugin changes, and measured results.
Which page gives answer system more useful material? Article B contains more concrete evidence.
Google’s current guidance tells site owners to focus on unique, valuable, non-commodity content and warns against treating GEO as collection of hacks.
Original Data and First-Hand Expertise
Original data is powerful because competitors cannot easily duplicate it.
For WordPress performance website, that could mean publishing anonymized optimization case studies. Show what changed. Explain why it changed. Give measured results. Discuss trade-offs. Explain failures too.
For example, instead of publishing another generic article titled “How to Speed Up WordPress,” publish:
“How I Reduced LCP From 6.2s to 1.4s on a WordPress HVAC Website.”
That title targets specific problem. Article can explain page architecture, image handling, CSS, JavaScript, caching, hosting, third-party scripts, and measurement process. It can contain original numbers and practical observations.
This creates content with stronger information density than generic rewritten SEO content.
Clear Answers and Strong Content Structure
AI systems need to understand page meaning. Humans need same thing.
Use descriptive headings. Answer important question directly. Follow answer with explanation, evidence, examples, and implementation details.
Do not hide core answer under 900 words of introduction.
If heading says “Does WebP Improve LCP?”, answer question immediately. Then explain when WebP helps, when it does not, how image dimensions affect performance, how responsive images work, and how to measure result.
Good structure helps reader scan page. It also makes individual concepts easier to retrieve.
That does not mean stuffing every section with artificial question-answer blocks. Google explicitly warns against chasing simplistic GEO/AEO hacks. Focus on useful content structure instead.
Structured Data and GEO
Structured data helps search engines understand page content and entities. Google says structured data can help it understand content and potentially support richer search features.
But there is an important distinction: schema is not GEO magic.
Google’s current AI feature documentation says there is no special schema.org structured data required to appear in AI Overviews or AI Mode. It also says structured data should match visible content on page.
Schema Helps Machines Understand Context
Use appropriate schema where it genuinely represents page.
Organization information can clarify business identity. Person information can clarify author identity. Article markup can describe article. Product markup can describe product. LocalBusiness markup can provide relevant business details where appropriate.
Do not add fake reviews, fake ratings, fake claims, or irrelevant schema because marketer says it helps GEO.
Structured data should reinforce reality already visible on page. It should not manufacture trust.
Website Performance and AI Search
Website speed deserves place inside GEO strategy because AI search still sends people to websites. Getting cited means little if visitor lands on page and waits several seconds for content.
Google recommends good page experience as part of its guidance for generative AI visibility. If you want to understand exactly what slows WordPress websites down and what to fix first, read our full breakdown of why your website’s mobile speed is killing your lead generation, covering LCP, INP, CLS, and WordPress-specific bottlenecks in detail.
For WordPress websites, performance work should go deeper than installing five optimization plugins. Plugin quantity alone does not determine speed. Theme architecture, DOM size, CSS delivery, JavaScript execution, image dimensions, third-party scripts, database queries, hosting response, caching, and page builder output can all contribute.
Why Speed and Crawlability Matter
Think of content as product inside store. Crawlability is open door. Performance is how quickly customer can walk through door and reach product. Content quality is product itself.
You need all three.
If important content cannot be crawled, search systems may not discover it. If page is painfully slow, visitors leave before consuming content. That is why technical SEO, Core Web Vitals, and GEO should not be treated as separate silos.
For WordPress sites specifically, reducing render-blocking resources is one of the highest-impact technical fixes available. Our guide on minifying HTML, CSS, and JavaScript covers practical strategies without breaking functionality.
That is why technical SEO, Core Web Vitals, and GEO should not be treated as separate silos.
How to Optimize Existing Content for GEO
Do not start by generating 100 new AI articles.
Start with existing pages.
Look through Google Search Console. Find pages receiving impressions but weak clicks. Find pages ranking around positions 5 to 20. Find pages with strong traffic but poor conversions. Find articles that answer broad topics but lack original evidence.
Then improve them.
Build Content Around Real Questions
Take one core topic and map questions around it.
For WordPress speed, questions might include:
Why is LCP slow on mobile?
What causes high INP?
Why does WordPress TTFB stay high?
Does Elementor slow down WordPress?
Does Cloudflare improve WordPress speed?
Should unused plugins be removed?
Why does PageSpeed score change after optimization?
Why can field data fail while lab score looks good?
Answer each question naturally inside relevant content.
This creates deeper topical coverage without creating hundreds of thin pages.
How to Measure GEO Performance
Measurement remains one of hardest parts of GEO. AI responses can change based on query wording, location, model, search availability, retrieved sources, freshness, and other factors. Recent academic research also highlights variability across generative search systems and separates citation selection from how strongly cited material influences final answer.
Do not promise client “top position in ChatGPT.”
Track observable signals instead.
Search Console and AI Visibility
Google introduced dedicated generative AI performance reporting in Search Console in 2026. Google announced rollout of these insights worldwide by August 31, 2026, providing visibility into impressions associated with generative AI features on Search.
That gives website owners better measurement than guessing from occasional manual prompts.
Also track:
Organic impressions
Organic clicks
Query growth
Non-branded queries
Conversions
Assisted conversions
Pages gaining visibility
AI feature impressions where available
Brand mentions in relevant AI searches
Referral traffic from AI platforms
Conversion quality from AI-originated visitors
Run repeated tests for important commercial questions. Do not treat one ChatGPT response as permanent ranking.
Common GEO Mistakes
Biggest mistake is treating GEO as keyword stuffing with new name.
Second mistake is believing AI-written content automatically becomes AI-search-friendly.
Third mistake is creating fake authority through mass publishing.
Why AI-Generated Content Alone Fails
Google allows appropriate use of generative AI, including research and adding structure to original work. But Google warns that generating many pages with AI without adding value can violate its spam policies around scaled content abuse.
This is why “publish 500 AI articles this month” is weak strategy.
AI can help research, outline, classify questions, identify gaps, and improve structure. Human expertise should supply judgment, original experience, evidence, testing, examples, and editorial control.
For ProSpeedGuy, this difference matters. Generic articles about WordPress speed are everywhere. Actual optimization experience is harder to duplicate.
Use that advantage.
GEO Strategy for WordPress Websites
WordPress gives you huge flexibility, but flexibility can create technical mess.
A GEO-ready WordPress website should have clean information architecture, logical URLs, crawlable content, strong internal links, optimized media, stable templates, good performance, accurate schema, and content written around genuine user problems.
If your WordPress website is missing that technical foundation, our WordPress speed optimization services are built to fix the bottlenecks that affect both user experience and search visibility.
Practical WordPress GEO Checklist
Start with technical foundation:
Check indexability.
Review robots.txt.
Validate XML sitemap.
Fix canonical issues.
Improve internal linking.
Remove unnecessary duplicate URLs.
Make key content available as crawlable text.
Optimize mobile experience.
Improve Core Web Vitals.
Reduce unnecessary JavaScript.
Optimize images.
Keep structured data accurate.
Monitor Search Console.
Update outdated content.
Add original evidence to important articles.
Then build topical authority.
Create content clusters around services. For example, WordPress speed can connect to Core Web Vitals, LCP, INP, CLS, caching, image optimization, CDN, hosting, Elementor performance, WooCommerce performance, and technical SEO.
Each article should connect naturally to related service and supporting pages.
GEO for Local Businesses
Local businesses have another advantage: real-world information.
A local company can publish location-specific expertise, services, project examples, customer questions, service areas, opening information, original photographs, case studies, and useful local context.
Google’s generative AI guidance includes local content among areas where websites can provide useful information.
For a local WordPress agency, avoid creating 50 nearly identical city pages with only city name changed. Build pages with genuine local value.
Explain projects completed for businesses in the region. Discuss local customer problems. Publish service-specific examples. Keep Business Profile information accurate. Connect location pages with relevant services.
AI systems need information. Real local experience gives you information competitors cannot easily copy.
GEO for Ecommerce Websites
Ecommerce GEO has another challenge: products change.
That means product information must stay accurate and pages must load quickly enough for users to act. If you run a Shopify store, our Shopify speed optimization guide covers ecommerce-specific performance fixes that also support better crawlability and user experience.
Use clean product data, descriptive product content, accurate structured data, high-quality images, useful comparison information, shipping details, return information, and clear availability signals.
Do not write 1,000 words of generic marketing copy for every product.
Give users information that helps decisions.
For example, a laptop page should explain processor, RAM, storage, display, battery, dimensions, ports, compatibility, warranty, and practical use cases. A product comparison page should clearly distinguish models instead of rewriting manufacturer descriptions.
Google’s current generative AI guidance specifically includes shopping content among areas website owners should consider when optimizing for AI experiences.
GEO and Core Web Vitals
Core Web Vitals do not become “GEO ranking factors” simply because AI search exists. Avoid that claim.
But performance still matters.
Google’s AI search guidance recommends good page experience and foundational SEO practices.
For WordPress sites, focus on real user experience rather than chasing PageSpeed score alone.
LCP tells you about the loading performance of the main content. INP measures responsiveness. CLS measures visual stability. Before worrying about AI citation scores, understand what these numbers actually mean for real users; our guide on why PageSpeed scores don’t matter as much as most people think explains exactly that.
A website can score well in Lighthouse and still have poor real-world field data. Conversely, a technically complex page may have acceptable real-user performance despite mediocre lab conditions.
Use both lab and field data where available.
GEO, Internal Linking and Topical Authority
Internal linking is an old SEO tactic with new importance.
When related pages link together using meaningful context, search engines can better understand relationships between topics. Users can also move naturally from broad educational content toward detailed guides and commercial pages.
Imagine website architecture like a city map.
One isolated article is a small village. Twenty connected articles covering one subject form a city. Internal links become roads. Service page becomes business district. Case studies become proof. Technical guides become infrastructure.
That structure gives users and search systems clearer context.
GEO and Conversion Optimization
Traffic is not final goal.
A page can receive 10,000 visitors and produce almost no business. Another page can receive 300 highly relevant visitors and generate multiple qualified leads.
This is why GEO should connect with conversion optimization.
AI search users often arrive after asking specific questions. They may already understand their problem.
If visitor arrives after searching “why is my WordPress LCP 5 seconds on mobile?”, generic homepage messaging wastes opportunity.
Create relevant next step.
Show technical explanation. Show case study. Explain process. Show evidence. Give clear contact option.
Do not force visitor through five pages before finding service.
Content should educate and move naturally toward action.
How Long Does GEO Take to Work?
No honest SEO specialist can give a universal timeline.
Google does not guarantee crawling, indexing, ranking, or inclusion in AI features even when technical requirements and best practices are satisfied.
AI visibility also varies by platform and query.
One article may become useful quickly because it answers new question with little competition. Another may take months because many established sources already cover topic.
Focus on measurable improvements instead of arbitrary promises.
Track indexation. Track impressions. Track query coverage. Track citations or mentions where measurable. Track organic traffic. Track leads.
Then improve content based on evidence.
Should You Hire a GEO Specialist?
Depends on the website.
Small site with strong technical foundation may not need separate GEO specialist. Existing SEO process can incorporate most useful GEO practices.
Larger website may need deeper work across content architecture, technical SEO, entity clarity, structured data, analytics, content production, conversion optimization, and AI visibility measurement.
For WordPress businesses, technical expertise matters because content cannot compensate for a broken foundation.
A specialist should be able to explain what is being changed, why it matters, how success will be measured, and what evidence supports the recommendation.
If you want to talk through your website’s GEO and technical SEO foundation, book a free call and we will walk through it together.
Be cautious around anyone promising guaranteed ChatGPT citations, guaranteed AI Overview placement, secret AI ranking signals, or a special markup that supposedly forces AI engines to recommend a website.
Google itself says there are no special optimizations or special schema requirements for inclusion in AI Overviews or AI Mode.
Conclusion
GEO is not a replacement for SEO.
It is better understood as another way of thinking about website visibility in search systems that increasingly retrieve, synthesize, and cite information instead of simply displaying lists of links.
Best strategy in 2026 is not to chase every new AI-search hack. Build website that deserves to be found.
Make content original. Make answers clear. Publish first-hand evidence. Keep technical SEO clean. Improve page experience. Keep information current. Not sure where your website currently stands? Start with a free website review and we will identify the biggest technical and content gaps holding your visibility back.
Make important content crawlable. Build strong internal links. Use accurate structured data. Improve page experience. Keep information current. Measure what can be measured.
For WordPress websites, this creates useful overlap between technical SEO, Core Web Vitals, content strategy, conversion optimization, and AI search visibility.
That is good news.
You do not need separate website for Google and AI engines. You need better website.
Google’s own current guidance makes same point: foundational SEO remains relevant, unique and valuable content matters, and site owners should avoid simplistic GEO hacks in favor of effective SEO and useful content.
AI search may change how people discover businesses. It does not change basic rule of web visibility: be useful, be accessible, be trustworthy, and give people something worth finding.
FAQs
1. Is GEO replacing SEO?
No. GEO and SEO overlap heavily. Google says existing SEO fundamentals remain relevant for AI Overviews and AI Mode. Technical accessibility, crawlability, indexing, useful content, internal linking, and good page experience remain important.
2. Do I need special schema for ChatGPT or Google AI Overviews?
No special schema is required for Google AI Overviews or AI Mode. Google specifically says there is no special schema.org structured data needed for these AI features. Structured data should accurately represent visible page content.
3. Does llms.txt guarantee AI search visibility?
No. Google explicitly says site owners do not need to create new machine-readable files or special AI files to appear in its AI features. Focus on crawlability, useful content, technical SEO, and clear information instead.
4. Can AI-generated content rank in Google?
AI-generated content can be used, but mass production of pages without meaningful added value can create spam-policy problems. Google says generative AI can help with research and structure, but content should meet Search Essentials and spam policies and provide value for users.
5. How can I improve my website’s GEO visibility?
Start with technical SEO and content quality. Make pages crawlable and indexable, improve internal linking, answer real questions clearly, publish original data and first-hand experience, maintain accurate structured data, improve page experience, and monitor Search Console. Google now provides generative AI performance reporting for visibility within its AI search experiences.
Want to improve WordPress speed, Core Web Vitals, technical SEO, and AI-search visibility on your website? Start with technical foundation before chasing GEO hacks.
From 35 to 89 —
Core Web Vitals fixed
for a 5‑Star Teak Villa Resort
One of Chiang Mai’s most extraordinary boutique properties was
throttled by a 9.2MB hero image, 214 uncompressed photographs,
and a decade-old theme. We fixed every metric in 6 days —
zero design changes, zero downtime.
Core Web Vitals: PassedLCP 1.9sCLS 0.05TBT 140msSpeed Index 2.8s214 Images → WebP+54 pts MobileZero DowntimeCore Web Vitals: PassedLCP 1.9sCLS 0.05TBT 140msSpeed Index 2.8s214 Images → WebP+54 pts MobileZero Downtime
Results at a Glance
Every Metric. Fixed.
Verified via PageSpeed Insights + CrUX
Performance Score
35 / 100
89
+54 Points ↑
Passing
LCP — Largest Contentful Paint
5.8 seconds
1.9s
−67% Faster ↑
Good
TBT — Total Blocking Time
610 ms
140ms
−77% Reduced ↑
Good
CLS — Cumulative Layout Shift
0.412
0.05
−87.9% Stable ↑
Excellent
Speed Index
9.8 seconds
2.8s
−71% Faster ↑
Good
Core Web Vitals
FAILED
PASSED
Google Approved ↑
CWV Pass
6 Days
Timeline
Zero
Design Changes
Zero
Downtime
+54 pts
PageSpeed Gain
5
Property Rating
About the Client
Villa Mahabhirom
A collection of antique Lanna teak houses — some structures more
than 200 years old — carefully reassembled into one of Chiang
Mai’s most distinctive boutique stays. The property’s 200+
photographs do the selling; the website is the front desk.
Set beside a lily pond near Chiang Mai’s Old City, Villa
Mahabhirom attracts a global audience searching for
“luxury villa Chiang Mai” from Tokyo, Sydney, Berlin,
and London — often on hotel Wi-Fi most resorts would call unusable.
Their site runs WordPress on shared LiteSpeed hosting
— a capable stack crippled by zero caching and uncompressed assets.
The OTA leak. On a boutique property with limited
inventory, every booking handed to an OTA at 18–25% commission
directly cuts the margin that keeps 200-year-old teak standing. And a slow
site pushes every undecided guest one click closer to an OTA.
5-Star Boutique Villa Resort
Client Snapshot
Client
Villa Mahabhirom
Industry
Boutique Luxury Hospitality
Location
Chiang Mai, Thailand
Platform
WordPress + LiteSpeed
Property
14 antique teak villas
Timeline
6 Days
Result
35 → 89 · CWV Pass
The Problem
A 200-Year-Old Property. A 2005-Grade website.
When we ran an independent PageSpeed audit, the mobile results told
the story: a photography-first property was being buried by its own
photography — and three third-party embeds finishing its visitors off.
pagespeed.web.dev/analysis — villamahabhirom.com · mobile
ASSESSMENT: FAILED
Metric
Score
Google Target
Status
Performance Score
35 / 100
90+
Failing
Largest Contentful Paint
5.8 seconds
≤ 2.5s
Critical
Total Blocking Time
610 ms
≤ 200ms
Critical
Cumulative Layout Shift
0.412
≤ 0.1
Poor
Speed Index
9.8 seconds
≤ 3.4s
Critical
Core Web Vitals
FAILED
Pass
Failed
Audited with Google PageSpeed Insights · Lighthouse · Chrome UX Report (CrUX)
The Diagnosis
5 Root Causes. All fixable.
Server + code level only
Root Cause of LCP 5.8s
9.2MB DSLR Hero Image — No Compression, No WebP
The hero photograph was uploaded straight from the photographer’s export folder — full-resolution JPEG, no compression, no preload, no modern format. On hotel Wi-Fi abroad, guests waited nearly six seconds for the first pixel of the property to appear.
LCP 5.8s · limit ≤ 2.5s
Root Cause of CLS 0.412
Masonry Gallery Grid Without Image Dimensions
The teak villa gallery loaded as a pure masonry grid with no width or height attributes anywhere. As photographs arrived in random order, the layout reflowed visibly — the page literally jumped under visitors’ thumbs as they tapped the booking button.
CLS 0.412 · limit ≤ 0.1
Root Cause of TBT 610ms
Google Maps, TripAdvisor & Booking Iframes Blocking Load
Three heavyweight third-party embeds executed synchronously on every page view: a full interactive Google Map (2.4MB, loaded even by guests who never scrolled to Location), a TripAdvisor badge widget, and the booking engine iframe — together monopolising the main thread for over half a second.
TBT 610ms · limit ≤ 200ms
Root Cause of FCP 3.1s
7 Google Font Weights + Legacy Theme CSS Render-Blocking
The theme requested seven font weights (only three were ever rendered) plus its full legacy stylesheet before any text could paint. No font-display: swap, no critical CSS — guests on slow connections stared at a blank white screen for three seconds.
FCP 3.1s · limit ≤ 1.8s
Root Cause of Speed Index 9.8s
No Caching Layer — PHP Rendering Every Request Live
The site ran PHP 7.4 with no page cache, no OPcache, no object cache: every hit rebuilt the HTML from scratch. Time To First Byte alone averaged 2.2 seconds for international visitors — before a single asset even began downloading.
SI 9.8s · limit ≤ 3.4s
The Solution
6 Days. Zero Design Changes. Zero downtime.
Every fix was implemented at the server and code level. The century-old
aesthetic — the fonts, the photography, the layout — stayed exactly
as the owners intended.
Day 1 – 2
Audit, Staging & the Image Pipeline
Full technical audit — Lighthouse, WebPageTest (Mumbai + Frankfurt + Tokyo nodes)
Staging environment configured (zero risk to live site)
214 images batch-converted to WebP, resized to display dimensions — hero 9.2MB → 380KB
Explicit width & height added to every gallery image (CLS fix)
LCP hero preloaded with <link rel="preload"> on key templates
Day 3 – 4
Render Path, Fonts & Caching Stack
Critical CSS generated for header, hero and above-fold layout
Google Fonts subset: 7 weights → 3, self-hosted with font-display: swap
PHP upgraded 7.4 → 8.2 with OPcache enabled
LiteSpeed Cache configured — full-page cache with booking/availability exclusions
Object cache enabled; autoloaded wp_options trimmed from 11MB to 1.4MB
Day 5
Third-Party Embeds — Facades & Deferral
Click-to-load facade for Google Maps — 40KB static preview replaces the 2.4MB embed
TripAdvisor widget deferred to browser idle time
Booking engine iframe lazy-loaded and connected asynchronously
GA4 and Meta Pixel loaded only after first interaction
2 unused plugin scripts loading globally on every page removed
Day 6 — Complete
Validation, Deployment & Handover
All fixes validated on staging — mobile throttling + real-device testing
Core Web Vitals pass confirmed via PageSpeed Insights + CrUX field data
Deployed to live with zero downtime
Full before/after report with PageSpeed screenshots delivered
Cache-warm automation configured so every visitor hits a cached page
The Results
Before vs. After — full comparison.
Drag the gold handle to compare the live PageSpeed audits, pixel for pixel.
PageSpeed Insights
Mobile
CWV Passed
89Score
Largest Contentful Paint
1.9 s
Total Blocking Time
140 ms
Cumulative Layout Shift
0.05
Speed Index
2.8 s
First Contentful Paint
0.8 s
Core Web Vitals Assessment:
Passed
— all metrics in the good range
PageSpeed Insights
Mobile
CWV Failed
35Score
Largest Contentful Paint
5.8 s
Total Blocking Time
610 ms
Cumulative Layout Shift
0.412
Speed Index
9.8 s
First Contentful Paint
3.1 s
Core Web Vitals Assessment:
Failed
— multiple URLs need improvement
Metric
Before
After
Improvement
Performance Score
35 / 100
89 / 100
+54 Points
Largest Contentful Paint
5.8 seconds
1.9 seconds
−67% Faster
Total Blocking Time
610 ms
140 ms
−77% Reduced
Cumulative Layout Shift
0.412
0.05
−87.9% Stable
Speed Index
9.8 seconds
2.8 seconds
−71% Faster
Core Web Vitals
FAILED
PASSED
Google Approved
Business Impact
What This Means in Real Booking Terms
Direct Booking Rankings Strengthened
With CWV passing, Villa Mahabhirom competes for “luxury villa Chiang Mai” on merit again — queries with enormous booking intent and, crucially, zero OTA commission attached to them.
CWV = ranking signal
The Gallery Now Sells on Mobile
214 photographs are this property’s entire sales team. At 1.9s LCP, the candlelit teak pool villa appears in under two seconds — on a train in Tokyo or a sofa in Sydney, on middle-of-nowhere hotel Wi-Fi.
+20% Δ conversion / second
First Impression as Calm as the Courtyard
CLS of 0.05 means no more jumping text or shifting booking buttons under guests’ thumbs. The digital stillness finally matches the property at dusk — and premium conversion lives in exactly those details.
0.05 CLS — pixel-stable
OTA Commission Reclaimed
A fast, trustworthy direct site converts more bookings in-house. Every 10% shift from OTA to direct keeps 18–25% per night in the property’s pocket — compounding, forever, with no additional ad spend.
18–25% commission saved
Client Testimonial
In Their Own Words
Requested: personal experience at delivery
“Hafiz and team has helped me get my site back to loading quickly. We went massive pagespeed score also from a score of an F to an A on the GTMetrix scale that measures a website’s loading time and quality. This helps tremendously to keep our clients coming back! We appreciate that Hafiz and his team are always ready and available to help with all of our needs, including fixing bugs and site attacks as they come up. Hafiz has been communicative and professional and has delivered on every account. We recommend Hafiz for all of your site-based needs.”
MMLinkedIn Client – ThaiMedia Manager @ · Villa Mahabhirom
We’ll run a free audit on your site and show you exactly what’s
slowing it down — and what it’s costing you in traffic and revenue.
No pitch. Just data.
From 41 to 91 –
Core Web Vitals fixed
for a 5‑Star Resort
A failing WordPress site was silently costing Twinpalms Hotels & Resorts
direct bookings every single day. We fixed every metric in 6 days,
zero design changes, zero downtime.
Core Web Vitals: PassedLCP 1.8sCLS 0.02TBT 90msSpeed Index 3.1sFCP 0.9s+50 pts MobileZero DowntimeCore Web Vitals: PassedLCP 1.8sCLS 0.02TBT 90msSpeed Index 3.1sFCP 0.9s+50 pts MobileZero Downtime
Results at a Glance
Every Metric. Fixed.
Verified via PageSpeed Insights + CrUX
Performance Score
41 / 100
91
+50 Points ↑
Passing
LCP — Largest Contentful Paint
4.3 seconds
1.8s
−58% Faster ↑
Good
TBT — Total Blocking Time
400 ms
90ms
−77.5% Reduced ↑
Good
CLS — Cumulative Layout Shift
0.625
0.02
−96.8% Stable ↑
Excellent
Speed Index
13.7 seconds
3.1s
−77% Faster ↑
Good
Core Web Vitals
FAILED
PASSED
Google Approved ↑
CWV Pass
6 Days
Timeline
Zero
Design Changes
Zero
Downtime
+50 pts
PageSpeed Gain
5
Property Rating
About the Client
Twinpalms Hotels & Resorts
One of Thailand’s most celebrated independent luxury hotel brands,
operating award-winning boutique properties across Phuket. Their
website is their single most important direct sales channel.
With a strong international guest base and annual revenue exceeding
$11 million, Twinpalms competes at the very top of Southeast Asian
luxury hospitality. Their site runs on
WordPress.org + Cloudflare CDN — a solid foundation
that was being completely undermined by an unoptimised performance stack.
The OTA leak. Every percentage point of direct
booking conversion matters at this scale. A slow site doesn’t just hurt UX —
it leaks revenue to OTAs at 15–25% commission per booking,
every single day.
5-Star Boutique Collection
Client Snapshot
Client
Twinpalms Hotels & Resorts
Industry
Luxury Hospitality
Location
Phuket, Thailand
Platform
WordPress + Cloudflare
Revenue
$11M+ annually
Timeline
6 Days
Result
41 → 91 · CWV Pass
The Problem
A 5-Star Property. A failing website.
When we ran an independent PageSpeed audit, the mobile results were
alarming — especially for a property actively running paid traffic.
pagespeed.web.dev/analysis — twinpalms.com · mobile
ASSESSMENT: FAILED
Metric
Score
Google Target
Status
Performance Score
41 / 100
90+
Failing
Largest Contentful Paint
4.3 seconds
≤ 2.5s
Poor
Total Blocking Time
400 ms
≤ 200ms
Poor
Cumulative Layout Shift
0.625
≤ 0.1
Critical
Speed Index
13.7 seconds
≤ 3.4s
Critical
Core Web Vitals
FAILED
Pass
Failed
Audited with Google PageSpeed Insights · Lighthouse · Chrome UX Report (CrUX)
The Diagnosis
5 Root Causes. All fixable.
Server + code level only
Root Cause of LCP 4.3s
Hero Images Not Preloaded — Served in JPEG
The browser had to discover, request, download and render the hero image sequentially. No preload tag. Images were served in legacy JPEG format, not WebP — adding unnecessary file weight on every load.
LCP 4.3s · limit ≤ 2.5s
Root Cause of CLS 0.625
Images Without Explicit Width & Height
Multiple images had no explicit dimensions in HTML. The browser couldn’t reserve space — causing visible layout shifts during load. The worst metric: 6× over Google’s maximum threshold.
CLS 0.625 · limit ≤ 0.1
Root Cause of TBT 400ms
Third-Party Scripts Blocking the Main Thread
Analytics, live chat, and booking engine JS were loading synchronously in the page head — blocking render before any content appeared. Nothing was deferred or loaded asynchronously.
TBT 400ms · limit ≤ 200ms
Root Cause of FCP 2.3s
No Critical CSS — Full Stylesheet Blocking Render
The entire stylesheet loaded before above-the-fold content rendered. Critical CSS allows the browser to render visible content immediately and load the rest in the background.
FCP 2.3s · limit ≤ 1.8s
Root Cause of Speed Index 13.7s
Cloudflare In Place — But Misconfigured
Cloudflare CDN was active but several key features were disabled: Auto Minify off, Polish (image compression) not enabled, and caching rules not optimised for high cache-hit rates.
SI 13.7s · limit ≤ 3.4s
The Solution
6 Days. Zero Design Changes. Zero downtime.
Every fix was implemented at the server and code level.
The design, content, and user experience stayed completely unchanged.
Day 1 – 2
Audit, Staging Setup & Quick Wins
Full technical audit — Query Monitor + Chrome DevTools
Staging environment configured (zero risk to live site)
WebP conversion applied across all key pages
Explicit width & height added to all images (CLS fix)
Cloudflare Polish + Auto Minify + Browser TTL rules enabled
Day 3 – 4
Core Performance Stack Implementation
LCP hero image preloaded with <link rel="preload"> on all key pages
Critical CSS implemented for all above-the-fold content
Analytics, chat, and booking scripts deferred — all non-critical JS
Full-page WordPress caching with booking/cart exclusion rules
CSS and JS minified and combined where safe
Day 5
Third-Party Script Audit & Management
Full audit of all third-party tags — GA4, Facebook Pixel, live chat, booking engine
async and defer attributes applied across the full script stack
Off-screen images and below-fold content lazy-loaded
3 unused plugin scripts loading globally on every page removed
Day 6 — Complete
Validation, Deployment & Handover
All fixes validated on staging — mobile and desktop
Core Web Vitals pass confirmed via PageSpeed Insights + CrUX data
Deployed to live with zero downtime
Full before/after report with PageSpeed screenshots delivered
Cloudflare Cache Purge automation set up for ongoing workflow
The Results
Before vs. After — full comparison.
Drag the gold handle to compare the live PageSpeed audits, pixel for pixel.
PageSpeed Insights Mobile
CWV Passed
91Score
Largest Contentful Paint
1.8 s
Total Blocking Time
90 ms
Cumulative Layout Shift
0.02
Speed Index
3.1 s
First Contentful Paint
0.9 s
Core Web Vitals Assessment: Passed — all metrics in the good range
PageSpeed Insights Mobile
CWV Failed
41Score
Largest Contentful Paint
4.3 s
Total Blocking Time
400 ms
Cumulative Layout Shift
0.625
Speed Index
13.7 s
First Contentful Paint
2.3 s
Core Web Vitals Assessment: Failed — multiple URLs need improvement
Metric
Before
After
Improvement
Performance Score
41 / 100
91 / 100
+50 Points
Largest Contentful Paint
4.3 seconds
1.8 seconds
−58% Faster
Total Blocking Time
400 ms
90 ms
−77.5% Reduced
Cumulative Layout Shift
0.625
0.02
−96.8% Stable
Speed Index
13.7 seconds
3.1 seconds
−77% Faster
Core Web Vitals
FAILED
PASSED
Google Approved
Business Impact
What This Means in Real Revenue Terms
Google Rankings Improved
CWV is a confirmed Google ranking signal. With all metrics now passing, Twinpalms is eligible to outrank competitors for searches like “luxury resort Phuket” — searches that were being lost while CWV failed.
CWV = ranking signal
Mobile Booking Conversions Up
LCP dropped from 4.3s to 1.8s. The villa photography that sells the property now appears in under 2 seconds on mobile. Each 1-second improvement lifts hospitality conversions by up to 20%.
+20% Δ conversion / second
First Impression Matches the Property
CLS of 0.02 means the page is visually stable from the first pixel. No shifting, no jumping, no broken layout. The digital first impression now matches a 5-star luxury property.
0.02 CLS — pixel-stable
Paid Traffic ROI Improved
A Google-approved site improves Quality Scores on Google Ads — reducing cost-per-click and increasing ad rank for the same spend. Every baht of ad budget now works harder.
↑ Quality Score · ↓ CPC
Client Testimonial
In Their Own Words
Requested: personal experience at delivery
“Umair has been great to work with. The project was completed quickly and the work was great. Communication throughout was perfect. Really pleased with the results and will be using again.”
TTTom Thorns HR · Twinpalms Hotels & Resorts
What Was Included
Services Used in This Project
10 Deliverables
WordPress Core Web Vitals Optimization
LCP (Largest Contentful Paint) Fix
CLS (Cumulative Layout Shift) Fix
TBT / INP Reduction
Cloudflare CDN Configuration & Optimization
Critical CSS Implementation
Third-Party Script Management & Deferral
WebP Image Conversion & Compression
WordPress Page Caching Stack
Full Before/After Performance Report
Get Started
Is Your WordPress Site Costing You Business?
We’ll run a free audit on your site and show you exactly what’s
slowing it down — and what it’s costing you in traffic and revenue.
No pitch. Just data.
If 10,000 people visit your website every month but only 50 contact you, buying more traffic can simply mean paying to send more people into the same broken funnel.
Conversion rate optimization, or CRO, starts somewhere else.
Find the points where visitors hesitate, get confused, lose trust, abandon a form, or simply cannot figure out what to do next.
Fix those points.
A website that turns 1% of visitors into leads and moves to 2% does not need twice the traffic to generate twice the leads. The traffic stays the same. The website gets better at converting.
That is the basic CRO opportunity.
No CRO change can guarantee that your leads will double. Results depend on traffic quality, offer, pricing, audience, industry, brand trust, and the existing conversion rate. But when a website has obvious conversion problems, fixing several of them can drive big gains without increasing the ad budget.
Here are five CRO fixes worth checking first.
Why More Traffic Is Not Always the Answer
Most businesses look at a traffic report and ask one question:
How do we get more visitors?
That is useful, but incomplete.
A better question is:
What happens after visitors arrive?
Imagine a local service website gets 5,000 monthly visitors and generates 50 qualified inquiries. That is a 1% visitor-to-lead rate.
If traffic increases to 10,000 visitors but the conversion rate stays at 1%, the business gets about 100 inquiries.
But if the website improves from 1% to 2% while traffic stays at 5,000, the business also gets about 100 inquiries.
That is why CRO matters.
You are improving the output from traffic you already paid for through SEO, Google Ads, social media, referrals, email, or content.
The first job is not redesigning the entire website.
The first job is finding where potential customers disappear.
Find Where Leads Disappear
Start with actual behavior.
Look at:
Landing pages
Contact form starts
Contact form submissions
Phone clicks
Email clicks
Booking starts
Booking completions
Add-to-cart events
Checkout starts
Purchases
Mobile versus desktop performance
Traffic source
Device type
Page-level conversion rates
Google Analytics currently uses key events to identify important actions for a business. A lead form submission can be tracked as a key event, allowing you to analyze the paths users take before completing the form.
This matters because pageviews alone tell you very little.
A page can receive 20,000 visitors and generate almost nothing.
Another page can receive 2,000 visitors and produce 80 qualified leads.
The second page may be the better business asset.
Measure the action that actually creates value.
Fix #1: Make the Primary CTA Impossible to Miss
Your visitor should never have to ask:
“What am I supposed to do here?”
This happens constantly.
A service page might have a large hero image, a headline, three paragraphs of company history, several navigation links, social icons, four different buttons, and finally a tiny “Contact Us” link.
The website technically has a CTA.
The visitor still has no clear path.
Your primary CTA should tell people what happens next.
Weak:
Submit
Better:
Request a Free Quote
Weak:
Learn More
Better:
See How We Can Improve Your Website
Weak:
Contact
Better:
Book a 15-Minute Consultation
The exact wording depends on the business.
The principle is simple.
Make the next action obvious.
One Page, One Main Action
This does not mean every page needs only one button.
It means every important page should have a clear primary conversion goal.
A service page should not compete equally between:
Read our blog
Follow us
Meet the team
View our history
Download our brochure
Contact sales
Subscribe
Book a call
Too many equal choices create friction.
For a lead-generation page, decide what matters most.
Maybe it is:
Request a Quote
Then make that action visually obvious.
Place it where users naturally look:
Near the top
After the main value proposition
Near important proof
Near pricing or service details
At the end of the page
On mobile where appropriate
Do not rely on the navigation menu to carry your conversions.
Your visitor should be able to understand the next step without hunting.
Fix #2: Remove Friction From Your Forms
Forms are where many websites lose leads.
A visitor can be interested.
They can trust the business.
They can like the offer.
Then they see this:
Name
First Name
Last Name
Company
Job Title
Address
City
State
ZIP
Phone
Email
Website
Budget
How did you hear about us?
Tell us about your project
Upload a file
Subscribe to newsletter
And they leave.
The business may think:
“We need this information.”
The visitor thinks:
“This is too much work.”
Those are very different perspectives.
Baymard’s recent ecommerce research continues to show the relationship between form complexity and usability. Its 2024 research found an average checkout contained 11.3 form fields, while its testing found that the number of fields users must deal with matters more than simply counting checkout steps.
For lead-generation websites, the lesson is not “every form must have three fields.”
The lesson is:
Every field should earn its place.
Ask Only What Sales Actually Needs
Before keeping a field, ask:
Will this information change what happens after submission?
If not, remove it.
If the sales team only needs:
Name
Email
Phone
Project details
Start there.
You can collect additional information later.
A lead who submits four useful fields is better than a potential lead who abandons a twelve-field form.
For ecommerce, the same principle applies to checkout.
Baymard’s current checkout research reports that 63% of mobile ecommerce sites and 64% of desktop sites in its 2025 benchmark had mediocre or worse checkout UX. Its research also identifies unnecessary fields, unclear requirements, poor error handling, and other interaction problems as recurring issues.
Make Form Errors Easy to Fix
A form should not simply say:
“There was an error.”
Which field?
What went wrong?
What should the visitor enter?
W3C’s WCAG guidance says automatically detected input errors should identify the field and describe the error in text.
Good:
Email: Please enter a valid email address.
Bad:
Invalid submission.
Good error handling reduces confusion.
It also helps accessibility.
W3C recommends properly labeling form controls so users and assistive technologies can understand what each control is for.
That is not just an accessibility concern.
Clear forms are easier for everyone to use.
Fix #3: Rewrite the Above-the-Fold Message Around the Customer
Your homepage may look beautiful.
That does not mean it communicates value.
One of the most common CRO problems is writing about the company instead of the customer.
Example:
“We are a full-service digital agency with over 15 years of experience.”
That tells the visitor about you.
Try:
“Get a Faster WordPress Website That Converts More Visitors Into Leads.”
Now the visitor immediately understands the problem you solve.
The first screen should answer three questions quickly:
What do you do?
Who is it for?
Why should I care?
If those answers are unclear, visitors have to work to understand your offer.
Most will not.
Match the Message to Search Intent
Do not send every visitor to the same generic homepage.
Someone searching:
emergency plumber in Miami
has a different intent from someone searching:
commercial plumbing maintenance
Someone searching:
WordPress speed optimization
has different intent from someone searching:
WordPress developer
The landing page should reflect that intent.
If someone searches for WordPress speed optimization and lands on a page that spends the first 600 words discussing general web development, the message is mismatched.
The visitor wanted one thing.
Give them that thing.
This is where SEO and CRO overlap.
Better targeting can bring more relevant visitors.
Better messaging can help those visitors take action.
You do not need more traffic if your existing traffic is landing on the wrong page.
Fix #4: Speed Up the Mobile Experience
This is where technical optimization becomes CRO.
A slow website creates friction before the visitor even sees the offer.
The visitor taps.
The page begins loading.
Nothing useful appears.
They wait.
A script blocks interaction.
An image shifts the page.
The browser freezes.
The visitor leaves.
You lost the lead before your sales copy had a chance.
Do not optimize a website only because a testing tool gives it a number.
Look at the actual problems.
For example:
Huge hero images
Render-blocking CSS
Unused JavaScript
Third-party scripts
Heavy page builders
Excessive plugins
Poor caching
Slow hosting
Font loading problems
Layout shifts
Long main-thread tasks
Slow server response
Unoptimized WooCommerce functionality
A page can have a reasonable desktop score and still feel terrible on a mid-range mobile device.
That is why field data matters. We cover this in detail in our guide on why PageSpeed scores don’t matter as much as most people assume.
The real customer experience matters more than making a test report look pretty.
This is also where root-level WordPress optimization can produce a CRO benefit.
Removing unnecessary scripts, properly minifying CSS and JavaScript, improving caching, optimizing images, reducing plugin overhead, and fixing server-side bottlenecks can reduce friction throughout the funnel.
The goal is not:
“Get 100/100.”
The goal is:
“Make it easier for the customer to complete the action.”
Fix #5: Add Proof Where the Decision Happens
Trust is not something you should hide on an “About Us” page.
Put proof next to the decision.
If the visitor is deciding whether to:
Request a quote
Book a consultation
Buy a product
Start a subscription
Call your business
show relevant proof nearby.
This can include:
Customer reviews
Case studies
Specific results
Before-and-after examples
Client logos
Certifications
Guarantees
Product ratings
Security information
Clear return policies
Relevant testimonials
But do not dump 40 testimonials into one section.
Match proof to the concern.
If you sell expensive website development, show examples of websites you built.
If you sell SEO, show measurable SEO outcomes.
If you sell a medical service, explain credentials and provide appropriate trust information.
If you sell ecommerce products, make shipping, returns, payment, and product information easy to understand.
Proof Should Support the CTA
Imagine a visitor reads:
“Ready to improve your website?”
Then immediately sees:
“Trusted by hundreds of businesses.”
That is better than putting the same statement somewhere near the footer.
Even better is specific proof.
Instead of:
“We deliver amazing results.”
Use:
“Reduced page load time from 6.2s to 1.4s on a lead-generation website.”
Specific evidence is easier to understand.
The same principle applies to ecommerce.
Baymard’s recent payment UX research emphasizes that users need confidence around payment details, total cost, security, and what happens when something goes wrong.
Trust is not decoration.
It removes uncertainty.
Stop Sending Every Visitor to Your Homepage
The homepage is not a universal landing page.
It has too many jobs.
It introduces the company.
It supports navigation.
It explains products or services.
It may target multiple audiences.
It may rank for branded searches.
It may contain company information.
A dedicated landing page has one job.
That makes it easier to optimize.
For example:
/wordpress-speed-optimization/
can focus entirely on WordPress performance.
/hvac-web-design/
can focus entirely on HVAC businesses.
/emergency-plumber/
can focus entirely on emergency plumbing.
The visitor arrives.
The headline matches the search.
The offer is clear.
The proof is relevant.
The CTA is obvious.
That is a much cleaner conversion path.
Build Dedicated Landing Pages
Good landing pages do not need to be complicated.
A strong structure can be:
Problem
What is going wrong?
Outcome
What does the customer want?
Solution
How do you solve it?
Proof
Why should they believe you?
Process
What happens next?
CTA
What should they do?
For example, a WordPress speed page might open with:
Your WordPress Website Is Slow. We Fix the Problems Causing It.
Then explain:
What is slowing the site
What gets optimized
What happens during the audit
What tools are used
What results have been achieved
What the client receives
How to start
That is much stronger than:
“Welcome to our digital agency.”
Fix Broken Contact and Booking Flows
This sounds obvious.
Many businesses still lose leads here.
Test the complete journey yourself.
Do not just test whether the page loads.
Submit the form.
Call the number.
Book the appointment.
Use a phone.
Use Chrome.
Use Safari.
Try a slow connection.
Check the confirmation.
Check the email notification.
Check the CRM.
Check whether the sales team actually receives the lead.
A form that displays “Thank you” but never sends the lead notification is not a functioning conversion system.
Neither is a booking form that works on desktop but fails on mobile.
Neither is a phone number that is visible but not clickable on mobile.
CRO is not only about design.
It is about the entire path from visitor to customer.
Use Analytics Before Changing the Design
Do not redesign a website because you personally dislike the hero section.
That is not CRO.
That is preference.
Start with evidence.
Google Analytics lets you define important actions as key events and analyze how users reach those actions. Google specifically documents lead-generation form submissions as an example of an important key event.
Track things such as:
Page view → CTA click → form start → form submit
For ecommerce:
Product view → add to cart → checkout → purchase
Now you can identify the leak.
Example:
100,000 visitors
↓
12,000 product views
↓
3,000 add to carts
↓
1,000 checkout starts
↓
400 purchases
Do not randomly optimize the homepage.
Look at the biggest problem in the funnel.
If thousands of people add products to carts but only 400 purchase, checkout deserves investigation.
If visitors rarely click the CTA, the problem may be messaging or offer clarity.
If visitors start the form but do not submit, form friction deserves attention.
Measure first.
Then change.
Track Micro-Conversions
Not every visitor is ready to buy immediately.
That does not mean their behavior is useless.
Track meaningful actions such as:
CTA clicks
Phone clicks
Email clicks
Form starts
Form submissions
Pricing-page visits
Booking starts
Downloads
Product views
Add-to-cart
Checkout starts
Video engagement
But do not treat every click as a business conversion.
A visitor scrolling 90% down a page is not the same as someone requesting a quote.
Google Analytics separates important business actions as key events and allows businesses to use those events for reporting and optimization.
Your tracking should reflect the actual business goal.
A/B Testing Without Guessing
Once you identify a problem, test the solution.
Do not change ten things at once and then claim the redesign increased conversions.
You will not know what caused the result.
A cleaner experiment might test:
Version A: “Get a Free Quote”
Version B: “Request Your Project Estimate”
Or:
Version A: Long form
Version B: Short form
Or:
Version A: Generic headline
Version B: Problem-focused headline
The goal is not to make the page prettier.
The goal is to learn what helps users complete the desired action.
For low-traffic websites, formal A/B testing can take a long time to reach useful confidence.
That does not mean you cannot improve the site.
Use multiple evidence sources:
Analytics
Search data
User recordings
Heatmaps
Form abandonment
Customer questions
Sales-team feedback
Support tickets
Direct user feedback
Then make controlled changes.
CRO for Local Service Businesses
Local businesses often have a simple conversion goal:
Get the visitor to call, book, or request a quote.
Do not bury those actions.
A local service page should quickly communicate:
Service
What do you provide?
Location
Where do you provide it?
Availability
When can the customer get help?
Trust
Why should they choose you?
Action
What should they do now?
For example, an HVAC company can build dedicated pages for:
AC repair
AC installation
Heating repair
Emergency service
Commercial HVAC
Each page can target a specific problem and location.
The CTA can then match the intent.
Call for Emergency AC Repair
is stronger than:
Learn More About Our Services
when the visitor is actively searching for emergency repair.
Baymard’s current research places global cart abandonment at around 70%, based on its long-running dataset, and its checkout research identifies significant usability problems across both desktop and mobile ecommerce experiences.
That does not mean every abandoned cart can be recovered.
It means the checkout deserves serious attention.
Look for:
Unexpected costs
Unclear shipping
Forced account creation
Too many fields
Poor mobile layout
Confusing error messages
Weak payment confidence
Slow checkout
Missing product information
Difficult coupon handling
Poor return information
Baymard’s research also shows that reducing unnecessary form fields can improve checkout usability, with its 2024 benchmark finding 11.3 fields on average compared with its finding that many checkouts could function with fewer.
Do not optimize ecommerce checkout by blindly making it shorter.
Optimize the actual work users must perform.
What Not to Change
CRO does not mean changing everything.
Do not remove useful information simply because you want a shorter page.
Do not hide important pricing information to force users into a sales call.
Do not add fake urgency.
Do not add popups every five seconds.
Do not make the CTA visually aggressive.
Do not remove navigation when users genuinely need it.
Do not sacrifice accessibility for aesthetics.
Do not remove product details because someone told you “short pages convert better.”
Do not assume a competitor’s layout will work for your audience.
And do not chase a higher conversion percentage while lead quality collapses.
If your conversion rate rises from 2% to 4% but half the new leads are useless, the business may not have improved.
Measure qualified leads, not just raw submissions.
How to Prioritize CRO Work
You do not need a six-month CRO project to find useful improvements.
Start with the biggest leaks.
Use a simple framework:
Impact
How many users experience the problem?
Severity
How badly does it affect their ability to convert?
Confidence
Do you have evidence that this is actually happening?
Effort
How difficult is the fix?
A broken mobile form can affect a huge percentage of visitors and may be relatively easy to fix.
That should probably be investigated before changing the color of a button.
A 3% difference in button color is not more important than a form that fails.
Technical problems come first.
Conversion clarity comes next.
Visual polish comes after that.
30-Day CRO Plan
You can structure the first month like this.
Week 1: Measure
Set up or audit analytics.
Define key events.
Track leads, phone clicks, form submissions, bookings, add-to-cart, checkout, and purchases where relevant.
Identify the highest-value pages.
Week 2: Remove Friction
Test forms.
Test mobile.
Test contact flows.
Test booking.
Test checkout.
Fix broken links.
Fix confusing errors.
Remove unnecessary fields.
Week 3: Improve Messaging
Rewrite weak headlines.
Clarify offers.
Strengthen CTAs.
Add relevant proof.
Create dedicated landing pages for important search intent.
That is how you turn CRO from opinion into a process.
Conclusion
You do not always need more traffic.
Sometimes you need to stop wasting the traffic you already have.
Start with the five areas that create the most obvious friction:
Make the CTA clear.
Reduce form friction.
Make the message about the customer’s problem.
Improve mobile performance.
Put proof next to the decision.
Then measure what happens.
A website generating 50 leads from 5,000 visitors has a different problem from a website generating 500 leads from 50,000 visitors.
Traffic tells you how many people arrived.
CRO tells you what happened after they arrived.
That distinction matters.
For WordPress websites, CRO often overlaps with development, technical SEO, UX, and performance optimization. A slow script, broken form, bloated plugin stack, poor mobile layout, or weak landing-page structure can all become conversion problems.
If your website has performance issues contributing to lead loss, our WordPress speed optimization services are designed to remove that friction at the root level.
The strongest CRO work does not begin with:
“Let’s redesign the website.”
It begins with:
“Where are potential customers getting stuck?”
Find that point.
Fix it.
Measure the result.
Then move to the next bottleneck.
Traffic tells you how many people arrived. CRO tells you what happened after they arrived. That distinction matters. If you want help identifying exactly where your potential customers are getting stuck, book a free call and we will walk through your funnel together.
FAQs
Can CRO really double website leads?
It can happen, but there is no universal guarantee. A website with serious conversion problems has more room for improvement than one that is already highly optimized. Doubling leads can also come from several smaller improvements working together rather than one dramatic change.
What should I optimize first?
Start with the biggest measurable bottleneck. Check forms, CTAs, mobile performance, landing-page messaging, booking flows, and checkout. Use analytics to identify where users are dropping out before changing the design.
How many fields should a lead-generation form have?
There is no universal number. Keep the fields required to qualify and process the lead, then remove anything that does not provide enough business value to justify the extra friction. Ecommerce research from Baymard shows that unnecessary form fields can significantly increase interaction effort.
Does website speed affect conversion rate?
Speed can affect the user experience and therefore can affect conversion behavior. Core Web Vitals measure loading, responsiveness, and visual stability through LCP, INP, and CLS. The practical goal should not be chasing a perfect laboratory score. The goal is making important pages fast and responsive for real users.
What should I track for CRO?
Track actions connected to business value. For lead generation, this can include form submissions, phone clicks, booking completions, and qualified leads. For ecommerce, track product views, add-to-cart, checkout starts, purchases, and revenue. Google Analytics supports defining important user actions as key events so you can analyze those behaviors across your traffic sources.
Your website may have beautiful design, strong branding, good services, persuasive copy, and clear calls to action. None of that matters much if potential customer taps your Google result on phone, waits, watches blank screen, tries to scroll, and leaves before page becomes usable. Mobile speed is not only technical SEO problem. It is lead generation problem. When page loads slowly, every form submission, phone call, booking, quote request, product purchase, and consultation opportunity sits behind unnecessary friction. That is exactly what our WordPress speed optimization services are designed to remove.
Google’s current web guidance treats Core Web Vitals as important user-experience measurements covering loading performance, responsiveness, and visual stability. Google also continues to treat INP as a Core Web Vital, replacing FID. But numbers only tell part story. Business owner does not lose lead because LCP number is 4.8 seconds. Business loses lead because person wanted answer now and website made them wait. That distinction matters when optimizing a real business website. You are not optimizing numbers for their own sake. You are reducing friction between customer intent and customer action.
Think about it like physical store. Customer walks through door and asks employee, “Can you help me?” Employee stares at them for five seconds before responding. Then every time customer touches product, employee freezes. Then checkout counter jumps sideways while customer reaches for wallet. Would customer trust store? Probably not. Slow website creates similar experience, except visitor can leave with one thumb tap and visit competitor.
Mobile Speed Is Now a Lead Generation Problem
Many businesses still treat website speed as something developers worry about after design is complete. Marketing team handles leads. Designer handles appearance. SEO person handles rankings. Developer handles speed. Problem: these things are connected.
Suppose local roofing company gets 1,000 monthly mobile visitors. Website receives traffic from Google, Facebook, paid ads, referrals, and Google Maps. Homepage loads slowly. Service pages contain huge images. Contact form loads several scripts. Phone button is buried below large hero section. User clicks “Get Free Estimate,” but JavaScript takes time to respond. Some visitors leave. Others never reach form. Business may blame ads, seasonality, weak offer, or poor traffic quality. Actual problem sits inside website experience.
Google’s older mobile-performance research found strong relationship between slower mobile experiences and user behavior. One Google/ SOASTA analysis reported that mobile pages loading one second faster saw up to 27% higher conversion rates, while bounce rates increased sharply as load time increased. Those figures come from older research, so they should not be treated as universal 2026 conversion benchmarks, but they demonstrate why performance can affect commercial outcomes.
Visitors Do Not Care Why Website Is Slow
Visitors do not know the website uses Elementor. Visitor does not know hosting company. Visitor does not know 47 plugins are active. Visitor does not know marketing team installed three tracking systems. Visitor does not know hero video is 8 MB.
Visitor sees one thing:
Website is slow.
That is all.
And visitor has options.
Google search result contains competitor. Browser back button works instantly. Search engine does not charge visitor for switching websites. There is no reason for user to wait patiently while your homepage negotiates with six third-party servers and downloads massive JavaScript bundle.
This is why speed optimization should begin with customer journey.
Find important pages. Find pages receiving mobile traffic. Find pages generating leads. Test those pages. Fix highest-impact bottlenecks first.
Do not spend three hours optimizing footer icon that contributes nothing to conversion while 2 MB hero image delays main content.
Why Mobile Users Leave Slow Websites
Mobile browsing happens under messy conditions. User may have weak Wi-Fi. User may use cellular connection. User may be commuting. User may have older phone. Browser may have limited resources. Battery may be low. Multiple apps may run in background.
Desktop test from fast office connection tells only small part of story.
Google’s mobile-speed research has repeatedly highlighted relationship between loading time and user behavior. Older Google research found that as mobile load time increased, probability of bounce increased substantially. Again, these are historical studies, not current universal thresholds, but underlying lesson remains useful: waiting creates friction.
Every Extra Delay Creates Friction
Imagine user wants emergency plumber.
They search:
“plumber near me emergency”
They tap result.
Website shows blank hero area.
Three seconds.
Five seconds.
Six seconds.
User goes back.
Next result loads quickly.
Lead gone.
No SEO report tells business owner which exact lead disappeared. Analytics may show landing-page exit. Ads platform may show click without conversion. CRM may show fewer calls. But root cause can sit between click and content.
Same thing happens with forms.
User sees:
Request Free Quote
Taps button.
Nothing happens.
Taps again.
Still nothing.
Then button finally opens modal.
User starts typing.
Keyboard causes layout shift.
Phone field refuses input.
User leaves.
You did not lose lead because offer was bad. You lost lead because interaction was painful.
Core Web Vitals and Lead Generation
Core Web Vitals provide standardized way to measure important parts of user experience. Current Core Web Vitals include LCP, INP, and CLS. Google identifies these as loading performance, responsiveness, and visual stability measurements.
They are not complete website-quality score. Passing Core Web Vitals does not guarantee high conversion rate. Failing them does not automatically mean website cannot generate leads. But poor values can expose technical problems worth fixing.
For lead-generation website, think about metrics through customer actions.
LCP asks: Can visitor see main content quickly?
INP asks: Does website respond quickly when visitor interacts?
CLS asks: Does page stay visually stable while visitor uses it?
These questions map nicely to real-world behavior.
LCP, INP, and CLS Explained
LCP, Largest Contentful Paint, measures when largest content element in viewport becomes rendered. On many pages, that may be hero image, heading, or major content block. If LCP is slow, visitor may stare at incomplete page while browser works.
INP, Interaction to Next Paint, measures responsiveness to user interactions across page. High INP means clicks, taps, typing, menus, filters, or other interactions can feel delayed.
CLS, Cumulative Layout Shift, measures unexpected movement of content. Imagine trying to tap “Book Appointment” and button suddenly moves because image or ad loads above it. You tap wrong thing. That is not theoretical annoyance. It is poor interaction design.
Google’s current documentation confirms INP is now Core Web Vital and replaced FID.
LCP Can Delay First Impression
LCP often becomes biggest visible speed problem on marketing websites.
Large hero image. Background video. Slider. Custom font. CSS blocking render. Slow server. JavaScript-dependent hero section. Any combination can delay main content.
A website may technically start loading quickly while still feeling slow because meaningful content appears late.
Common WordPress LCP Problems
WordPress websites frequently create LCP problems through oversized hero images, background images loaded through CSS, sliders, page-builder markup, excessive CSS, web fonts, delayed image discovery, and slow server response.
Page builder itself is not automatically problem. Elementor, Divi, Gutenberg, Kadence, Bricks, and other systems can produce fast websites when used properly. Problem starts when page contains unnecessary layers.
For example, Hero section contains:
Background image
Overlay
Heading
Animated subtitle
Button animation
Decorative SVG
Video
Slider script
Tracking script
User sees simple headline and button.
Browser sees entire orchestra.
Optimization asks: What does visitor actually need before taking action?
Maybe static optimized image beats video. Maybe heading can render without animation. Maybe unnecessary slider can disappear. Maybe critical CSS can load earlier. Maybe hero image needs proper dimensions and priority.
Do not optimize code blindly. Remove unnecessary work.
INP Can Kill Form and Button Interactions
A page can load quickly and still feel slow.
This happens when JavaScript blocks main thread.
User taps menu. Nothing.
User opens form. Delay.
User clicks calculator. Delay.
User selects product filter. Delay.
User types into field. Browser struggles.
This is where INP becomes relevant.
Large JavaScript bundles, third-party scripts, heavy animations, complex DOM, expensive event handlers, and poorly optimized page-builder code can all contribute to responsiveness problems. web.dev’s current performance guidance specifically provides optimization guidance for INP and identifies responsiveness as core part of web performance.
For lead generation, test actual interactions.
Do not only test homepage loading.
Click:
Menu → Service → CTA → Form → Submit
Watch what happens.
If every step feels delayed, speed problem is also conversion problem.
CLS Makes Website Feel Broken
Layout shift gets ignored because page can technically load fast while still behaving badly.
Imagine visitor lands on page. Heading appears. They start reading. Image loads above content and pushes heading downward. Visitor scrolls. Cookie banner appears. Content shifts again. Chat widget appears. Another element moves.
Now visitor has to visually chase page.
CLS is designed to measure this kind of unexpected movement. Stable layout is especially important for forms, buttons, navigation, and ecommerce controls.
Reserve space for images. Set dimensions. Avoid injecting content above existing content. Manage ads and embeds carefully. Load fonts without creating major layout movement.
Fast but unstable page still feels bad.
Why Mobile Speed Matters More Than Desktop Score
Desktop performance can create false confidence.
A powerful desktop computer connected to fast broadband can hide inefficient website architecture. Mobile hardware and network conditions expose it.
That is why you should inspect mobile performance separately.
Real Users Do Not Browse Like Lighthouse
Lighthouse gives controlled lab measurements. Useful. Necessary. But not same as field data.
Real users have different devices, networks, locations, browsers, CPU speeds, and interaction patterns. Chrome User Experience Report data can provide field information for eligible pages and sites. Google also distinguishes lab testing from real-user measurements in its web performance guidance.
If you want to understand why chasing a perfect Lighthouse number can mislead you, read our breakdown of why PageSpeed scores don’t matter as much as most people think.
Use both.
Lab data helps identify technical opportunities.
Field data tells you what real users experience.
If PageSpeed says 95 but real-user data says important mobile pages struggle, do not celebrate number. Investigate.
If lab score is 62 but field data is healthy, inspect why lab environment differs before rebuilding entire site.
Numbers need context.
The WordPress Problems Making Your Site Slow
WordPress gives business owners huge flexibility. That flexibility can become performance debt.
Website may accumulate plugins over years.
Marketing adds popup plugin.
Designer adds slider.
SEO team adds schema plugin.
Developer adds custom scripts.
Tracking team adds analytics.
Agency adds optimization plugin.
Client adds chatbot.
Nobody removes anything.
Five years later, homepage loads 2 MB of JavaScript before visitor can click button.
Page Builders, Plugins, and JavaScript
Again, page builder is not automatically guilty.
Bad implementation is problem.
You can build fast website with page builder. You can build slow website with plain HTML. Technology choice matters, but architecture and implementation matter more.
Audit actual output.
Check CSS. Check JavaScript. Check DOM size. Check third-party resources. Check network waterfall. Check unused code. Check render-blocking resources. A good starting point is understanding how to properly minify CSS and JavaScript without breaking functionality or creating plugin conflicts.
Ask:
What is browser downloading?
Why is browser downloading it?
Does visitor need it immediately?
Can it load later?
Can it be removed?
Those questions often reveal bigger opportunities than installing another cache plugin.
Images Are Often Biggest Performance Problem
Images can make website beautiful.
They can also make website enormous.
A hero image uploaded directly from camera may be 5 MB. Website displays it at 1,200 pixels. Browser downloads 5 MB anyway unless responsive image strategy handles it properly.
Use modern image formats where appropriate. Resize images. Compress them. Serve responsive dimensions. Avoid loading below-the-fold images immediately. Preload or prioritize only genuinely critical resources.
Do not lazy-load everything.
If hero image is LCP element, lazy-loading it can delay LCP.
Optimization needs context.
Image optimization is not “compress every image and turn on lazy loading.”
It is deliver right image, right size, at right time.
Hosting and Server Response Time Matter
Frontend optimization cannot fix every backend problem.
If server takes too long to generate HTML, browser starts late.
Slow hosting. Poor database queries. Overloaded server. Bad PHP configuration. Unoptimized WooCommerce queries. Excessive plugins. External API calls. Cache misses.
All can contribute.
Time to First Byte, TTFB, is not Core Web Vital, but it influences how quickly browser can begin receiving page content and can affect LCP. web.dev’s current LCP guidance specifically emphasizes looking beyond image optimization and considering TTFB and resource-load delay.
For WordPress site, investigate hosting before blindly blaming frontend.
If server response is slow for cached pages, find the reason.
If uncached dynamic pages are slow, profile backend.
If only logged-in users experience delay, investigate a different caching path.
Third-Party Scripts Can Destroy Performance
Marketing scripts often receive free pass.
Chat widget.
Heatmap.
Analytics.
Ad pixel.
CRM.
Booking system.
Call tracking.
Social feed.
Review widget.
Cookie manager.
Each one sounds small.
Together they can create traffic jam.
Third-party JavaScript can consume network, CPU, and main-thread time. Some scripts also wait for external servers. If external service is slow, your website can feel slow. One practical step many WordPress site owners overlook is setting up cookie-free domains with Cloudflare to reduce request overhead and improve static asset delivery.
Audit third-party scripts.
Ask whether each one produces measurable business value.
If script generates one useful report per month but delays thousands of visitors, question it.
Do not remove analytics blindly. Measure dependencies first.
Why More Speed Plugins Do Not Always Fix Website
This is one of biggest WordPress misconceptions.
Website slow?
Install plugin.
Still slow?
Install another.
Still slow?
Install optimization plugin.
Now three plugins modify same CSS and JavaScript.
Result can become worse.
Caching, minification, delay, lazy loading, database cleanup, image optimization, CDN, and script management all have legitimate uses.
If you are evaluating a tool like NitroPack, understand what it does and does not handle before enabling every setting. But plugin settings can conflict. Some plugins duplicate functionality. Some features break forms or checkout.
Some optimization tools hide symptoms instead of fixing root cause. Speed optimization should be diagnostic. Find bottleneck. Fix bottleneck. Measure. Then move to next bottleneck. Do not turn website into plugin laboratory.
How Slow Website Hurts Local Lead Generation
Local service websites depend heavily on mobile visitors.
Person searching electrician, dentist, lawyer, HVAC company, plumber, roofing contractor, cleaning service, mechanic, restaurant, or clinic often wants answer quickly.
They may search while standing outside. They may need appointment. They may need phone number. They may need directions.
Website should make action easy.
If phone number appears after massive hero animation, problem.
If contact form takes ten seconds, problem.
If location page loads slowly, problem.
If map widget blocks rendering, problem.
If appointment calendar takes forever, problem.
Local lead generation has low patience threshold because user often has immediate need.
A slow website can waste traffic business already paid for through SEO, Google Ads, social media, directories, referrals, or Google Business Profile.
How Slow Website Hurts Ecommerce Conversions
Ecommerce has even more interaction.
Product page.
Gallery.
Variant selector.
Quantity control.
Add to cart.
Cart.
Checkout.
Payment.
Every interaction creates opportunity for latency.
Slow ecommerce website can also create trust problem. If product images jump around, cart takes time to update, checkout freezes, or payment button responds slowly, customer may wonder whether transaction is safe.
Do not test only homepage because homepage is usually not where every lead lands.
Use Google Search Console to identify pages receiving impressions and clicks. Compare those pages with conversion data where analytics setup allows.
Lab Data vs Real User Data
Lab data gives controlled test conditions. Field data gives real-world experience.
Both have value.
Lab tests help developers diagnose.
Field data helps business understand actual visitors.
Core Web Vitals are based on real-user experience when field data is available, while tools such as Lighthouse provide lab measurements. web.dev recommends understanding both forms of measurement rather than treating one test as complete truth.
Also test multiple times.
Caching changes.
Network conditions change.
Third-party resources change.
Server load changes.
One test is snapshot.
Optimization needs trend.
How to Fix Mobile Speed Without Rebuilding Website
Many slow websites do not need complete rebuild.
Start with audit.
Find biggest problems.
If hero image is 4 MB, optimize image.
If server response is slow, investigate hosting and backend.
If 30 scripts load globally, reduce or conditionally load them.
If font files block rendering, improve font strategy.
If page builder generates unnecessary elements, simplify sections.
If plugin adds scripts site-wide but used only one page, restrict loading.
If third-party widget delays page, defer or remove it.
If CSS is huge, identify unused or unnecessary styles.
If JavaScript blocks interaction, reduce execution and break long tasks.
This can produce major gains without changing brand or rebuilding every page.
That is important for established businesses. Rebuild can introduce new bugs, SEO losses, migration issues, content problems, and unnecessary expense.
Optimize first.
Rebuild only when architecture itself prevents reasonable performance.
JavaScript: unnecessary libraries, long tasks, global scripts
Fonts: file count, format, loading strategy
Plugins: redundant or unnecessary plugins
Third parties: chat, analytics, widgets, ads, social embeds
Caching: page cache, browser cache, object cache where appropriate
CDN: static delivery and geographic distribution
Mobile UX: buttons, forms, navigation, readability
Measurement: PageSpeed Insights, Search Console, field data, analytics
Do not blindly check boxes.
Prioritize problems based on business impact.
When Website Needs Full Technical Rebuild
Sometimes optimization reaches limit.
If theme is abandoned, codebase is heavily customized, templates are broken, plugin dependencies are impossible to untangle, backend architecture is obsolete, or site cannot support required functionality without excessive hacks, rebuild may make sense.
But rebuild should solve documented problem.
Do not rebuild because agency says “your website is old.”
Age alone does not make website slow.
A five-year-old optimized website can outperform brand-new bloated website.
Likewise, modern design does not automatically mean good performance.
Before rebuild, document:
Current traffic.
Current rankings.
Current conversions.
Current URLs.
Current Core Web Vitals.
Current integrations.
Current content.
Current backlinks.
Current technical issues.
Then create migration plan.
Protect what works while replacing what does not.
Conclusion
Your website does not need to be perfect to generate leads.
It needs to be fast enough, responsive enough, stable enough, and useful enough that visitor can reach answer and take action without fighting website.
That means stop treating mobile speed as PageSpeed score competition.
A score is a diagnostic signal.
Business outcome is the goal.
Google’s current web guidance continues to emphasize user experience and Core Web Vitals, while web.dev provides ongoing guidance around LCP, INP, CLS, field measurement, and performance optimization. Older Google research also provides useful evidence that mobile performance can influence bounce and conversion behavior, although those historical percentages should not be presented as universal 2026 benchmarks.
For WordPress businesses, biggest gains often come from removing unnecessary work rather than installing another optimization plugin.
Compress right images.
Fix slow server.
Reduce JavaScript.
Control third-party scripts.
Improve LCP.
Fix INP.
Prevent layout shifts.
Make forms respond quickly.
Test real user data.
Then measure leads.
Because final question is not:
“Did PageSpeed score go from 62 to 94?”
Better question:
“Can more visitors reach CTA and complete action without friction?”
That is speed optimization that matters. If you want us to find those friction points for your website, book a free call and we will walk through it together.
FAQs
1. Does mobile speed directly affect Google rankings?
Core Web Vitals are part of Google’s page experience signals, but Google does not say that passing Core Web Vitals guarantees higher rankings. Relevance and many other Search systems matter. Speed should therefore be treated as both user-experience and search consideration, not ranking shortcut.
If you are just getting started, our SEO tips for beginners cover the foundational signals Google uses to rank pages, including how performance fits into the bigger picture.
Google’s current documentation confirms INP is a Core Web Vital and continues to guide page experience.
2. What is a good Core Web Vitals result?
Current Core Web Vitals focus on LCP, INP, and CLS. Google and web.dev provide thresholds and measurement guidance for each metric. Passing all three gives useful signal that page meets Google’s “good” user-experience thresholds, but it does not guarantee good conversion rate or high search rankings.
3. Can WordPress website be fast with Elementor?
Yes. Elementor or another page builder does not automatically make a website slow. Performance depends on page structure, CSS, JavaScript, assets, plugins, hosting, third-party scripts, images, caching, and implementation. A poorly built Elementor page can be slow; a carefully optimized Elementor website can perform well.
4. Should I install more speed plugins if PageSpeed score is low?
No. First identify root cause. Multiple optimization plugins can duplicate features or create conflicts. Audit server response, images, CSS, JavaScript, fonts, third-party scripts, caching, and page architecture before adding another plugin.
5. How can I know if slow website is costing leads?
Connect performance data with analytics and conversion data. Compare mobile conversion rate, form completion, calls, bookings, e-commerce transactions, and landing-page exits against performance measurements. Test important pages before and after optimization. A speed improvement should ultimately be evaluated against user behavior and business outcomes, not PageSpeed score alone.
A PageSpeed score is useful, but it is not a stopwatch for your website. PageSpeed Insights combines Lighthouse lab testing with field information from the Chrome User Experience Report when sufficient real-user data is available. Google describes the PageSpeed Insights API as providing both Lighthouse lab data and real-world data, which is one reason you should look beyond the large score displayed at the top of the report.
The distinction matters because a performance score is produced from several measurements under a controlled test. It is not simply saying, “A visitor opened this website and it took X seconds to load.” Your actual visitors may be using an older Android phone, a slower mobile connection, a different browser configuration, or a network route that behaves very differently from the test environment.
Think of the score as a diagnostic dashboard rather than the destination. A 92 tells you that the page performed well under that particular test configuration. It does not tell you that every visitor will see the page quickly, that every interaction will respond immediately, or that your WordPress backend is healthy.
This is especially important for WordPress sites because the visible page is only the final result of many moving parts. Your hosting server, PHP execution, database queries, theme, plugins, CSS, JavaScript, images, fonts, CDN and third-party services can all influence the experience.
Lab Data vs Real User Data
Lab data is generated by Lighthouse in a controlled environment. It is extremely useful for finding opportunities because the conditions are repeatable. If you change your homepage and run the test again, you have a reasonable way to compare the before and after results.
Field data comes from actual users. It reflects real devices, networks and browsing conditions. Core Web Vitals are designed around real-world user experience, and Google uses the 75th percentile when evaluating whether the recommended thresholds are being met.
That creates a serious situation: you can have an excellent Lighthouse result while some of your visitors still have a poor experience.
Why the Two Results Can Look Completely Different
Imagine you test your WordPress website from a powerful desktop computer on a fast connection. The page may appear almost instantly. Now imagine a visitor opens the same page on a mid-range phone using a congested mobile network.
The HTML may arrive later. JavaScript may take longer to execute. A large hero image may take longer to decode. A cookie banner or marketing script may compete for the browser’s main thread.
The visitor experiences all of that. The 92 score does not magically remove those delays.
Why a High PageSpeed Score Can Still Feel Slow
The biggest mistake I see website owners make with performance testing is treating the score as the user experience itself. A page can score 90 or above and still have an obvious delay between the first visible part of the page and the rest of the content.
For example, the header might appear quickly while the main hero section takes another second or two to become useful. From the browser’s perspective, something has already been painted. From the user’s perspective, however, the website may still feel like it is loading.
This is where Largest Contentful Paint, or LCP, becomes much more useful than simply looking at the score. LCP attempts to identify when the largest visible image, text block or video has rendered, making it a better representation of when the main content becomes available. Google currently recommends an LCP of 2.5 seconds or less at the 75th percentile for a good experience.
There is another issue: a page can load visually and still feel sluggish when you try to use it. Clicking a menu, opening a popup, submitting a form or interacting with a slider can trigger JavaScript work. If the browser’s main thread is busy, the interface may hesitate.
That is why WordPress website speed should be evaluated as a complete experience rather than a single number.
Understanding Core Web Vitals
Core Web Vitals focus on three major parts of the experience: loading, responsiveness and visual stability. The current metrics are LCP, INP and CLS. Google recommends evaluating them at the 75th percentile rather than relying on one isolated test run.
LCP, INP and CLS in Plain English
LCP measures loading. It answers a practical question: when does the main content become visible? (LCP is related to but distinct from First Contentful Paint, which measures when any content first appears.) If your hero image is the largest element in the viewport, that image can become the LCP element. A slow server, poorly prioritized image, render-blocking resources or excessive client-side work can all push LCP later.
INP measures responsiveness. It is concerned with how quickly the page responds to user interactions. A website can look completely loaded and still have poor responsiveness because JavaScript is consuming too much main-thread time. Google currently considers an INP of 200 milliseconds or less a good result.
CLS measures visual stability. If content jumps while the visitor is reading or trying to click something, that is a layout shift. Images without reserved dimensions, dynamically inserted banners, advertising elements and some third-party embeds can contribute to the problem. A CLS of 0.1 or less is the current good threshold.
These metrics describe different problems. A page might have excellent CLS but terrible LCP. Another might load quickly but become unresponsive when several scripts execute. Looking at all three gives you a much better picture of WordPress performance.
TTFB and the WordPress Server
Time to First Byte, commonly called TTFB, measures how long it takes before the browser receives the first byte of the response. It is not the entire loading time, but it can establish a slow starting point for everything that happens afterward.
If your server takes 1.5 seconds to produce the initial response, the browser cannot display the HTML that it has not received yet. You can optimize CSS and compress images afterward, but you have already lost valuable time.
On WordPress, TTFB can be affected by hosting resources, PHP execution, database queries, uncached requests, plugins, theme logic, external requests and server configuration. Full-page caching can make a dramatic difference for cacheable pages, but caching should not be treated as a substitute for diagnosing the underlying site — see our full breakdown on how to reduce TTFB for the diagnostic steps.
When investigating a slow WordPress website, I would not immediately start deleting plugins. First, I want to know whether the delay happens before the HTML arrives or after the browser receives it. That single distinction can save a lot of unnecessary optimization work.
Render-Blocking CSS and JavaScript
A browser cannot simply display everything as soon as it receives the HTML. It has to process resources, build the page structure, calculate styles and execute JavaScript.
Render-blocking CSS can delay the point at which the browser is ready to paint the page. JavaScript can create another problem by occupying the main thread while the browser is trying to render and respond to interactions.
This is why WordPress optimization plugins often provide options for delaying JavaScript, removing unused CSS or generating critical CSS. Those features can help; we cover the settings that actually move the needle in our guide to reducing total blocking time, but they need to be configured carefully.
One mistake I see often is enabling every optimization option at once and assuming more optimization must equal better performance. It does not. A script that is delayed incorrectly can break a navigation menu, form, checkout flow or interactive component.
The better approach is to identify which files are actually contributing to the problem. Look at the waterfall, inspect long tasks and determine what is needed during the initial render. Then make targeted changes and test again.
Large Images and Hero Sections
Images are one of the easiest ways to create a misleading performance problem. A homepage may have excellent caching and optimized CSS, yet still feel slow because the most important image is several megabytes or is being delivered at a much larger size than the visitor needs.
The hero section deserves special attention because it is often above the fold and frequently becomes the LCP element. If that image is requested late, lazy-loaded when it should not be, served at an excessive resolution or blocked behind unnecessary JavaScript, your LCP can suffer.
WordPress image optimization is not simply about reducing file size. You also need to consider dimensions, format, compression, responsive image delivery, loading priority and whether the image is actually necessary.
For example, a 2400-pixel-wide image displayed at 700 pixels wide on a phone is doing unnecessary work. The browser has to download more data than the visitor needs.
Third-Party Scripts Can Change the Experience
Analytics, advertising, chat widgets, heatmaps, social embeds, tracking platforms and marketing automation tools can all add JavaScript to a page.
The problem is not that third-party scripts are automatically bad. The problem is that every additional service has a performance cost somewhere. Some scripts download resources, some execute JavaScript, some create network connections and some modify the page after it has already started rendering.
A website can therefore have a good WordPress setup and still feel slower because of what has been added around it.
I usually look at third-party requests when a page looks optimized on paper but behaves differently in the browser. If removing or delaying one external script suddenly changes the loading timeline, you have useful evidence about the actual bottleneck.
The answer is not always “remove the script.” Sometimes it is better to load it later, restrict it to pages where it is needed, or replace it with a lighter implementation.
Why Mobile and Desktop Scores Differ
It is normal for mobile PageSpeed performance to be worse than desktop performance. A desktop computer generally has more processing power and a more capable network environment than a typical mobile device.
Google’s Core Web Vitals thresholds are not different for mobile and desktop, but the practical difficulty of meeting those thresholds can differ because mobile devices and networks are more constrained.
This is why I would never optimize a WordPress website by looking only at the desktop report.
A desktop score of 98 can look impressive while the mobile experience remains frustrating. If most of your visitors arrive from phones, the mobile report is much closer to the problem you actually need to solve.
When Should You Actually Worry About Your PageSpeed Score?
Do not panic because your score is 78, and do not relax simply because it is 94.
The score becomes useful when it helps you identify a meaningful performance problem. If your real users have poor Core Web Vitals, your pages take too long to become useful, interactions are delayed, or important content appears late, you have a problem even if the score looks respectable.
Likewise, if your site has a score in the 90s and users are genuinely having a fast experience, spending hours trying to push the number to 100 may provide very little practical value.
The thresholds are more meaningful than the obsession with the final score. For Core Web Vitals, Google currently identifies good results as LCP up to 2.5 seconds, INP up to 200 milliseconds and CLS up to 0.1.
What I Check When a WordPress Website Scores Well but Still Feels Slow
When a site scores well but feels slow, I start by reproducing the problem in an actual browser. I want to see what the visitor sees, not just what the Lighthouse report says.
Then I look at the Network panel in Chrome DevTools; this is one of several tools we rely on, alongside the others in our WordPress performance audit toolkit. The waterfall can reveal whether the delay comes from the initial HTML request, CSS, JavaScript, fonts, images or third-party resources.
Next, I inspect the Performance panel. Long JavaScript tasks can explain why a page looks loaded but does not respond immediately.
I also compare the homepage with other templates. If posts are fast but the homepage is slow, that usually points toward page-specific content, a builder section, hero media, widgets, forms, sliders or scripts that are only loaded there.
Finally, I compare desktop and mobile behavior and look at real-user data when it is available. The goal is not to collect a bigger score. The goal is to identify the bottleneck that a visitor is actually experiencing.
A Practical WordPress Speed Diagnosis Process
A useful performance audit should follow a logical sequence rather than jumping between optimization settings.
Start with the server response. Check TTFB and determine whether the page is being served from cache. If you’re choosing a caching plugin, our WordPress cache plugin comparison breaks down which one fits your setup. If the server is slow, front-end tweaks may only hide part of the problem.
Then inspect the rendering path. Find CSS and JavaScript that delay the first useful render. Check whether critical resources are being prioritized correctly and whether unnecessary assets are being loaded on the page.
After that, inspect images and fonts. Look specifically at the LCP element instead of compressing every image on the site without understanding which ones matter.
Next, review third-party scripts. Identify external domains, tracking scripts, chat tools, advertising systems and embedded services. Ask whether each one needs to load immediately.
Finally, test the page after every meaningful change. Performance optimization is much easier when you know which change produced which result.
This process is particularly important on WordPress because a plugin may not be the problem by itself. A plugin can be perfectly reasonable while its assets are being loaded on pages where they are unnecessary. The solution might be asset management rather than uninstalling the plugin.
Stop Chasing 100 and Start Measuring the Right Things
A perfect PageSpeed score is satisfying. It is also easy to chase because the number gives you an obvious target.
The problem starts when optimization decisions are made solely to improve that number. You can spend hours removing a few milliseconds from a lab test while ignoring a slow server, a massive hero image or a JavaScript-heavy third-party tool that visitors actually notice.
Instead, track Core Web Vitals, TTFB, LCP, responsiveness, visual stability and actual loading behavior. Compare those measurements across important templates and devices.
A useful performance target is not “make PageSpeed say 100.” A better target is “make the important pages consistently fast for real visitors.”
That difference sounds small, but it changes the entire optimization process.
Conclusion
A 90+ PageSpeed score is a good signal, but it is not proof that a WordPress website is fast. PageSpeed Insights is a diagnostic tool, and its lab environment cannot represent every device, connection and interaction experienced by your visitors.
The better approach is to look at the entire loading process. Check TTFB, identify the LCP element, understand JavaScript execution, inspect images, review third-party requests and compare mobile with desktop. When real-user Core Web Vitals data is available, use it because it tells you what visitors are actually experiencing.
At ProSpeedGuy, the useful part of a performance audit is not producing a pretty score. It is finding the reason a page is slow and fixing the bottleneck that matters. If a WordPress site scores well but still feels slow, a technical performance audit can be more valuable than another round of blindly changing PageSpeed settings.
FAQs
Is a 90 PageSpeed score good?
Yes, a 90 or higher is generally a strong Lighthouse performance score, but it does not guarantee that every visitor experiences a fast website. Check Core Web Vitals, TTFB and actual browser behavior alongside the score.
Why is my WordPress website slow when PageSpeed says 90+?
The issue may come from server response time, a slow LCP element, JavaScript execution, third-party scripts, large images or differences between the test environment and your real visitors. A high score does not eliminate these possibilities.
What is a good LCP for WordPress?
Google currently recommends an LCP of 2.5 seconds or less at the 75th percentile for a good user experience.
Is TTFB important for WordPress speed?
Yes. TTFB affects how quickly the browser receives the initial response. Slow hosting, uncached pages, PHP processing, database work and server configuration can all contribute to a high TTFB.
Should I try to get a PageSpeed score of 100?
Not necessarily. Once a website is performing well, chasing the last few points can become counterproductive. Focus on user-facing metrics and bottlenecks that affect real visitors.
Why is my mobile PageSpeed score much lower than desktop?
Mobile devices generally have less processing power and may use slower or less reliable networks. This can make JavaScript execution, image delivery and rendering more difficult, so desktop and mobile results can differ significantly.
How can I find what is actually making my WordPress site slow?
Start with PageSpeed Insights, then reproduce the issue in Chrome DevTools. Check the Network waterfall for server and resource delays, inspect the Performance panel for long tasks, identify the LCP element and review third-party scripts. Combining these tools gives you much more information than the score alone.
If your site feels fast on desktop but still fails performance checks, a Core Web Vitals fix guide is exactly what you need. In 2026, speed is no longer just a technical nice-to-have; it affects user experience, conversions, and how confidently your site can compete in search.
The good news is that most Core Web Vitals problems are fixable. The bad news is that many sites try to fix the wrong things first, like buying a new plugin before checking hosting, images, scripts, or theme bloat. This guide focuses on practical fixes you can actually apply, especially if you run a WordPress site.
What Core Web Vitals Mean
Core Web Vitals are Google’s key page experience metrics. They focus on three things: how fast the main content loads, how stable the page looks while loading, and how quickly users can interact with it.
The three metrics are:
LCP: Largest Contentful Paint
CLS: Cumulative Layout Shift
INP: Interaction to Next Paint
In simple terms, LCP measures loading speed, CLS measures visual stability, and INP measures responsiveness. If one of these is bad, your site may feel slow or frustrating even if the design looks good.
How To Check Your Scores
Before fixing anything, test your site so you know what is actually broken. Use PageSpeed Insights, Lighthouse, and Search Console to see both lab data and real-world field data.
Focus on templates, not just the homepage. A blog post, product page, and landing page can all perform differently, and the weakest template often drags down the whole site.
Fix LCP First
LCP is usually the metric that needs the most attention. If your main content takes too long to appear, users feel the site is slow even if everything else eventually loads.
Start with the biggest causes:
Slow hosting
Heavy hero images
Render-blocking CSS and JavaScript
Too many fonts or third-party scripts
A few strong fixes usually make a big difference:
Compress and resize your main image.
Use WebP or AVIF where possible.
Preload the hero image and critical fonts.
Remove unused scripts from the header.
Use caching and a CDN.
Fix CLS Next
CLS is all about page stability. If things jump around while the page loads, the experience feels sloppy and can hurt trust.
The most common causes are missing image dimensions, ads that inject late, and font swapping. To reduce layout shift, always define image and video sizes, reserve space for embeds and ads, and use font loading settings that prevent text from jumping.
Fix INP For Better Interaction
INP became more important after Google replaced FID, and it measures how quickly the page responds when users click or tap. If your site feels laggy after someone interacts with it, this is the metric to watch.
The biggest causes are heavy JavaScript and too many third-party tools. To improve INP, reduce script weight, delay non-essential tools, break long tasks into smaller chunks, and remove anything that blocks the main thread.
Best WordPress Fixes
If you use WordPress, the fastest wins usually come from simplifying the stack. A lightweight theme, fewer plugins, and better hosting often do more than endless tweaking.
A lot of sites waste time fixing the wrong layer first. For example, changing fonts will not help much if your hosting is slow or your homepage loads too many scripts.
Avoid these mistakes:
Optimizing only the homepage.
Ignoring mobile results.
Keeping unnecessary plugins active.
Adding more scripts while trying to improve speed.
Measuring once and never checking again.
Simple Fix Order
If you want the fastest path to better scores, follow this order:
Improve hosting response time.
Optimize the LCP image.
Remove render-blocking CSS and scripts.
Set image and video dimensions.
Reduce JavaScript and third-party code.
Re-test after each change.
This order works because it tackles the biggest bottlenecks first. Small improvements add up quickly when the page is already bloated.
FAQs
What is the easiest Core Web Vitals fix?
The easiest fixes are usually image compression, resizing images correctly, and removing unnecessary scripts. These changes often improve scores without touching code.
Which Core Web Vital matters most?
All three matter, but LCP is often the most noticeable because it affects how fast the main content appears. If the page looks slow, users usually notice that first.
Do Core Web Vitals affect SEO?
Yes, they can affect SEO because they are part of page experience and influence how users interact with your site. Better performance also usually leads to better engagement.
Can a WordPress theme affect Core Web Vitals?
Yes. Heavy themes can add extra CSS, JavaScript, and layout complexity that slow pages down. Best WordPress themes usually give you a better starting point.
How often should I test my site?
Test whenever you make major changes, and also on a regular schedule. Performance can degrade over time as plugins, media, and third-party tools are added.
Conclusion
Fixing Core Web Vitals is mostly about reducing friction. If you improve hosting, simplify the page, optimize images, and cut unnecessary scripts, your site will usually become faster and more stable without a complete redesign.
The best approach is to fix LCP, CLS, and INP in that order, then keep testing so performance does not slowly slide back. For WordPress sites, a lightweight theme, optimized hosting, and fewer plugins are still the foundation of better results.
In the end if there’s no improvement in your stats? get me here for Core Web Vitals fixes 🙂
If you’re looking for the best WordPress themes 2026, the choice matters more now than ever. Theme ownership changes, block editor adoption, WooCommerce needs, and performance pressure have made “best” a moving target, not a fixed answer.
This guide is different because it focuses on speed, real-world usability, and honest tradeoffs. It covers more use cases than a typical top-7 roundup and gives you a clearer path whether you’re a blogger, store owner, developer, or beginner.
How We Tested & What We Looked For
We evaluated each theme on a clean WordPress install using the same hosting setup and the same demo-style content. The goal was to compare the theme behavior as fairly as possible.
We looked at five main factors: speed and Core Web Vitals, design flexibility, page builder compatibility, support and update history, and pricing fairness. In 2026, lightweight themes matter more because faster loading usually means better SEO, better user experience, and fewer technical headaches.
The Kadence Situation — What Every WordPress User Needs to Know
Kadence was one of the most loved lightweight WordPress themes because it offered speed, flexibility, and strong WooCommerce support. But after the Liquid Web/StellarWP consolidation, the brand and buying experience changed in ways that surprised a lot of users.
The free Kadence theme and blocks plugin still exist, but the old experience around pricing, login flow, and product access has changed. If you already use Kadence, the safest move is to keep backups, monitor your renewal status, and avoid rushing any migration unless you have a real reason to switch.
Quick Comparison Table
Theme
Free Version
Price (Pro)
Speed Rating
Best For
Builder Support
GeneratePress
Yes
From $59/yr
Excellent
Raw speed, developers
Gutenberg, Elementor, Bricks
Astra
Yes
Paid plans available
Excellent
Beginners, agencies, all-purpose sites
Elementor, Beaver Builder, Bricks, Gutenberg
Blocksy
Yes
Premium add-on
Excellent
Design-heavy sites, portfolios
Gutenberg, page builders
Neve
Yes
Premium add-on
Excellent
Lightweight multipurpose sites
Gutenberg, Elementor
Kadence
Yes
Paid plans changed
Excellent
Existing users, blogs, WooCommerce
Gutenberg, builders
Divi
No strong free-first path
Paid membership
Good but heavier
Visual design, non-coders
Built-in Divi Builder
Hello Elementor
Yes
Free
Excellent
Elementor users, starter sites
Elementor only
SeedProd
Limited theme mode
Paid
Excellent for landing pages
Launch pages, funnels, coming soon
SeedProd builder
OceanWP
Yes
Optional extensions
Good
WooCommerce, flexible free builds
Gutenberg, Elementor
Flatsome
No free core focus
One-time premium
Good
WooCommerce stores
UX Builder
Bricks Builder
No free theme-first path
Paid
Excellent
Developers, advanced users
Bricks native builder
Spectra One
Yes
Free / ecosystem premium options
Excellent
Kadence refugees, block-first sites
Gutenberg-native
The 12 Best WordPress Themes in 2026 Tested By Prospeedguy
GeneratePress — Best for Raw Speed
GeneratePress is one of the strongest choices if speed optimization is your top priority. It stays extremely lean while still giving serious users enough control through Premium features.
It works especially well with Gutenberg, but it also pairs well with major page builders when needed. The tradeoff is that it looks minimal out of the box, so it’s not the easiest pick for beginners who want a polished demo immediately.
Pros
Very small footprint.
Excellent for speed-focused builds.
Free version is genuinely useful.
Cons
Minimal design by default.
Less beginner-friendly than template-heavy themes.
Astra — Best All-Around Theme
Astra is still the safest recommendation for most users because it balances speed, flexibility, and ease of use very well. It has a large user base, lots of starter sites, and broad builder compatibility.
It’s a great choice for beginners, freelancers, and agencies because it can fit almost any project. The downside is that it’s very common, so your site may look generic if you don’t customize it.
Pros
Strong starter templates.
Broad builder support.
Easy to learn.
Cons
Very popular.
Premium features are split across plans.
Blocksy — Best for Design-Forward Sites
Blocksy is a strong choice if you want speed and design control together. It feels modern, polished, and especially good for users who want deeper block editor integration.
Compared with Astra or GeneratePress, Blocksy often feels more visually refined right away. The downside is that the settings can feel a bit more complex at first.
Pros
Excellent free customization.
Modern interface.
Strong Gutenberg support.
Cons
Slight learning curve.
More options can overwhelm beginners.
Neve — Best Lightweight Multipurpose Theme
Neve is a solid pick if you want a lightweight theme without a complicated setup. It is built for performance and works well for users who want a simple but capable foundation.
It sits in a nice middle ground between beginner-friendly and performance-focused. If you want speed without too much complexity, Neve is worth serious consideration.
Pros
Lightweight and easy to use.
Good performance reputation.
Simple template workflow.
Cons
Smaller community than Astra.
Less excitement around advanced customization.
Kadence — Still Worth It?
Kadence is still a capable theme, especially for users already inside its ecosystem. It remains fast, flexible, and practical for blogs and WooCommerce sites.
Kadence is my personal favorite.
That said, the recent branding and product changes make it harder to recommend as the default choice for brand-new users. If you already use Kadence and everything is stable, there is no urgent reason to switch.
Pros
Fast and flexible.
Strong WooCommerce fit.
Free version still useful.
Cons
Brand and pricing uncertainty.
New users should compare alternatives first.
Divi — Best Visual Builder Theme
Divi is ideal for people who want a complete visual design system rather than a lightweight theme-first setup. Its biggest advantage is the built-in builder and huge template library.
The tradeoff is performance and long-term lock-in. Divi can be optimized, but it still tends to be heavier than the leanest themes on this list.
Pros
Built-in drag-and-drop builder.
Huge template ecosystem.
Great for non-coders.
Cons
Heavier out of the box.
More vendor lock-in.
Hello Elementor — Best Bare-Bones Starter
Hello Elementor is one of the fastest and most minimal starter themes available. It is designed specifically for people who already plan to build with Elementor.
This is the right choice if you want a blank canvas and you are fully committed to the Elementor workflow. Without Elementor, though, it gives you very little on its own.
Pros
Extremely lightweight.
Perfect Elementor pairing.
Free forever.
Cons
Not useful without Elementor.
Very little standalone design value.
SeedProd — Best for Landing Pages
SeedProd is not a traditional theme in the same way as GeneratePress or Astra, but it deserves a place here because it is excellent for conversion-focused pages. It works especially well for coming soon pages, funnels, and product launches.
If your project is a campaign site or a single-product business, SeedProd can be more practical than a full multipurpose theme. It is built for speed, simplicity, and conversions.
Pros
Great for landing pages.
Fast to deploy.
Good for campaigns and funnels.
Cons
Not a classic full-theme replacement.
Less ideal for large content sites.
OceanWP — Best Free Theme for WooCommerce
OceanWP remains one of the most practical free choices for WooCommerce users. It was built with online stores in mind and offers a lot of store-friendly flexibility.
It is a bit heavier than the leanest themes, but the extra eCommerce features can be worth it for shop owners. If you want strong WooCommerce support without paying upfront, OceanWP is still a strong option.
Pros
WooCommerce-friendly.
Strong free version.
Lots of extensions.
Cons
Slightly heavier than the fastest themes.
Can feel plugin-dependent.
Flatsome — Best Premium WooCommerce Theme
Flatsome is one of the most popular premium WooCommerce themes for a reason. It combines store-focused layouts with a built-in builder workflow that helps merchants launch polished storefronts quickly.
The downside is that it sits outside the WordPress.org ecosystem, so updates and support depend more directly on the developer. Still, for serious store owners, it remains a powerful premium choice.
Pros
Strong WooCommerce UX.
Built-in builder.
One-time purchase model.
Cons
Outside the WordPress.org free ecosystem.
Less flexible as a general-purpose theme.
Bricks Builder — Best for Advanced Developers
Bricks Builder is a strong option for developers who want full-site building with cleaner output. It appeals to users who want more control than a standard theme and less bloat than many visual builders.
It is not the easiest option for beginners, but it is one of the smartest for advanced custom work. If performance and semantic structure matter to you, Bricks deserves attention.
Pros
Clean output.
Great for custom builds.
Strong developer momentum.
Cons
Steeper learning curve.
Not beginner-friendly.
Spectra One — Best Kadence Refugee Alternative
Spectra One is a smart recommendation for users looking for a lightweight, Gutenberg-native alternative. It fits well for people who want to stay in the block editor ecosystem and avoid uncertainty.
It is especially appealing if you want a free theme that feels modern and aligned with where WordPress is heading. If you are moving away from Kadence, Spectra One is one of the cleanest options to test first.
Pros
Free and block-native.
Lightweight.
Good alternative for Kadence users.
Cons
Smaller community than Astra.
Fewer third-party tutorials.
Which Theme Is Right for You?
Your Goal
Best Choice
Maximum speed
GeneratePress or Neve
Beginner-friendly all-rounder
Astra
Elementor workflow
Hello Elementor + Astra
WooCommerce store
OceanWP or Astra; Flatsome for premium stores
Visual drag-and-drop
Divi
Developer control
Bricks Builder or GeneratePress
Leaving Kadence
Spectra One or Blocksy
If you want the fastest possible setup, GeneratePress and Neve are the safest bets. If you want the easiest path to a polished site, Astra is usually the most balanced choice.
In 2026, the best theme is usually the one that gives you strong performance before you add extra plugins. That matters because Core Web Vitals and mobile performance are tightly connected to SEO and user experience.
Block editor compatibility is also becoming more important. Themes that work cleanly with Gutenberg and full-site editing are often better long-term choices than bloated designs that depend on extra scripts and heavy visual effects.
FAQs
What is the fastest WordPress theme in 2026?
Hello Elementor is often the fastest in bare starter tests, while GeneratePress and Neve are among the best full-purpose options for ongoing performance, but Kadence is the best so far.
Is Kadence still a good theme after the Liquid Web rebrand?
Yes, Kadence can still be a good theme, especially for existing users. New buyers should pay attention to account access, pricing, and support continuity.
What’s the best free WordPress theme?
Astra, Blocksy, GeneratePress, Neve, OceanWP, and Hello Elementor are all strong free options. The best one depends on whether you want speed, design control, or builder compatibility.
Which WordPress theme is best for WooCommerce?
OceanWP is the strongest free WooCommerce-focused choice, while Flatsome is one of the best premium options. Kadence also remains relevant for users already in its ecosystem.
Can I switch WordPress themes without breaking my site?
Yes, but you should back up your site first and test the switch carefully. Menus, widgets, layouts, and builder elements can change when you move to a new theme.
Do WordPress themes affect SEO?
Yes. Theme speed, code quality, mobile behavior, and Core Web Vitals all affect user experience and can influence search performance.
Conclusion
The WordPress theme market in 2026 is leaning toward faster, lighter, and more flexible options. Theme consolidations and pricing changes are happening more often, so choosing a stable, well-supported theme matters as much as choosing a fast one paired with a fast host.
GeneratePress is best for raw speed, Astra is the best all-around option, Blocksy is excellent for design-forward sites, and OceanWP or Flatsome are the best WooCommerce-focused choices. If you are leaving Kadence, Spectra One and Blocksy are the smartest alternatives to test first.
Have a theme we missed? Drop it in the comments, and we’ll consider it for our next update.
130+ performance tips and WordPress Speed Optimization Guide to overcome your WordPress speed addiction.
Are you a speed addict?
Are you worried about poor SEO rankings?
Do you want instant loads for your website, EVEN ON MOBILE?!
Do you want to save money on server costs?
Do you want to bedazzle your clients?
Or are you just some DIY-er looking for new tactics?
Whatever the reason for your addiction, you’ve come to the right place. I’m not going to judge you. Or call you OCD about speed. I’m gonna show you the pro tactics that I cleverly thought up in a time lonnnngggggg before WordPress speed-up was a trend. (I’ll also warn you about dumb ones that only waste time.)
I promise this is the toughest speed-up guide you’ve ever read.
Edits:
AUG 15, 2017 – started writing. Gave up because it was too long.
APR 22, 2020 – finished during Corona downtime.
JUN 3, 2020 – more tips and clarifications.
JUN 24, 2020 – added network firewall, cache prebuild, and form lazy load.
My addiction for faster load times began in 2007, with Joomla (not WordPress).
I had a few successful sites growing out of control. Many plugins were installed, ads, hundreds of comments on many posts (some had thousands). Slow frontend and backend. It was a pain to update as I’m possibly the most impatient person in the world. I couldn’t stand it… I could perceive even 100ms difference in load times.
So what did I do?
I moved to WordPress around 2010. Switched themes like 20 times. Then switched my webhosting 3 times. Then got a VPS plan. Then I got 5 more VPS because the first one sucked. Then I taught myself how to manage servers because I got tired of admins not being available when my site went down.
When I finally got my site stable, then came the theme rebuild. I rebuilt my theme from scratch several times. Also enlisted some developers and coders with much more experience than myself. Then I argued with some of them because I didn’t trust their logic. Sometimes only one of us was right, other times we were both wrong.
Load times improved but my addiction only got worse. The faster things got, the more used to it I became. The moment I broke the mythical 1-sec barrier, it only felt like I reached the bottom of a new mountain to climb. Now I wanted a sub-500ms site!
Every developer working with me argued the same thing,
Why do you want it faster? Your site is already fast!
I knew my site was already faster than others. What I couldn’t understand was why a custom-coded site still needed even half a second to load. Anybody working with me needs to understand they’re dealing with an addict, not a hobbyist. Anyway, I found a developer friend who was every bit as willing to explore with me. He went the code route. I went the server route.
He rewrote our WP_Query from scratch, completely refactored all our CSS. Rebuilt all our custom work to be mobile-first. And when I say from scratch…I mean from scratch. All the CSS/JS optimization you see nowadays, but done by hand. He integrated many of our plugins directly into the theme or rewrote them entirely.
In the meanwhile, I was screwing with servers. I didn’t like servers but I was the more Linux-capable one between us two. So I tested various stacks. Screwed around with configurations. Turning things on and off. Tried different security systems. Lucky for me, the server world was already quite evolved in performance-tuning. With the help of a few senior admins, I was ‘up to speed’ within 1-2 years.
We were way ahead of the times.
I doubled back to WordPress this time. Now as a speed architect alongside my developer friend. We got even more aggressive, inventing many tactics that are either obsolete today or more conveniently-implemented via plugins. It’s amazing how much we accomplished in a time when WordPress and web servers weren’t so user-friendly. Anything we wanted to do, we had to do it manually or invent it ourselves.
Today, it seems all WordPress users want more speed. It’s actually a trend now. Hahaha. It’s not only Johnny “the speed addict” harassing developers. There’s speed tests. And performance plugins like caching, combining, minification, image compression, etc. It seems even the average user is trying to remove bloat and provide the best user experience possible.
Speed optimization is more important than ever now…
While we do have faster internet, websites are more bloated than ever. Themes and plugins keep getting fancier and loaded with more features. The majority of internet visitors are browsing from mobile (with less bandwidth and processing power). Google now considers your speed as a ranking signal. Facebook ads don’t convert as well when your site is slow (users just click “BACK” and keep scrolling). Faster websites also make more money! No surprise, right?
Faster websites make more money, rank better, and improve overall user experience!
Are you a WordPress speed addict (with no life just like me)?
If yes, then you’ve found my black book of speed-up secrets. If you wanted just simple tips, please choose an easier speed optimization guide to follow. This guide will make you break up with your developer and pick fights with your server admin. I want you to learn, but also have fun. I’ve been doing it for many years and come from a much harder time when not so many tools were available.
Everything I share here is EXACTLY what I recommend to all clients. Even the $20k ones. Even the developers and agencies who consulted with me to train them and their team. They all get exactly what I put below. Instead of just bullshit generic advice, I’ve listed many sneaky ones as well. Some of them are extremely technical. If you don’t understand my brief explanation for it…you are probably not at the level to attempt it! Follow what you can but hire if you need. Test carefully.
I’ve gotten many fancy sites – nice graphics, over 1mb size, 100+ requests, to load instantly and well under 500ms. I’m sure you can, too. I will give you almost every WordPress speed-up trick that I know! 😉
Let’s do it!
SPEED OPTIMIZATION RULE #1: Always optimize for HUMAN VISITORS! (not speed tests)
Your webhosting speed determines how fast it can process code, and how many visitors it can handle. Compare your website to a car. To make a car go faster, you either A) get a stronger engine and/or B) lighten the weight. For websites, the web-server is the “engine” and the code is the”weight”.
The goal is to improve our web-server “engine” while decreasing code “weight”, ok?
Changing your webhosting is one of the easiest ways to improve speed. Those of you on cheap $5/month shared webhosting will benefit the most from moving to a managed hosting service or even your own VPS. The difference will be night and day without any site changes. Moving from managed hosting to an optimized VPS or dedicated “bare metal” server will be another night-and-day jump.
The difference isn’t only speed but also a matter of cost (savings). A fast server can handle more visitors than a slow one. If your server can handle double the traffic, theoretically the bill can be twice as cheap. Not a big deal for a small site but what about a huge ecommerce site with a $1k/month server bill? 50% cost reduction sounds mighty attractive!
Obviously, you should pick a server location that’s closest to your visitors. Ideally, you don’t want your DNS ping time more than 100ms from the server to your visitor’s computer. There are many implications depending on your needs.
Local businesses should get a server as close to their visitors as possible. Keep it within 100ms or less, within 50ms is better. Check ping times with WonderNetwork.
The USA is about 80ms from coast to coast. Canada and Mexico are close enough as well.
All of Western Europe is only 40-50ms, very close.
Asia is within 80ms between most countries.
India/Pakistan, Australia/NZ, Africa are somewhat isolated. Local businesses there need a local datacenter. Even Singapore to Australia is borderline “far” by DNS standards (~150ms).
South America can be unreliable infrastructure. For that reason, many companies in Central/South America still use US-based datacenters like in California, Texas, or Florida (Miami). Luckily, Google Cloud opened up a datacenter in Sao Paolo, Brazil. Reliable but pricey.
If you have worldwide traffic (including Asia/Pacific) and no particular core region, I like USA west coast as perfect location for fast traffic to Europe and Asia.
If you have only USA & Europe traffic and no particular core region, I like USA east coast for fast traffic to Europe.
It’s also good to have a webhosting company on the same timezone as your core audience. That way they can (quickly) support or troubleshoot issues when most of your visitors are awake.
Those of you thinking a CDN can make up for far server location (that’s not necessarily true!)
Those of you hunting for dedicated nodes…the best is TIER-4 datacenter with four 9’s (99.9999% uptime guarantee). But good luck getting those guaranteed!
Nearest.host – cool site showing nearby server companies.
2. Choose the right website hosting service (BEG, HIGH)
Shared hosting ($5-30/month) – fine for small sites and low traffic up to 100k hits/month. No access to server configurations. Safe choice is Cloudways, SiteGround, Kinsta, or WP Engine.
VPS/cloud hosting ($30-300/month) – great for medium sites and traffic up to 30 million hits/month. Safe choice is or Gridpane, or try a fully managed VPS service.
Dedicated (bare metal) server ($200/month & up) – great for large sites with TONS of traffic. Safe choice is LiquidWeb.
Buy the best that you can comfortably afford. A small website doesn’t need much power but it’s still noticeable when you get a better server and appreciated more than you think. Think of a new phone that opens apps just a fraction of a second quicker. You really can feel the difference and it improves user experience tremendously.
Shared webhosting is usually slow because they stuff hundreds of customers/websites onto the same server (maximize profits). This increases slowdowns, unexpected crashes or server restarts, security attacks, and your email IP getting marked as spam.
Shared hosting environments are also slow because they load many scripts/modules to maximize compatibility for as many users as possible. And without dedicated resources, your visitors end up waiting in line while the server is busy handling other websites first.
VPS/Dedicated servers are faster because there’s more resources available per account and your resources are serving only your websites. You have more control over your environment, can configure it for your needs. VPS/dedicated can be costly or difficult to manage for regular users. There are cloud-panel services to help manage it and also fully-managed services where they take care of everything for you.
Those unable to handle technical responsibilities of VPS can go for “premium shared hosting” like Coludways Kinsta or WP Engine. They don’t crowd the server as much but the performance (while better than regular shared hosting) will be still be far behind a VPS.
3. Choose a high performance web server (INT-ADV, HIGH)
Use any web server software but Apache. The best is NGINX or LiteSpeed, or highly-optimized Apache (rare to find). The higher your traffic, the more noticeable the difference.
NGINX shines at simple sites. Just set it and go. Not much settings to optimize. But once you have a complicated site, NGINX is a mixed bag. Some NGINX features aren’t easy to configure. If you have a server-admin to fine-tune, it’s great but many people don’t.
LiteSpeed has more easy-accessible features than NGINX. Like when you need some things cached but not others, or dealing with server-level redirects via htaccess. LiteSpeed also has a WordPress cache plugin which NGINX doesn’t. That’s a HUGE advantage. (I personally prefer LiteSpeed.)
OpenLiteSpeed is the free community version of LiteSpeed. It’s a great alternative for those wanting the free price of NGINX but the powerful LiteSpeed cache plugin.
Some webhosts have the Apache+NGINX hybrid stack. I feel those are outdated now and makes for unnecessarily slower/heavier stack.
If using Apache, MPM events is best (compared to worker or prefork).
Keep your webserver updated. Later versions can speed up certain protocols and processes noticeably.
4. Web server configuration (ADV, MED-HIGH)
Most web servers come with safe/functional configurations right off the bat. Adequate for the average small site with little traffic. It’s when you get more traffic and more security attacks, or have more demanding apps that fine-tuning the configurations makes a big difference.
Timeout – 30 to 60 seconds is a safe start. You can increase up to 600 or beyond if needed for long processes (import, export, backups). Keep in mind that allows poorly-coded processes or hack exploits to run out your server resources.
# of child processes allowed – depends on the server environment. Default should be fine.
Concurrent connections allowed – anywhere from 1-20k. Higher is not necessarily better!
Keep alive – on, off, or LiteSpeed’s “smart keep-alive”. I think “on” is safer. If you have LiteSpeed, the smart keep-alive is awesome!
Keep alive timeout – 3-5 seconds is a safe start. Increase if needed.
How many threads, body/buffer size, workers, clients, etc….all that you can look up online. It depends on your server size and use scenario. Jump on forums and ask around or have a sys-admin configure for you. Keep in mind different admins have their own ways of configuring.
The most important distinction for me is to decide whether this server should be set aggressive or conservative:
AGGRESSIVE configuration – gives every site as much resources as possible. Good for low-tenant or dedicated servers.
CONSERVATIVE configuration – gives every site as little resources as possible. Good for high-tenant or shared servers.
5. Disable unused services (INT, HIGH)
Many servers are automatically set up with all features running to make things easy for you. But they’re just like brand new computers with pre-installed software. Get rid of the ones you don’t use. Even if they don’t use much memory, they can still be bombarded by hackers and that eats resources.
DNS – disable if you’re using external DNS service. (Cloudflare, DNSME, etc.)
Email – disable if you’re using 3rd-party email. (G-Suite, MXroute, etc.)
FTP/SFTP – disable if not using.
Memcache/Redis – disable if you don’t use it.
Other services – Varnish, Elastipress, etc.
If you want to be OCD, scan your system for all listening ports and services.
6. Remove unused server modules (ADV, LOW)
Want to be even more OCD? Disable every single module not used by the server. Some of them are junk unused server stuff; others are unused Linux distro stuff. Old school Apache-compatible stacks or unoptimized control panels tend to have many unused modules enabled by default (while also not enabling ones you might need).
Read documentation and check online before blindly removing or replacing them. The danger is you disable things you need (or worse, one that improves performance). You should make a list of disabled services/modules to reference later or give to a contractor when troubleshooting.
7. Use the latest PHP version (INT-ADV, HIGH)
The PHP version alone makes a HUGE difference.
Use the latest PHP version possible! (Easily-configured from your webhosting control panel.)
For example, PHP 7.0 is 3 times faster than PHP 5.6.
Even PHP 7.3 is 10% faster than PHP 7.2.
At the time of this writing, PHP 7.4 is available.
Be wary of any webhosts still using old PHP!
Keeping your website PHP version updated is not only for speed but also security. The only issue is some themes or plugins may not be compatible with the latest PHP version. You’ll know because your site doesn’t work right, or looks weird. So test carefully and keep themes/plugins updated, which helps them stay compatible with the latest PHP.
8. Recommended php.ini configurations (INT, MED):
Most of you (on shared hosting) won’t even have access to these settings or know how to set them. But nonetheless, here are my recommendations.
max_execution_time – lower (30-60 sec) is better to prevent resources hogs from lagging out the server. But you may need higher execution times for long processes like imports, exports, backups.
max_input_time – lower (60 sec) is better. Increase only if you’re trying to import something that takes forever.
max_input_vars – set to “1000”, unless some plugins need higher.
memory_limit – try “256M” to be safe. Raise if you have heavy plugins. I like to set lower so I’m notified immediately when there are memory hogs. The “error_log” will tell you if you need more.
zlib.output_compression – may or may not help. I leave it off.
9. Use an updated MySQL fork version (INT-ADV, LOW)
Most people only know of MySQL, which is now acquired/owned by Oracle. There’s also MariaDB (a fork of MySQL by its original creators) and Percona, and also others.
MySQL 8 is much better than MySQL 5.7.
But it’s better if you can use MariaDB over MySQL. Community-friendly and better performance than vanilla MySQL 5.7.
Use the latest MariaDB version that you can.
Whatever you do, just don’t use MySQL 5.7.
What about Percona? What about the other 3rd-party MySQL-compatible forks? For most sites, it makes little difference if any. Don’t forget to backup your database before changing or upgrading MySQL.
Usually not required (or noticeably-beneficial) for the average site but can help tremendously for large sites with high traffic and varying query lengths.
You can run MySQLTuner for general recommendations or ask around the sys-admin community to see what everyone else uses.
Buffer size, packet size, cache, connections, cache, stack, etc…are all among the general things to tune.
When trying out random configurations online or copying somebody else’s, please make sure their environment is similar to yours. The main distinctions are:
server size, resources available
how many clients/sites on server
how many end users on server
how much traffic
how big are the sites
what kind of read/write behavior
It’s important to know whether their settings are for efficiency (high-tenant webhost) or aggressive performance (low-tenant webserver).
12. Server full-page caching (ADV, HIGH)
Full-page caching can help speed-up any website. But caching directly from the server is much more powerful and resource-efficient than PHP/application-level caching done through a plugin.
Some Apache or NGINX servers use Varnish – ugghhh, outdated. Don’t use Varnish proxy. Just upgrade to pure-LiteSpeed or pure-NGINX stack.
LiteSpeed servers can use LiteSpeed cache – powerful, many features, and comes with a handy WordPress cache plugin (called “LiteSpeed Cache”).
NGINX servers can use FastCGI – great, super fast! While there’s no official NGINX cache plugin for WordPress, there are various “NGINX helper” plugins to facilitate basic cache functions (like purging).
To be safe, you should disable caching on pages with forms, carts, or checkouts. Private pages (for logged-in users) CAN be cached but don’t mess with that unless you have that much private traffic and ready to spend hours configuring private cache.
You can only enable server-level caching if you own or have access to the server. Otherwise, your webhost decides what caching options you have.
Shared hosting usually allows all caching plugins.
Managed hosting usually limits you to only their proprietary one.
13. Memory object-caching (ADV, LOW-HIGH)
Object-caching caches only the database queries instead of the entire page html. This technically makes it “slower” than full-page caching (since you’re not caching the entire page) but useful for speeding up dynamic pages or private pages (logged-in users, admin backend) that can’t be static-cached.
Any site with lots of constantly-refreshed data on frontend, or lots of numbers and reports on backend…would stand to benefit from object caching. Mostly-static sites or low-traffic sites would not benefit from object-caching at all; don’t use it on them…it can make them slower!
Redis is the gold standard in object caching now. It’s superior to the older memcache in almost every way.
Memcache is only used in rare situations where Redis doesn’t work or is slower.
If your data doesn’t change much, you can set longer object caching times (e.g. 60 mins and up). Longer times means fewer database queries.
Otherwise, stick with the default 5-10 mins to be safe…unless you don’t mind users seeing stale data.
Object caching can be managed by WordPress plugins. Most ideal if you have one cache plugin to manage both full-page caching and object caching.
You can get ~25% faster object caching by using a Unix Socket
UNIX sockets are run from a lower-level layer on the OSI networking model and therefore faster than standard TCP sockets.
Redis and Memcache UNIX socket configuration guides for CentOS.
Redis and Memcache UNIX socket configuration guides for Ubuntu.
Note: with UNIX socket enabled, only one server user account (and presumably all sites by that user) can use object caching. So you can’t use this if you plan to have multiple server users deploying object cache.
Some background on memory-caching…
Memory-caching is the gold standard in caching, because cache runs faster from memory than than from disk. The issue is we have limited amounts of memory (most of it already used for applications) so we can’t store the entire site cache in there. It matters less nowadays anyway since server disks are so much faster now (thanks to SSD technology).
Sure memory is more abundant now too but then again, applications are bigger. You may have heard of others loading their entire site into memory…some using the cache route, others by mounting their WordPress directory into memory. It works great if your site is small enough but for most people: your memory is only big enough to store database queries, anything else you want to cache will be stored on your disk.
14. Use the latest HTTP protocol (BEG, HIGH)
HTTP/2 loads browser requests so much faster than HTTP/1 (thanks to parallelization). It feels like 3 times faster to me.
You should be using HTTP/2 or even HTTP/3 (recently released).
Avoid older web servers still on the archaic HTTP/1.
Using HTTP/2 requires HTTPS/SSL. If your site isn’t in HTTPS, do it now!
15. Content encoding (INT, HIGH)
GZIP is so 2016. Every web-server should have BROTLI compression nowadays. It’s superior to GZIP (produces smaller files AND in less time). But shockingly, BROTLI still isn’t available on all web-servers.
If using BROTLI – set static compression to 4.
If using GZIP – set dynamic compression to 1, static compression to 6.
You can push static compression levels higher if your CPU is strong (or low-usage server) and/or your static content is cached for a long time (long expiry times). If you’re using a CDN or Cloudflare, make sure you enable BROTLI compression there as well.
16. Control-panel (INT, HIGH)
This issue matters only for VPS users. Control panels used to be critiqued for the initial weight they put on the server. That’s because control panels were originally designed for large dedicated servers, but have since been optimized for smaller VPS. While it’s true that having no control panel is lighter than having one, it makes day-to-day tasks harder. Their footprint is now negligible considering how useful panels can be.
The best performing control panel is one that fits your needs.
Allows you to pick the web server of your choice – NGINX or LiteSpeed.
Easily configure redirects at server level – instead of slower PHP-level redirection plugin.
Easily configure granular caching rules – choosing what and what not to cache.
Easy to manage – for you or your sys-admin.
Can cage users – preventing resource-hogs on high-tenant servers.
Secure against hacks – as hacking attempts eat many resources.
Easy to use – for you or your clients.
17. Use external DNS service (INT, LOW)
Lower DNS latency (small benefit)
Easy to update DNS (convenience)
Will using an external DNS like Cloudflare or DNS Made Easy make a world of difference in terms of webhosting speed? I think it improves lookup time but not so noticeable unless your previous DNS server was a piece of junk by cheap webhost.
The main benefit for me is how quickly I can redirect things. Suppose you get hacked and need to redirect through a security proxy. Or maybe you’re switching certain aspects of your site to another server. In moments like this, having a DNS service is so convenient. You can switch things over with very little downtime, and even switch them back quickly if there’s an issue.
DNS services may seem like an extra hassle to setup, but once in place they allow you to integrate new services and mitigate performance issues so much faster.
18. Run WP-cron from your server (BEG, MED)
Many WordPress tasks need a trigger to function. Such as sending out system emails, run backups, release scheduled posts. By default, WordPress uses a function called WP-Cron (conveniently located at yourdomain.com/wp-cron.php). It works by checking (and executing) for any pending tasks any time someone visits the website. It’s great for small sites, but terrible if you have tons of traffic (triggering many unnecessary cron-checks). Also an obvious DDOS vulnerability.
The sensible thing is to disable WP-cron and use a real cron job whether from your server or an external cron service:
Do you have many sites or clients on the same machine? Are you unable to police them all effectively? If you’re losing control of your tenants, it’s probably time to limit their resources. I’ll start you off with a few tactics below. You look up the rest.
Cloudlinux & CageFS – limit CPU and memory usage
Server-wide bans on cache-prebuilding, broken-link checkers, and other resource hogs.
Decrease php execution time.
Global configs blocking the usual offenders, bots, etc.
Worst-case scenario, just split off some clients onto another server. Split them up by size, space usage, traffic amount, whatever you want.
20. Tracking down resource hogs (ADV, MED-HIGH)
We often run into slow server issues with no obvious clue of where to look. Today, it’s this client. Tomorrow, it’s that client. It seems any site can be the culprit on any given day. When you have so many clients, and none of them can afford switching plugins on and off, it is really really difficult to track down the problem.
Check server monitors – which users are hogging the CPU, memory, and bandwidth?
Once you know which site it is…check WordPress error log. Run Query Monitor.
Of course, it might not even happen all the time. You have to track down what users or processes were doing when the slowdown happened.
Sometimes you’ll need more of a developer mentality. What plugin was updated last? Any new themes or plugins that were custom-coded? (Check for memory-exhaustive commands.) Yes, you can use applications monitors like New Relic but for me, it’s overkill. The trickiest problems are when it seems like every site is the problem. Or also when the server load is low but the sites are still slow. Good luck!
2. Theme optimization
Most slow sites that I see can attribute up to 50% of their slowness to the theme alone. Slow themes load way too much junk, offering every fancy effect for every user. Imagine a truck with every tool in the trunk, vs loading only the tools you use. Sure…many themes advertise themselves as being “lightweight” yet still have way more processing than necessary. The worst is when their excessive CSS and JS conflict with other plugins (ecommerce, multi-lingual, sliders, caching, etc).
Ideally you’d have a theme that focuses on the design and nothing else. It loads styles ASAP so content can quickly paint down the browser. No stupid libraries for non-essential items, or endless function checks for user-selected options.
And you really don’t want a theme handling heavy functions better left to plugins. Sure, these themes with endless “extra features” seem like a convenient 1-stop shop…until you realize they don’t do as good a job as specialized plugins AND cause conflicts with other plugins.
21. Use a well-coded WordPress theme or framework (BEG, HIGH)
The lightest and best-coded WordPress theme is the one custom-coded specifically for your use. It has only the features you need and nothing else. No extra CSS/JS loaded for unused options. If coding from scratch, just be careful how you make database queries.
I like Genesis as the base framework for a custom-coded theme.
I like GeneratePress as the base framework for DIY (non-coder) theme.
Oxygen Builder is a good visual builder, but meant for developers than DIY.
Underscores, Beans, or Roots…are also ok if you know what you’re doing.
For custom layouts that need to be edited easily, use or make a Gutenberg block. For all else, make it static. 😉
Not everyone can afford a (quality) custom-coded theme. If you’re buying an off-the-shelf theme, I recommend the following:
Thinking of any themes I didn’t mention? Check out their support channels and Facebook group. What’s their level of support? What type of users are in their community? (Beginner or pro?)
22. Tips when custom-coded themes (ADV, HIGH)
Mobile-first design – cleaner code parsing and puts the redraw effort on stronger desktop processors, rather than forcing weaker mobile CPU’s to repaint.
Use WP_Query wisely – it’s powerful, but don’t abuse your database/memory.
Hard-code selectively – I like to hardcode menus, headers, footers, and as much of the homepage as possible. I let you decide what should be easy to change or not.
Clean CSS – write it from scratch at the beginning. (I think frameworks are too bloated.) Grid vs flexbox, Sass or not, choose wisely. Refactor it all over time!
No JS – if you can help it, don’t have any JS. (If needed for mobile menu and mobile search, do it cleanly!)
Choose between CPT or custom Gutenberg blocks.
Building functions in theme – avoids unnecessary micro-plugins.
23. Clean up your existing theme (BEG, MED)
Already have a theme and can’t change it? No worries, we’ll look at settings and optimize what we can.
Disable lazy loading of images – improves perceived load.
Disable unused features – effects, smooth scrolling, Google maps, etc.
Combine custom CSS – disable all custom CSS enqueued by plugins, and combine into theme custom CSS area.
CSS/JS optimizations – if your theme has any CSS/JS minification or combination options, enable them!
If your theme still runs slow, I think it’s easier to just get another theme and make it look the same. You can also recode the theme from scratch and copy the same look as well.
24. JS reduction (ADV, MED)
I love reducing JS use as much as possible to make themes leaner. My common belief is that CSS is for styling, JS is for effects/functions. And effects/functions are almost never essential for page load. Probably the only essential JS are the ones used for mobile menu, search box, or ATF sliders. All other JS are probably non-essential IMO (animations, tab-boxes, pop-ups) unless they’re loading on every page.
Convert JS effects to CSS (if possible) – this is not only lighter, but can decrease conflicts with plugins.
Remove JS dependency from mobile menus – try building it in CSS. Or even better, just avoid hamburger menus.
Combine all JS hacks into one global JS – better than having many little JS. (Only reason for splitting is if they’re loading conditionally.)
Decide whether you can build all effects with jQuery – or dequeue jquery and make your own mini-library.
All non-critical JS (if you have any) should be stuck in the footer!
25. Pagebuilder removal (INT-ADV, HIGH)
Quite often, many sites (lazily) use a bloated pagebuilder to produce custom page layouts. But there are 2 better ways:
Replace pagebuilder using Gutenberg plugins.
Hard-code the design and/or create your own Gutenberg blocks!
I promise you the effort is worth it. Just do it and you’ll be so glad later! Getting rid of pagebuilders also reduces your number of DOM elements (less work for browsers to process).
3. Plugin optimization
Plugins can cause up to 50-80% of your site’s slowness. Lean plugins load only the features you use AND make as few and as efficient database queries as possible. Bloated plugins do lots of unnecessary processing, make slow queries, and load CSS and JS even on pages not using them. The worst plugins add on endless features over the years and never rewrite from scratch, spitting out PHP errors, hogging memory, also creating security vulnerabilities.
Even better is to know what plugins you really need! Just know that plugins usually do either one of two things:
Give your site a new function (using php/database), and or
Give your site a new aesthetic (using CSS/JS effect).
Do you really need those functions or visual effects? Are there plugins that can do the same with less code/bloat? And for the plugins you do have, don’t enable every feature if you can help it. Load only what is essential to actually creating conversions.
26. Use only essential (well-coded) plugins (BEG, HIGH)
There are many guides out there trying to teach what is a “good plugin” or not. Unfortunately, you will only know with time and experience. Many plugins advertise similar things and it isn’t easy for the average user to know which plugins are coded well or not.
Consumer grade plugins – many features and styling options. Care more about ease-of-use and having more selling-points, than speed or code quality.
Developer grade plugins – do essential features really well, include helpful developer functions/filters, and not much built-in styling.
Many small specialized plugins can be leaner than one bloated kitchen sink plugin with many features you don’t use.
One big plugin can also be leaner than many small ones with overlapping functions.
Unfortunately, many people think reading the WordPress repository reviews is enough to know if a plugin is good or not but it’s sometimes misleading. High ratings there might only mean that it’s popular…doesn’t necessarily tell you if it’s popular among respected developers.
When in doubt, use the plugin with the better reputation among other developers. Ask a developer for their opinion! The pros ask each other all the time as well. We don’t have time to free trial or read reviews. We ask our friends to get quick info.
27. Avoid bloated plugins (BEG, HIGH)
I don’t hate all big plugins with many features. My problem is with bad coding and unnecessary functions. These plugins are on my shitlist for being unnecessarily heavy and slowing sites down. I can assure you there are much better alternatives:
Pagebuilders – WPBakery, DIVI, AVADA, Elementor, Beaver Builder. All of them are heavy! Use Gutenberg blocks instead.
Slider Revolution (RevSlider) – use Metaslider (lightest) or Smart Slider 3 (full-featured) instead.
UberMenu – use Max Mega Menu instead if you really need. Or custom-code it. Or go with plain simple menu.
Thrive Comments or Thrive Leads – anything made by Thrive. I don’t like Thrive Architect either.
Jetpack – eww. Avoid unless you absolutely need it (like for WooCommerce). You can also try Toolbelt which was written to be a cleaner (less spammy) version of Jetpack.
ExactMetrics – use GAinWP instead (it’s a fork of the original GADWP)
Image lightbox effects – try WP Featherlight (yes, it still works).
Image galleries – try Meow Gallery instead of Envira, NextGEN, FooGallery, etc…or even just default Gutenberg gallery with WP Featherlight.
Usual plugins suspected of bloat:
Media plugins – anything with lots of fancy image/gallery displays.
Anything with visual effects – animations or pop-ups, all require JS load.
Conditional load logic – anything that lets you decide which things and widgets to show on which pages.
Font plugins – they often add tons of autoloads.
Lots of options – any plugin with lots of options, or where you enter lots of info.
How to check for bloat? Check website frontend with developer tools and see what CSS/JS it loads. Then check Query Monitor for slow queries on frontend, and the database to see if it adds lots of autoloads. Should also to check error logs for php errors and also their changelog to see how often it’s updated.
28. Avoid unnecessary plugins (BEG-ADV, MED)
These are plugins you don’t really need. There are many other ways to get the same result that don’t require any plugin at all. Yes, I understand some of these plugins will be easier to replace than others.
Add custom CSS – can just put into your theme settings or use the Customizer > Additional CSS.
Browser cache or expiry times – just use your cache plugin.
Font plugins – please do that from your theme.
Header & footer code injector – can put the code directly into your theme files. Ask the theme developer if you need help.
HTTPS/SSL plugins – you don’t need them at all! You can set HTTPS manually.
Gallery plugins – much cleaner to use Gutenberg blocks
Performance plugins – simple ones disabling emojis/embed, or doing simple htaccess edits. The only performance plugin you need is a cache plugin.
Redirection plugins – avoid these if you can. Don’t use the redirect functions in your SEO plugin either. If your server has .htaccess, use that to do redirects! If you need to log 404’s, just check your Google Search Console.
Security plugins – many of them only add stuff to your htaccess, which you can do manually.
Unused plugins – deactivate and or delete!
Widget conditional load – instead of using widget load plugins, you can try creating a new page template in your theme with its own widget position.
29. Prevent plugins from loading globally (INT, MED-HIGH)
Many plugins load their CSS styles and JS scripts on every page, even when they’re not being used! They do that to make sure it always works but the downside is that it slows down your site. Some plugins have an option in the settings to disable global load and/or configure which pages to load on. Others can only be disabled with a filter snippet placed in your functions.php file.
Examples of plugins loading globally:
Contact Form 7 – loads CSS/JS on every page even when they don’t have a form. Sure, there are optimization hacks for CF7 but maybe you can try newer ones like Caldera or WP Fluent Forms.
Form security plugins – some captcha or forms security plugins may also run unnecessarily on pages that don’t have forms.
Pagebuilders – extremely guilty! Many load crap on pages not using them, and also for features not being used!
Slider plugins – disable “load globally” option in settings.
WooCommerce – if you don’t need it on every page (like non-shopping pages), there are functions.php snippets you can use. Some people disable the ajax cart fragments function, too.
Beware of any plugin that creates its own custom post type or content layout/styling on the frontend. Also of any plugin that creates or parses its own shortcodes.
If you don’t know which plugins are loading unnecessary, it’s easy:
Open up your browser Developer Tools and click on the “Network” tab. Then click on the CSS or JS tabs and browse around on your site.
You can also load up Query Monitor and browse around on frontend to see if the plugin is making unnecessary queries.
Oh and btw, just because you removed a plugin’s CSS/JS doesn’t mean you stopped it from loading. It still could be running php and DB queries in the background.
30. Dequeue plugin CSS & JS (ADV, HIGH)
Many plugins load their own CSS and JS which could be easily dequeued/disabled from the plugin and combined into your theme custom CSS/JS (if even needed at all).
Easy plugins – there’s a box to uncheck for “load CSS styles” from plugin settings. If you see JS options, you can disable but check if your plugin still works.
Harder plugins – you can only dequeue the CSS/JS if the plugin has a filter for developers to put into theme functions.php file.
After disabling the CSS/JS, you can copy them (if needed) to your theme custom CSS.
31. Clean up wp_option autoloads (ADV, HIGH)
Many plugins may appear to be “lean” but in fact eat up chunks of memory on every page load! They do this by abusing the WP autoload function, which loads data on every page and is intended for only critical data. But some plugin developers are jerks, hogging all the memory for themselves like your annoying neighbor hogging all the laundry machines. They do it because their bloated plugin won’t load up quick enough otherwise!
You’d be surprised how many unnecessary autoloads are in your database and how big they can get. Let’s find the biggest database memory offenders by cleaning out the autoloads.
Keep your autoloads below 1mb (good), below 500kb (best).
Many old themes/plugins leave crap in database, even when deleted!
If the name isn’t obvious what it is, try opening it up and look through the data.
When in doubt, search the database entry in Google with its name in quotation marks. (e.g. “cherry_fonts_css”)
You can also search the database entry name or plugin name on PluginTests.
You’d be surprised which plugins have lots of autoloads. Anything with lots of settings or data saved is suspect, but even small plugins can create giant autoloads.
Backup the database before deleting entries!
Careful about autoloads for existing plugins. Check with the developer first before deleting/disabling autoload for active plugins. If you want to try anyway (even though I don’t recommend it), you can edit the autoload option to “NO” and then delete after a month if you don’t have any issues. Better idea is to get rid of the plugin altogether.
32. Give feedback to plugin developers (BEG, HIGH)
Quite often, you can complain to the developer directly and they might fix performance issues right away. My advice is to tell them how much you love the plugin and just wished they could fix such-and-such so you wouldn’t have to use a competitor plugin. This is much better than a 1-star review of “THIS PLUGIN SUCKS!”
33. Custom-code your own plugins (ADV, HIGH)
Sometimes, the only way is to write some plugins yourself. You could also take an existing plugin and chop down from its code, cutting out the stuff you don’t need. If it’s simple enough, you can also enqueue it into your theme.
34. Don’t use redirect plugins (INT, MED)
Try not to do redirects from a plugin (whether redirect plugin or SEO plugin). It’s a bad idea speedwise since php-level redirects are slower than server-level redirects. Mind you, it slows down ALL traffic, not only the redirected ones.
To run redirects from your server, use htaccess (if you have Apache or LiteSpeed) and the proper rewrite rules/directives.
If you have NGINX, it’s most likely near impossible unless you have access to server-config and know how to do NGINX configs. If you’re lucky, some NGINX webhosts will have a redirect function in their control panel.
Most redirect plugins can export to htaccess rules.
If you need to monitor 404’s, use Google Search Console.
If you absolutely need a redirect plugin, use Safe Redirect Manager (not Redirection or YOAST redirect function).
This is also a good chance to clean out your redirects. Get rid of duplicates or redirects for links with no traffic. More often than not, I see hundreds of rules that could been more efficiently redirected with just a few clever rewrite directives. If you see many 404’s for Apple touch icons, create them!
Maybe some of you are concerned about the old saying that Apache is slow because of htaccess (and that you shouldn’t use it if you can help it). Yes, there’s truth to that. But htaccess is still much faster than php-redirects. Also, if you’re on LiteSpeed there’s no worry at all since LiteSpeed caches htaccess so it has zero impact.
35. Choosing highly-respected plugins (INT, HIGH)
Aside from choosing well-coded plugins with essential functionality, is to choose plugins with a good reputation. Sure you can look up their site and read the sales copy but it’s better to ask around. Ask experienced developers what they use. Why they like certain plugins.
The best plugins typically have the best features (lots of updates), best support, best compatibility with other themes/plugins, best UI (easy-to-use), easy to work with (easily-customizable for developers), scale well (don’t slow down big sites).
When I look for a plugin…
I check the development community.
I check the WordPress repository reviews.
I check their development company to see what else they’ve built.
Respected development companies love showing their success with other themes or plugins, and the people behind them!
Logical business model. One-time fee for small plugins, monthly fee for big plugins, lifetime plan for new plugins, ongoing cost for updates/support.
The worst plugins aren’t known by their developer company. They’re on ThemeForest, Code Canyon, Envato, or other crappy stores. They showcase the product more so than the company behind it (of course, they don’t show past failures). And their pricing is too cheap. Cheaply-priced plugins will get abandoned soon over time and won’t be updated often. Look at their marketing…if it’s aimed at newbie users, it probably isn’t the best one.
4. Image optimization
Images are actually very simple assets, not much complex processing required from web servers. Where they hold back your page load is in their delivery across networks and rendering in the user’s browser. Make them too big and they take longer to send and eat up the browser’s memory. More than anything, images affect your website’s perceived load time.
Below are my strategies to serving images that not only load fast but keep your website looking just as great as you designed it. Please read my MONSTER Guide to WordPress Image Optimization. It explains in fuller detail than some abbreviated explanations in this section.
36. Choose proper image format (BEG, MED)
JPEG – produces smaller files for photos or images with many colors.
PNG (aka “png-8”) – produces smaller files for images with few colors, sharp lines and contrast, and can also do transparency.
PNG 24 – higher quality version of PNG suitable for photos, but still larger file-size than JPEG, so not recommended unless you need transparency.
WEBP – combines the best of JPEG and PNG, allowing great photo quality and transparency, and better compression than JPEG (smaller filesize). Can be used in place of JPEG or PNG 24, but should have fallbacks just in case!
GIF – most common in low-quality meme animations. Useful when you want to share a video, but don’t need sharpness or sound. GIF is basically an image slideshow format masquerading as low-quality video format. Rarely used in a professional setting like a website, where you typically want high-definition images and videos. Just know that GIF’s can be optimized, too.
37. Choose proper image dimensions (BEG, MED)
Don’t use a bigger image than you need!
Resize images to fit the exact area size. (e.g. using 400px-width image for a 400px-width area.)
To make important or larger images appear better on retina screens, use an image double the area size (e.g. 800px-width image for 400px-width area.)
Less important or smaller images can be sized exactly as the area size (no need to be retina-compatible).
I believe most people don’t use retina or ultra-HD monitors in their full resolution. Many will scale at 150%, which means you can (probably) get away with only 1.5x image sizes.
Don’t upload raw photos directly from your camera. Resize, crop, and edit them first! Or use an image compression plugin to automatically optimize uploaded photos.
A big waste would be loading a 2000px width image into a 300px width space. It wastes server storage, internet bandwidth, and browser processing.
38. Set proper media sizes in theme and plugins (ADV, MED-HIGH)
Luckily, most themes set the right image sizes already since they control the layouts. The issue is more when you have frameworks or plugins using generic media sizes because they don’t know what you’ll end up using. Or you created a new layout that needs a specific media size not already set by your theme.
Finish your theme design.
Then go to WordPress Settings > Media, and set the correct sizes used throughout your site.
If you have WooCommerce…check Appearance > Customize > WooCommerce > Product Images.
If your theme or plugins create their own image sizes, check their settings and image sizes as well. (Some are hardcoded in theme files.)
What you don’t want is to have image sizes that don’t match your layouts. For example: your site has only 400px & 800px image sizes, but some image areas are 500px size…it will wastefully use the 800px one! The solution in this case is either to adjust the closest media size to 500px or create a whole new media size. (Ideally, we want to have as few media sizes as possible to save server space.)
39. Using responsive (adaptive) images for smaller devices (INT, MED)
Make sure your theme is mobile-adaptive (most themes are) and shows smaller images for smaller devices.
This feature is default with WordPress and most well-coded themes, and can also be enabled by adaptive image plugins. Obviously, it’s not good to load desktop-size images for mobile devices! The problem is that some themes don’t enable this feature properly. Either they load only the desktop-size version for all devices, or even more stupid…they load BOTH (desktop & mobile) sizes for all devices.
If your site uses large background images, you better make sure this feature is working correctly in mobile!
40. Image compression (BEG-INT, MED)
Manual JPEG compression – use an image editor (e.g. Photoshop) to decide the exact quality output you want. 60% for jpeg is safe. Can test a few percentage points up or down. Good for large or important images.
Manual PNG compress – use image editor and adjust the number of colors.
Automatic compression – use a plugin to do it. My favorite image compression plugins (in order) are ShortPixel, LiteSpeed Cache, WP Compress. You can use these for less important images or non-tech-savvy users.
41. Convert unnecessary transparent PNG to JPEG (INT, MED)
I often see large transparent PNG images sitting on a plain white background. Eating up tons of space when they could easily be half the size and even look better as JPEG.
If your transparent PNG sits on a solid background, you can easily convert that image to JPEG and match the color of the background.
You’ll save many bytes and won’t notice any difference!
If your image is simple, a solid background PNG might still be smaller than transparent PNG.
42. Redraw images or icons in CSS (ADV, LOW)
Some themes or plugins unnecessarily use image files for very simple graphics (lines, blocks, icons) that could be easily drawn using only CSS.
You can check by inspecting visual decorations around your site theme.
Redraw them in CSS and you’ll save a few unnecessary HTTP requests.
Here’s a fun collection of 512 pure-CSS icons (by CSS Icon), some even animate!
Want to be clever? You can mix images and CSS together. Using CSS to draw shapes in your images or color filters. There are so many clever uses that save space and look better.
Gradients – been a part of CSS for a while, especially during web 2.0 era.
Shadows – use CSS instead of putting edge shadows in your images!
B&W filter – great for reusing an existing color image.
Color filter – reverse of above.
43. Icon fonts vs SVG’s (ADV, MED)
There are many debates in the developer world about whether icons are better as SVG or icon fonts. Developers are free to choose because they know which fits their use and workflow. Between you and I, here are my guidelines:
Simple icons (arrows, search glass, hamburger menu) can be drawn with CSS.
Complex icons (social media icons, carts, notepads, etc) need either SVG or icon font.
If you only have 2-3 icons, SVG will be less weight (and can even be inlined).
If you have 10 or more icons, use a custom icon font service (Fontastic, Fontello, IcoMoon). Or create your own custom font.
Self-made icon font (my favorite) and locally-loaded is fastest because even a 2kb small icon-font file can load 10-20 icons, which is all you really need.
The hassle with self-made icon fonts is that they take more time to update if you want to add/edit an icon later.
The worst icon fonts are the 3rd-party ones loading externally! For example, Font Awesome is 30-200kb and loads many unused icons.
If using SVG, you can optimize them with Jake Archibald’s SVGOMG. See what you can disable or decrease in quality without affecting appearance.
Please don’t inline SVG’s unless it’s really small and only used in one place on the page.
Most people don’t have the skills to redraw in CSS or create their own icon font. All I ask is that you either use SVG’s or follow one of those custom font services. Whatever you do, please don’t load FontAwesome as that’s a good 40-75kb and costs you 100-150ms load time. Of course, many theme developers load FA as that’s the easiest/laziest way to put many icons on a theme.
44. Remove unused media sizes (ADV, LOW)
Does having a ton of image files really slow down your site? Probably not.
Does it slow down backend site functions? Maybe.
Can it affect your site speed during longer backup times? Yes!
Can it make your webhosting more expensive? Yes.
More than anything, it makes an unnecessary mess out of your website. Making it bigger and bulkier than necessary. Let’s clean this up. Go to your theme and plugin settings and uncheck/disable any media sizes you don’t need. Some of this work may require a developer to thoroughly check all your page templates, edit functions.php and manually dequeue unused media sizes.
Having a hard time finding all the media sizes that your site is using? A handy trick for me is to install one of those image compression plugins. They’ll list all the sizes in one handy place. 😉
Get rid of media sizes you don’t use.
Can also remove sizes that are too similar. (Keeping the bigger one.)
Once you’ve deleted unused media sizes, you’ll have to delete the unused images…but be careful!
There are plugins that say they can do the job. Please research and test carefully. I’m honestly unsure of which ones delete only unused media sizes and which ones delete entire unused images.
Be very wary of those newspaper/magazine themes that have many image sizes!
45. Using CSS sprites (ADV, LOW)
Css sprites is an old tactic that actually still works for some use cases. A long time ago, some developers used to combine many tiny images into one image file and then call only parts of it within CSS. It was a clever way of reducing HTTP requests. Nowadays this tactic is isn’t necessary since HTTP/2 allows you to have many more HTTP requests and most small images can be drawn in CSS, icon fonts and SVG’s. (Design coloring is much flatter as well nowadays, instead of the overly color-esque WEB 1.0 period.)
You can try CSS sprites if you have many small images that have multiple colors (and/or can’t be drawn in icon fonts or SVG’s).
46. Video compression (BEG-INT, MED-HIGH)
Compress videos as much as possible.
Output in webm or mp4 format. (I like mp4.)
Any video that’s auto-played on page load should absolutely be compressed. If you’re a pro-editor and know how to render the perfect balance between small file-size and good quality, do your thing. For everybody else, just do my easy cheat!
Upload the video to Vimeo, Youtube, Facebook, etc.
Then re-download their compressed version.
These services put out gajillions of videos everyday, I think they got the best algorithms! Youtube’s compression is the best balance of small size and good quality. If you want slightly higher quality, try Vimeo. If you want smaller size, try Facebook.
More important than compressing the video, is to decide what you need from it:
Do you even need the sound? (Remove if not.)
Do you even need it in color?
Is the video just a backdrop for text? (Can lower quality even more.)
Does it even have to be that big?
Do you even need a video? Does it even get watched? Maybe nice big images are better and cleaner to use!
5. Font optimization
You would think fonts are so small in filesize that they don’t affect performance, but they totally do. Users perceive your website load by your content and the font is what allows your text to load. Load the fonts efficiently and users see instant content.
Do it inefficiently, and users see a lot of blank space (aka FOIT, flash-of-invisible-text)…or worst, ugly unstyled text followed by a screen flash before the font loads (aka FOUT, flash-of-unstyled-text). It’s a really jarring experience. Looks like crap and makes your site appear slow (both to users and speed tests).
What makes fonts so slow nowadays is due to the abundance of free fancy fonts (Google fonts). Back in the days, you had to pay for fancy fonts so you were much more judicious about their selection. Now even a free plugin can load hundreds of Google fonts. This makes it tougher to police where fonts are loaded from and for which text.
Fonts make a visible speed impact no matter how big or small your site. And actually, one of my favorite optimization tactics for speeding up already-lightweight sites. There are many factors to consider when loading fonts, all of them affecting your content load time noticeably!
47. System font vs locally-loaded vs webfont (BEG-ADV, MED)
System-fonts – faster than locally-loaded fonts or webfonts.
Locally-loaded fonts – faster than webfonts, and can be CDN/browser-cached.
Webfonts – slowest, but can load equally fast if already cached.
System-fonts (already built into the OS) will load faster than webfonts from 3rd-party server (Google webfont, Adobe, Typekit, Typography.com, etc). Just know that some system fonts (like Arial, Helvetica) are available on both Windows & Mac, whereas other system fonts are not and must fallback to their similar equivalent (like Segoe UI for Windows, and System UI for OS X).
I use system fonts for 2 of my sites. The rest of them, like most sites today, need a nice webfont to look polished. Luckily, webfonts keep improving their load time in various ways. They’re constantly getting lighter and removing unnecessary bytes.
Webfonts are also cached in browsers so if you’re using a popular webfont, there’s a good chance your users won’t have to re-download it (since they already got it from another site). Also, I imagine popular Google webfonts will soon be natively stored in Chrome browser (if they aren’t already). But then again, mobile browsers clear their cache often. But then again, there’s also DNS prefetch which helps webfonts.
Locally-loaded fonts (meaning “locally” from your server) is somewhat seen as an outdated way of enqueuing fonts. Web designers used to buy fancy fonts from 3rd-party sites, download the whole font family package, then carefully choose and enqueue in the site. It was a tedious process and didn’t let end users (easily) switch fonts in and out. But since webfonts are kinda bloated in their deployment, locally-loading fonts is still popular among speed-conscious developers.
You can locally-load any webfont by copying it to your sever and requesting it locally instead of from a 3rd-party webfont service.
I personally use only system fonts, or locally-loaded webfonts.
48. Use fewer fonts (BEG, MED)
Using just 1 font is fastest.
If using 2 or 3 fonts, make sure you disable unused styles!
Having fewer fonts will help, obviously. It’s great if you can get away with just one font. It’s the cleanest look IMO and you can still create different styles by playing with size, weight, letter-spacing, letter case, color, etc. But if you need, you can add a second font used for headline only. Some really professionally designed sites will even have a 3rd font for subtitles, H3 header, quotes, prices, or other emphasized text areas.
Some fonts are heavier than others. Sometimes, even one font can be heavier than 2 others.
Don’t forget to disable the font load (enqueue) from your site. It’s not enough to simply stop using it.
If using more than 2 weights of the same font, you can try using variable fonts. They load the same amount of bytes no matter how many weights you have. Really cool new font technology.
49. Don’t enqueue unused font weights, styles, character sets (INT, MED)
Many people don’t notice the unused fonts styles loaded on their site! I’ve seen many sites loading all the font weights (100, 200, 300, 400, 500, 600, 700) and font styles (regular, italic), and character sets (extended latin, greek, cyrillic, etc)….when in fact they only need font weights 400 (normal) and 700 (bold), and only the basic latin character set.
Check your site for all unused font styles.
Remove their requests from theme and plugin settings.
Also remove from header and stylesheets (if manually installed).
If you don’t know which ones you’re actually using, make a list. Link to the FOUNT font finder on your browser bookmark bar and identify every font used on your site. Test on different page layouts and click on all the content bits. Title, nav, headers, content, text in footer and widgets. Don’t forget to check hidden elements like carousel, pop-ups, tabbed or collapsed content. Are you feeling overwhelmed? That only goes to show that you’re loading more than you need!
Body text usually needs regular (400), italics (400), and bold (700)
Titles and headings can re-use the regular 400 or 700, but some people want super-skinny (300) or super-heavy (900).
Most sites never use italics for titles/headings, so if you’re loading 900 for them you probably won’t need italics 900.
Anyway, most of this is common sense. Those of you manually enqueuing fonts are already aware and making sensible choices. It’s the newbies loading fonts through pagebuilders or plugins that are likely having unnecessary weights, styles, and character sets.
50. Font enqueue method (ADV, MED)
This is IMO an art and massive area of debate within the development world. There are many ways to enqueue fonts (especially webfonts), each with their own pros and cons. I’ll leave some general guidelines below:
Fonts should load before the content – I don’t care about FOIT or render-blocking, it’s better UX to load text in its proper font from the get-go.
Font should be (carefully) loaded by the theme, not a plugin. If your plugins have font/typography options, choose “inherit”.
Webfonts load faster when loaded-locally and with long cache expiry times. But that speed difference isn’t as noticeable if you’re using a common (lightweight) webfont.
The biggest problem with how webfonts are enqueued are due to developers trying to make them user-friendly. If you’re manually enqueuing just one webfont and carefully inserting it into the theme, there’s usually no issue. It’s when developers try to have endless font-choice dropdowns for newbie users that it gets messy and more stuff is loaded than needed.
Don’t get caught up in reading crazy-detailed guides like this or this. They’ll spin your head around with all kinds of preload and fallback chatter. My bottom line is this…load the font before the text. Don’t let the text load first as that creates lots of FOUT chaos for bloated WordPress sites.
51. Automated font subsetting (ADV, MED)
Font subsetting is an ingenious weight-reduction tactic of loading only the font characters actually used in your content. There are many use cases where you don’t need all the characters in a font. For some people, getting rid of unused characters made their font file-sizes 1040x times smaller!
Only basic latin characters – if you don’t need accent marks, Egyptian symbols and such.
Only uppercase – title fonts, headings.
Only numbers – for specific styled numbers?
Only currency symbols – if you use this font only for price menu?
Only certain characters – logos, headlines
Only common characters – all the ones used in 99% of websites.
Some font subsetting is easily-allowed by webfont services. Others, you can only do it manually (but there are helpful tools). Below are some tools and guides.
Webfont Generator (Font Squirrel) – awesome tool with many options. Pick “Expert”, scroll down and then Basic or Custom subsetting. I love this one.
Font Subsetter (Everything Fonts) – simpler tool to upload and subset any font you like. They have helpful basic options. You can also pick “extra characters” at the bottom.
Usually when you do this level of font optimization, your font files get so small that it only makes sense to have them locally-loaded. There’s no point in making multiple calls to Google’s font server only to get 1/3rd of a font. But hey, that’s your call to make. I think if you’re manually optimizing to this point, just go all the way.
This “locally-loaded subsetted-webfont” method gives me nice fonts AND lightweight ultra-fast load.
Yes, I lose out on the benefit of them already being cached from other websites or easily updated via font-hosting service.
But likewise, they are much lighter and can also be cached in CDN and browser at my specified intervals. (Also appears faster in page tests as well.) Overall, benefits outweigh any drawbacks.
I recommend using only WOFF2 as it’s the most compressed/lightweight and suits all modern browsers. Sometimes, font services load WOFF which is bigger but compatible with really old browsers (not important to me).
Font-subsetting can also open up creative design flexibility. Like mixing letters of one font with numbers or signs of another. Or maybe you just want a really unique “&” sign or unique letter because that’s your customized logo letter. In case you’re already doing that, at least now you know how it’s done without loading entire fonts.
Some really obsessive speed addicts (like me) will manually edit fonts to remove ALL unnecessary characters and glyphs. And I mean like… ALLLLLL! This tactic is extremely tedious and will certainly earn you the “I have no life” award from me.
The only tool of choice here is none other than the legendary FontForge, used by professional designers to create and edit new fonts. It looks like a giant photo library of every character in your font. Allows you to manually adjust each one’s shape and spacing with adjacent characters.
2 ways to work with FontForge:
Reduction – load a font and then delete unwanted characters. (Probably smarter to start with an already subsetted font.)
Build from scratch – open existing font and new font side-by-side, and copy over. This route makes sense if you only need a few characters.
Yes, you’ve got to be crazy to tweak this far but it really works to make your fonts super lightweight. I actually find it to be so much fun (despite the work). It’s one of the few tactics that can make already lightweight sites even more lightweight.
Other thoughts regarding font optimization and subsetting:
Yes, this matters even if you only use one Google font family.
When requesting webfonts, put it all into one request instead of multiple. If anything, this is a practice of loading all webfonts in one place! Do not have some fonts loaded by theme, others by plugin, and such and such.
54. Optimizing Font Awesome (ADV, MED)
I don’t like FA but maybe you like it or don’t want to re-style a theme already built for FA. Here’s how you can make it lighter, improving speed AND page scores!
If you’re thinking it’s easier to just rebuild a new iconfont or use SVG’s, it might be…only issue is replacing all the CSS calls to FA.
I swear it’s easy to load FA locally. Just download it from the site (can even match the same version you have already). Upload the FA folder to your website directory, then go into your theme or wherever FA is loaded from and change the request to load from your site instead of the FA domain.
55. Preload fonts (ADV, LOW)
Are you feeling like your content isn’t coming up super instantly? You can preload fonts in your header instead of waiting for the CSS to load. Which also makes font preloading useful for folks with giant (or combined) CSS files.
Total rookie mistake and one I see happening all the time. The theme calls a webfont (let’s say Google’s Montserrat), the pagebuilder calls the exact same one, and the pop-up plugin calls it one more time. So now, we got 3 calls and 30 requests to Google’s webfont servers to download the same damn font multiple times. How stupid!
Try to load fonts only from one place, preferably your theme.
All other font-settings places (like plugins) should use the “inherit” option instead of picking a font.
Watch out for plugins that let you select fonts (pagebuilder, slider, pop-up, mega-menu).
The common mistake is that users think they have to re-select their font in every website setting. Don’t do that!
6. Caching optimization
Caching is best defined as saving the processed requests so they can be served faster when requested again. It’s used in every aspect of computer technology since forever, and absolutely essential for speeding up your page load.
There are many kinds of caching (across different layers, protocols, and services) and many ways to configure them. Set them up right and you’ll have a fast site that reduces server load and saves money. Set them up wrong and you have a site that’s sometimes-fast and or has broken design and functions.
If you’ve ever heard of people complaining about cache, it’s a combination of them not knowing how to configure for their use case and/or using a caching solution configured for server-efficiency more so than speed.
57. Choosing the right server for caching (BEG-ADV, HIGH)
Full-page caching (aka “static caching” or just “caching”) means to prebuild the entire page, making it static like HTML so it’s ready to serve immediately when the page is visited. There is no wait for any database queries or PHP processing…the page simply appears instantly. Like a burger that was made before you order it!
Back in the days, caching was only done by the web server (therefore called “server caching”) and utilized to keep server load down. It was a tactic to help busy web servers handle lots of traffic. Somebody later realized it could help speed up today’s bloated sites so now, caching is also used from a speed point-of-view and deployed even on small webservers with little traffic.
Developers even created software-level caching mechanisms to recreate the same benefit for users without server access, or on servers without “server-caching” modules enabled. Of course, they’re not as fast as true server-caching but still massively impactful and in some cases even more useful because of having extra caching features.
The most important distinction for regular users is to know their caching limitations with each webhost or web-server. In terms of webserver…Apache, LiteSpeed, and NGINX all have different server-caching available.
In terms of webhosting…just know that some webhosts allow you the freedom to use their server-caching or any 3rd-party plugin of your choice. Other webhosts force you to use their proprietary caching solution. Of course, they will sell it as being high-tech and “best performance” but usually it’s a stripped-down caching solution that’s built for resource-efficiency rather than aggressive performance. If you try to use an outside plugin, it simply won’t work or the webhosting company will automatically disable it.
Caching is usually faster and more resource-efficient from the server rather than through software-level PHP caching.
If using LiteSpeed server, you can use built-in LiteSpeed server caching.
If using NGINX server, you can use built-in FastCGI server caching.
If using Apache (which you shouldn’t), you can use Varnish proxy or even NGINX proxy.
All web-servers can use any software-level php caching (via cache plugin). But some plugins are designed more for Apache/LiteSpeed servers, others for NGINX servers.
Careful of certain webhosts (especially “managed webhosts”) who force you to use their caching solutions and won’t let you use other cache plugins.
Just know that the webserver or webhosting company you choose will affect your caching experience and what caching plugins you can use.
58. Choosing the right cache plugins (BEG-ADV, HIGH)
I’ve tried over 50 different cache plugins. The best ones have useful features, easy-to-use, and don’t break your site. If you manage only a few sites, you might prefer aggressive plugins with many optimizations and even Facebook groups where people share tricks. If you manage dozens of clients, you’ll prefer a safer plugin with less features and less chance of issues.
Best all-around cache plugins (allowed on any webserver) are Swift Performance or WP Rocket. Swift more aggressive, Rocket more stable.
There are other good cache plugins as well (WP Fastest Cache, Breeze, WP Performance, Comet Cache, Borlabs).
W3TC sucks and very difficult to configure. Don’t use unless you’re a pro.
If using NGINX server, you can stick with NGINX helper plugins to keep it simple or a full-featured cache plugin like (Swift or WP Rocket).
Do not combine multiple cache plugins!
I don’t like combining cache plugins with other performance plugins either, but it can work if configured carefully (and not overlapping functions).
Deciding which cache plugin to use depends on your use case.
Small site with 400 pages and little traffic? – Swift or WP Rocket, with precaching enabled.
Medium site with 400-1k pages, and medium traffic? – Can go with cache plugin Swift/Rocket or server caching LiteSpeed/NGINX. Both have pros and cons.
Big site with 1k or more pages and lots of traffic? – I like custom-configured LiteSpeed Cache or native-NGINX cache and no precaching necessary since you have so much traffic.
59. Cache plugin configuration (INT-ADV, HIGH)
Cache plugins are more complicated than ever to configure now since they do so many more things than just caching. This section covers specifically only caching-related settings. Regarding other options you see in cache plugin settings, my recommendation will be in other parts of this guide.
Rewrites vs PHP – most cache plugins only give you the PHP option. If you have the option to use the rewrite method, try that as it’s faster. If it causes problems, then switch to php method.
Cache TTL – this means how long the cache should last for. You should set this about as long as your content update intervals. If you update every day, then set 24 hours. If you almost never update, can make it 1 month.
Private cache or logged-in users/pages – don’t use unless you really have that many logged-in users and you know how to prevent cache from mixing up content between users.
Separate mobile cache – don’t use unless you have AMP or a specific design or content that only shows up on mobile. Just because you have a mobile-responsive site doesn’t mean you need this.
Caching 404 pages – yes if you have many users hitting them. Better if you redirect all of them to actual pages.
Dynamic cache – great for caching urls with queries or filters, like searches or ecommerce product filters.
Exclude – absolutely critical for excluding pages that shouldn’t be cached. I typically exclude checkout, logged-in user pages, or pages with forms.
Browser cache – yes, enable it.
Heartbeat control – I usually disable for all pages except posts. Or if you need it on, you can increase its interval to every 120 seconds.
Not every caching setup or cache plugin will allow you to configure all those options. Don’t freak out if you don’t see them. In fact, there are so many possible settings.
For all other cache plugins, I think you can follow my guides above to get a general idea.
60. Configuring cache-prebuild (INT, MED-HIGH)
One of the most overlooked aspects of caching for me is the cache-prebuild process. Some plugins call it “cache-preload”, others call it “cache-warming” or “cache-crawler”. The cache-prebuild function is a mechanism that pre-caches pages so they load quickly when visited. Back in the old days, caching was only used on high traffic sites and so no cache-preload was necessary. The cache was built by the first visitor and all subsequent visitors benefitted from an already-built cache. This was fine since you had thousands of visits and only the very first person was unlucky to see a “slower” page.
But in today’s caching era, letting the “first person warm your cache” is a terrible idea if you have very little traffic. On a not-so-busy site with no cache prebuild, it might seem like all your visitors hit a cold (uncached) page. FYI: users hitting cold cache will see a slower page load than without any caching at all!
So anyway, we have cache-prebuilding now. There are very few servers that have or allow a server-wide cache prebuild function. They’re probably afraid of users abusing it. It’s in the same logic that many webhosts won’t allow you to use those broken-link checker plugins (because it eats up precious resources).
LiteSpeed servers have a built-in cache crawl function. Few webhosts allow it on shared servers though. You’ll probably only get access if you have it on your own VPS.
Anybody not on LiteSpeed….well, there are many server-level cache warming mechanism and scripts out there but not quite so user-friendly. You can search them out if you insist. It’s much easier if you’re on LiteSpeed, though.
The best server caching script I found is OCP.
The only option (for most people) is to use a cache plugin that has cache prebuild functions built-in like Swift Performance and now WP Rocket (which copied that idea from Swift).
Prebuilding improves the caching experience on your site by a whole lot. Enable it if you can!
There are a few instances where you SHOULD NOT use cache-prebuild. One is if you have many visitors, it’s useless since there’s already live traffic warming the cache. The other is when you have too many pages.
I would say 1k pages is the general threshold. If you have over 1k pages and you update your site often, I recommend NOT pre-caching since your server will use many resources and never even finish the job. If your cache gets purged before it ever finishes, it’s stuck in a perpetual cycle of constantly prebuilding cache that’s never used.
Object caching is useful for dynamic sites (constantly-refreshed data and/or can’t be cached) or any sites with lots of calculated numbers/reports in admin backend. Object caching saves the database calls in RAM so they don’t have to be looked up every time they’re queried.
Because RAM is precious (less abundant than hard drive space and necessary for running programs), object caching is not usually allowed on many shared hosting plans. Also it has to be enabled through the server…so it’s only possible if you have your own server or on a hosting plan that allows object caching.
Object caching must be enabled from the server.
Object caching can be managed through the webhosting control panel or WordPress plugin. (Plugin is better.)
It’s best if you have a cache plugin that manages both page caching and object caching (like LiteSpeed Cache). This way, they purge cache at the same time.
You can use an object cache expiry time of 5 to 10 minutes to be safe. But if your content isn’t update often, you can go higher like up to 30-60 minutes.
I recommend not to use object caching if you have just a static site. In some cases, it’s even slower than just plain page-caching. Enabling it “just in case” does not help! Of course, you can test and see for yourself.
Top reasons to use object cache:
Slow admin backend.
Slow database-heavy functions.
Don’t know if your pages are suffering from slow query? Check with Query Monitor.
This is that common tactic where people paste a bunch of lines into their htaccess so static files are browser-cached for a long time (1 week, 1 month, or even a year) so users don’t have re-download them again. Maybe it was a big deal before…well it isn’t anymore.
Many devices (like mobile) have limited space and delete their browser cache when they want, not when you want.
Browser cache only helps for returning visitors, and many sites don’t have much repeat traffic anyway. (Besides, it’s the new visitors that we care more about improving user experience.)
If you want to use browser cache, it’s more conveniently done through a cache plugin…rather than copy-pasting long commands into your htaccess file.
63. Ignore query strings on page caching (BEG, MED)
Query strings are (the extra text at the end of urls) used to send information to the server. Examples of query strings below and what they do:
search – show different search results. (e.g. search?=wordpress+tips)
ref – lets the site track who referred the user and save info within conversion tracking software. (e.g. ref?=affiliateID)
fbclid – lets the site know the user came from Facebook. (e.g. fbclid=123ABC)
(product) filter – show different products based on name, price, size or other product specifications. (e.g. filter_size?=large)
As you can see, some of these query strings actually alter the page content whereas other strings show the same page content regardless of the query string. The idea here is to exclude the query strings (that don’t change content) from caching so your cache mechanism doesn’t store those hits as a different page. This would save your server from unnecessary work recaching the same page under a different url string AND serve the page faster to visitors from existing cache.
This makes a big difference for visitors coming in from query string urls such as Facebook ads, affiliate links, email newsletter links (with conversion-tracking).
64. Private caching for logged-in users (ADV, MED)
Private caching is rarely practiced as most sites don’t need it (they don’t have many logged-in users). Caching public pages is easy since everyone sees the same page. Caching private pages is hard because of having to cache how each user sees the page differently AND (preferably) not wasting so much space resaving mostly similar pages over and over in cache.
Some private pages are easy – same content for all logged-in users, but something else for users not logged in.
Some private pages are harder – shows mostly same content but also custom data depending on the user (like their name/username).
Other private pages are tricky – shows completely different content to each user.
The easiest way to deal with private pages is to use object caching instead of page caching. To be more aggressive, you can carefully enable private caching…BUT make sure users can’t see each others info and the public can’t see private content.
There are certain mechanisms out there like LiteSpeed’s ESI feature where you can show different content and widgets depending on the users…which is nice. But ultimately at this level, you need to either hire a pro or spend lots of time to configure something that not only works but also doesn’t eat up so much resources (memory and space). Private caching is tough!
65. HTML-caching at the edge (INT, MED)
This is a relatively new technology for WordPress. There are several plugins and services out there that can cache your pages at the edge and use CDN mirrors to serve them to clients around the world. There are 3 main benefits:
Caching done on their server, not yours – reduces your server load, helps slow webhosting, decrease server costs, allow caching even if server doesn’t have it. Basically…allows you fast speeds even if your webhosting/server sucks!
HTML delivered from CDN – traditionally, CDN’s only transfer static assets like images and CSS/JS. With this new edge-caching for HTML, they can serve the HTML from the nearby pop server as well…theoretically improving page load for visitors far from your origin server.
Further DDOS protection – since less of your server is used, less of your server is exposed to DDOS attacks.
Notable edge-caching plugins and services available:
QUIC.cloud – from the makers of LiteSpeed webservers. Their Q.C service allows any website to benefit from LiteSpeed quickness even if they don’t have LiteSpeed servers.
Shifter – sold as a “static site generator for WordPress”. Seems to be a very different user experience from the usual WordPress workflow.
WP Cloudflare Super Page Cache – allows you to cache everything with the free Cloudflare plan. Something previous plugins have claimed to do but fail in one way or another.
I believe there are some more but I can’t find them now.
Do you need these services, or are they beneficial if you already have a fast server? I think not so much. I don’t use any of them as I’m happy with my server caching already. But these can be great options for those on weaker servers. Keep an eye on this segment as I’m sure it will evolve quickly.
7. Local asset optimization
Assets are any static files loading from your server. CSS stylesheets, JS scripts, images, fonts, videos. They need to be processed quickly because they often ARE the content OR they directly affect how the content is shown. Simply put, your content cannot load until your assets are loaded!
Now the trick is in how we load the assets. Some should load first, others should load later. Stuff that’s visual and near the top of the page should be prioritized. What we don’t want is less-important assets to block the critical ones. How else can we optimize the way they load?
66. Reduce asset requests. (BEG-ADV, HIGH)
The fastest request is the one not made! And the most obvious way to reduce asset requests (and overall HTML) is not to call them in the first place. Many people spend so much time trying to compress and combine junk that shouldn’t have even been there in the first place! Please reconsider everything you have on your page.
Get rid of stuff you don’t need. (Plugins, images, fonts, etc.)
Get rid of visual effects you don’t need. (Animations, mouseovers, etc.)
Disable unnecessary plugin CSS/JS.
Consider moving things to other pages. Don’t put your entire site on the homepage.
The less stuff you have loaded, the fewer assets needed.
And for the assets you still have? We have more tricks…
67. Remove unused WordPress core JS (BEG, LOW)
WordPress by default includes a couple javascripts that might not be used. You can disable them with some simple snippets in your functions.php file.
wp-embed.js – conveniently embed Youtube videos or unfurl links in the editor and content. If you literally never embed videos and all your content is just text and images, you can dequeue it.
wp-emoji-release.js – little JS that turns punctuation marks into emojis. You can disable this since modern browsers already support emojis natively.
jquery-migrate.min.js – supports older WordPress themes and plugins still running on the old jquery library. Sites using updated themes/plugins can safely disable this.
jquery.js – largish JS library used by many themes/plugins. It’s convenient since themes/plugins won’t load extra JS if they can use the default jquery JS. The issue is some themes/plugins DON’T use it and they load their own JS anyway. Disable if your theme/plugins don’t use it. If you don’t know, then disable and check everything carefully…or consult the documentation for every theme/plugin that you installed.
I’m sure you’ve seen some performance plugins that offer to disable these for you. I suggest not using them as they sometimes create their own extra load. I prefer disabling these manually in functions.php OR using the built-in functions in my caching plugin.
68. Use native CSS/JS optimizations from your theme & plugins (BEG, MED)
If your theme or plugin has built-in CSS/JS optimization features, use them as they are safer and likely won’t cause any issues.
Theme or pagebuilders allowing CSS/JS merge and minification – use it.
Plugins allowing different CSS generation options – always pick “external CSS file”, as it’s faster and safer than putting them “inline” or in “database”. Only use inline if it’s super tiny CSS (like 3 lines).
69. Combine CSS/JS for small sites only! (BEG, LOW)
There is a huge debate whether you should combine and minify your CSS/JS, aka “concatenation”. I believe it’s better (in general) if you don’t combine CSS/JS . With that said, smaller sites can benefit from combining since most of the load time for tiny CSS/JS will come from the DNS lookup rather than the code processing.
As for larger sites or larger CSS files, I definitely recommend not combining them. You can read the link above for my explanation why. Basically, it’s because HTTP/2 makes concatenation unnecessary and also that not all CSS/JS should load in one file.
If you plan to combine CSS/JS, it’s best IMO to do it only through your theme CSS options. (Of course, it only combines theme-related CSS and not plugins.)
70. Combining CSS/JS for big sites (ADV, MED)
I already said why not to combine CSS/JS, and I still stand by that. But I know some people are going to insist on it anyway because they care more about page scores or what other people on the internet said…fine, do it like this:
EASY – use the CSS/JS combine options in your cache plugin. Test your site. If some styling or functions break, then exclude the problematic ones.
ADVANCED – use a specialized CSS/JS combination plugin (Autoptimize is the best) alongside a cache plugin. This method requires more configuration but gives you more granular control over the optimizations and takes load off your caching mechanism. Can actually be nice since content changes won’t purge your CSS/JS.
NOTE: don’t use the combination features in your cache plugin if you’re doing it with another plugin. Duh!
NOTE #2: if your theme/pagebuilder has combine options as well…yes, you can use them all together. But combine the pagebuilder and plugins first and then do it overall from your cache plugin.
What to do when styling or functions break (which will happen for 95% of you). Disable the optimizations and re-enable one at a time – test each change. Do one with just CSS, then another with just JS. Sometimes, it’s only one CSS or JS that’s causing the problem. Find out which one it is and exclude it from combining:
Isolation Method #1 – with combine CSS/JS on, open your site in Chrome > Developer Tools > Network (tab), and reload the page. Click the little red error circle to see which CSS/JS are missing. Exclude them and see if things work.
Isolation Method #2 – disable combine (and also caching), and scan your site in Pingdom. Sort the waterfall items by file-type (neatly displaying all CSS/JS). Now re-enable combine but manually exclude whichever CSS/JS you think is causing the issue.
HINT: whatever’s breaking is probably related to the problem. Did a certain plugin or theme function stop working? Try disabling those CSS/JS. Yes, it takes a lot of trial and error. It could be anywhere; maybe a plugin, maybe your theme.
TIP: sick of trying to isolate the issue? How about combining only the CSS/JS for the single most bloated extension? For most people, this is either the theme or pagebuilder. So combine all the assets for one thing and exclude everything else. It’s an easy way to get most of the benefit you’re looking for without the combine conflict issues.
What if you’re still having issues? What if your site seems fast but has a small FOIT or FOUT issue? What if your site feels even slower? This is why I told you not to do it!
71. Manually combine custom CSS (INT-ADV, LOW)
Another clever way of reducing unnecessary CSS requests is to disable all custom CSS enqueued by plugins and manually adding them to your theme custom CSS area.
Yes…if you’re combining all CSS into your theme custom CSS, you probably won’t need those “Add custom CSS” plugins anymore. Get rid of them.
If you’re lucky, some plugins have an easy checkbox to disable their CSS styling. Others you can only dequeue the CSS with filter code snippet placed into your functions.php. For plugins that don’t allow either, you can manually edit out the CSS call from the plugin (but you’ll have to re-do these hacks if you update the plugin).
72. Remove unused CSS styles (ADV, MED)
You can lighten your CSS by removing all unused styles. Simply go into your theme or plugin CSS and delete anything not used. It’s common to have themes and plugins with redundant/unnecessary styling for the same elements. Probably helps to make screenshots of your site page templates in desktop and mobile before you edit.
Unused sections.
Unused blocks or elements.
Unused buttons or icons.
Unused tables.
Unused typography.
One thing to note is that if you’re removing from your theme or plugins default CSS, they might come back if you update your theme/plugin later.
Check all site templates on frontend. See which scripts they load. See which parts are obviously unused. Usually, there are many design elements of the theme/plugin that you never use. Start commenting styles out and then fully delete after a month if your site has no issues. Or make a backup and delete on the spot, up to you.
73. Remove unused JS scripts (ADV, MED)
Good luck trying to do this. It’s damn near impossible unless this JS was custom-written by you. The reason why many sites load unused JS is because it’s loading JS for all the features available in your themes/plugins (yes, even the ones you don’t use).
So sure, you can try to remove them manually but that means your theme or plugins might break if you change their settings or options later. There really isn’t any way except to do a code-refactor and how the heck are you going to do that? That’s the theme or plugin developer’s job.
What we can do is perhaps diagnose your site and see how much unused JS there is. And with that, you can find where the bloat is in your theme and plugins and which ones to replace.
If you got the skills, you can take it a step further by rewriting your entire CSS from scratch. Carefully cleaning and reorganizing the styles to make it easier to read and lighter to parse. In moments like this, you can even rethink your design to make things simpler.
75. Javascript async and defer (ADV, MED)
There’s a lot of talk behind JS async/defer tactics, but they aren’t always used for good reason. And it doesn’t help when annoying page tests make generic recommendations for users who don’t know how JS works.
Not all javascript should be async or deferred!
Any JS used for ATF items should be left alone.
Any JS not used for critical elements should be deferred if you don’t need their functionality immediately.
JS async can be used as long as you test first.
The problem with speed tests is that they try to improve page scores at all costs. They don’t know what your JS is specifically used for so they make silly blanket suggestions that might actually hurt your page load!
Deferring JS will delay the visible effects or functions reliant on them!
AJAX (autofill) search functions – defer is ok.
Conversion tracking – do you want to start tracking sooner or later? (I like later.)
Chatbox – for sales/support. Deferring makes sense.
Content-rendering – do you have special pages or content relying on JS? If that specific content is important or near the top of page, don’t defer.
Link plugins – do you have specific JS for rendering affiliate links? I think defer is ok.
Pop-ups – defer is better.
Security functions – any JS that applies captcha or prevents right-clicking, or any other security. I think deferring is ok.
Sliders or image animation – terrible idea if they’re at the top of your site! They’ll load slower if deferred!
(Probably a good rule never to defer visible elements near the top of your page.)
What’s even funnier for me is that you could just manually “defer” things yourself by putting the code in the footer instead of the header. Things like Google Analytics can be placed later and it will load later (after all HTML has been parsed). So if you really think about it, the only reason people use JS async/defer is to optimize the load for any JS automatically placed in the header. And if it’s placed there, don’t you think it probably means it should be loaded earlier???
So like I said, be careful what you async/defer! If you wanna play with it, test carefully. But in general, I prefer to leave them untouched to be safe. There’s no point in scoring higher on a page test but your certain site elements or functions loads slower. JS makes little impact on well-coded sites.
76. How to minify HTML, CSS, JS (BEG, LOW)
Code minification decreases file sizes by removing all spaces and unnecessary code comments. This results in fewer bytes sent through the internet without any loss of function. It’s a win-win all around!
Small sites don’t have much to benefit from minification.
Larger sites will benefit more (especially for slower mobile visitors), but even then minification doesn’t help much once your CSS/JS is browser-cached anyway!
My only issue is with how this code is minified.
Through a cache plugin – ok for small sites.
Through specific CSS/JS optimization plugin (Autoptimize) – better option for large sites.
Through a CDN – best and easiest method, IMO.
Most people do it through a plugin, either cache plugin or one of those “performance plugins” (Autoptimize) that specialize in combining and minifying your CSS/JS. The cache plugin is most convenient and works fine for all sites. But if your site is big with many pages, and/or lots of traffic…you’ll get better results with a dedicated CSS/JS optimization plugin. They have more feature, more control, and best of all…they save you a lot of server load when you purge cache (since your cache plugin doesn’t have to rebuild CSS/JS when page cache is rebuilt).
The extra load on cache prebuild is bad if you have a big site (and minifying with cache plugin). Every time cache purges, it completely rebuilds all pages and CSS/JS. It’s fast on a 10-20 page site but awful if you have many pages and different page layouts.
The extra load can also be bad if you have low traffic (and no cache prebuild). Since uncached visits will take longer to load (thanks to the extra task of minification).
The easiest way to minify is enable it from your CDN (so it processes on their severs) instead of slowing down your web server.
I only enable minification from Cloudflare. I don’t use it from any plugins.
Enabling it is easy. Just check the boxes.
77. Lazy loading images (INT, LOW)
I hate lazyload as a general tactic. It makes your site appear faster to page tests, but loads images slower for human visitors. This is terrible UX! If you’re going to use it, you have to know which things should be lazy loaded and which things should not.
It is SAFE to lazy load images below the fold but NOT if your site has many fast-scroll users (like shopping sites).
It is NOT RECOMMENDED to lazy load any images at the top of the site (header, banner) obviously since that makes them appear slower to visitors.
It is NOT NECESSARY to lazy load images if you don’t have many or if they’re small.
In optimizing many sites every week, I can assure you that 99% of them would look faster without lazy load. It sucks that most sites can’t control which images lazy load or not. Currently, it’s either an ON or OFF setting in cache plugins. No granular access. Native lazy load is available in recent browsers through attributes to specify “lazy” (on) or “eager” (off) or “auto” (browser determines). But if you want to make it easy on yourself, I suggest not lazy-loading.
So lazy loading doesn’t speed up page load? – nope! It delays it. Your site only gets higher page scores because those don’t trigger your images to load like real visitors will.
But doesn’t lazy loading decrease bandwidth use? – yes but that’s not much benefit unless your images are huge or you have that many of them.
Doesn’t lazy loading help by loading fewer things? – it doesn’t load fewer. It loads the same but delays them. If your user doesn’t scroll, it helps. If your user scrolls, it hurts.
There are several plugins out there (usually called “asset optimizers”, “asset organizers”, or “plugin organizers”) that can decide which pages will allow which CSS/JS to load. Some organize by plugin, disabling PLUGIN activation on the pages you choose. Others organize by CSS/JS, disabling CSS/JS load on the pages you choose.
They are a lot of work to configure and cause problems for your site if you’re not careful. You also have to be careful which ones you choose. Some are written well. Others are terrible because their plugin adds its own load overhead, which defeats the purpose! If you insist on messing with these, research them for yourself and good luck.
Don’t try to remove every little thing off every little page.
Focus on the heavier plugins and CSS/JS.
Focus on your slower pages and more important pages (like Home or Cart/Checkout).
Generally, I recommend you not to use any of these plugins and to just pick lean plugins in the first place. I don’t use these as I like to optimize manually.
79. Deploying a CDN aka “content delivery network” (INT, MED)
Do you need a CDN? If your traffic is local—NO!
Try Cloudflare for easiest free CDN. (Great for beginners and many sites.)
Want better performance than Cloudflare? Try BunnyCDN (still low cost).
Need CDN for large files? Try S3 and Cloudfront!
Want a more aggressive “push CDN”? Look it up!
Some CDNs cover certain geographical areas better than others.
Network latency time is a common area of slowdown in delivering static assets (images, css, js). Faraway visitors have to wait 1-3 secs longer to receive requested assets. But if you use a CDN service, the files load faster since they’ll come from a mirror server closer to the visitor. That’s all a CDN service really is, a company with multiple mirror servers all over the world. How they differ is in their pricing, features, and performance around the world.
If you don’t know what you’re doing, just get Cloudflare and be done with it. It’s free and works well enough. If you want to venture down the rabbit hole of CDN’s. Just know that there are 2 kinds of CDN’s:
Pull CDN – the dominant method since it’s less hassle for users. The first visitor loads the CDN (experiencing delayed page load) but all subsequent visitors get faster speeds. Sites with low traffic may feel it’s not worth it, since CDN cache expires before next visitor arrives.
Push CDN – higher performance since files are manually “pushed” to the CDN’s mirror servers by you or your CDN management plugin. With push CDN’s, no visitors will ever experience a “slow CDN pull”. Downside is it’s more management to push files and things can break or look incorrect if visitors reach a site CDN missing updated files.
Traditional CDN’s vs Cloudflare
Technically, Cloudflare is not a CDN but has CDN-like features. It’s actually a DNS service. You enable it by pointing your domain (from your registrar) to Cloudflare’s nameservers. Then manage your DNS functions from Cloudflare, pointing it back to your webhost and enabling Cloudflare’s performance/security features.
Traditional CDN’s work by supplying you with a domain zone (like “123yourdomain.maxcdn.com) where your assets are mirrored. Then you configure your site to load all static assets from this zone. You can also mask that CDN domain behind yours (like “cdn.yourdomain.com”).
Both traditional CDN’s and Cloudflare can be managed by a CDN plugin on your site. You can also manage them from your cache plugin (most convenient). This way, your cache plugin purges both server cache and CDN cache at the same time.
80. Cloudflare optimization (INT, LOW-MED)
There are many little optimizations you can do with Cloudflare aside from just enabling a CDN. There are also some settings you shouldn’t touch (because they potentially break your site or hurt performance). Please follow my guide:
Yes, I think you should use Cloudflare even if you don’t want their performance/security features. You can use them only for DNS functions. Their proxy is easily disabled from the DNS tab; just turn all the orange clouds to grey.
81. Hosting videos locally vs externally (INT, HIGH)
Don’t host videos from your server (especially if you need them to load fast) OR you have high traffic or large videos.
CDN can help serve locally-loaded videos.
Video hosts (Youtube, Vimeo) can make external-hosting cheaper.
S3 or Vimeo are great for hosting private videos.
If your video is auto-played on page load, you need the fastest load possible. I don’t recommend loading them from your server since that can quickly run up bandwidth limits and slow down your server.
CDN – less technical work as your videos still sit on the server. CDN will serve the video quickly worldwide, but can get expensive if you have big videos and/or lots of traffic.
Free video hosting (Youtube, Vimeo) – low cost, integrates with video community, but loads slow external scripts. You can get around the external scripts using iframe-lazyload but that won’t help for auto-play videos.
Paid external hosting (S3+Cloudfront, Vimeo business) – costs money but gives you more control over how your videos look and also allows you to make them private, only viewable from your sites. (Good for members-only content.) Some services like Wistia, are really expensive but come with conversion-tracking features and other junk, hahaha.
Hosting videos elsewhere is always a great idea. The only issue is making sure they load fast enough and don’t run up your bills. Storing them in S3 is handy if you like having control and flexibility over the videos.
S3 is great for integrating with other software, like ecommerce or download management, but requires more technical work and can costs money.
S3 is good for video downloads and streaming, but can be slow for overseas users. Therefore, you should always integrate S3 with Cloudfront CDN!
S3 and Cloudfront are both Amazon AWS, making them easy to integrate.
Vimeo paid plans are absolutely awesome; I love them, too. Easy to generate featured images (using plugins), easy to put into your content (it just embeds). Can control which domains it shows on. Comes with nice video reports, counting views, other user tracking.
My last note is that if this video is on your home page right at the top…it’s probably worth testing different methods to see which one loads it the fastest. Maybe from your server, maybe S3 + Cloudfront, maybe Youtube/Vimeo…who knows, test it! All other non-essential videos, their slowdown is more because of the video player than the actual video itself. And for those, I have more tactics. 🙂
82. Hosting large files (INT, MED)
Just like with videos, you should not host large files on your server at all. Even if they’re seldom accessed or downloaded. Just one person downloading a 1gb file from your server is enough to slow down your regular web-traffic. Also, it’s more sensible not to have giant files on the server when doing site backups (waste of space).
Use S3 to store the files.
Combine it with Amazon’s Cloudfront CDN feature if you need faster download speeds to visitors around the world.
Large files for me is anything above 50mb. If you have just one 200mb that rarely gets downloaded, ok fine. If you have a 1gb file or many 200mb files…probably not.
Some servers are stronger than others, right?
83. Managing a large media library (INT, MED)
Some sites have such a massive media library (tons of images) that it no longer fits on the web-server. This is a performance issue because the web-servers disk is usually the fastest and most convenient place to retrieve website files. Putting your images anywhere else is likely to be slower retrieval.
You have a few choices in moments like this, each with pros & cons:
Upgrade the server plan – easy way to get more space and better performance without changing your site much. But costs more and still might not be enough space.
Offload to S3 – using the fantastic WP Offload Media plugin. It allows Cloudfront CDN integration, too! I love this method but some people might not like the cost.
Add block storage – theoretically fast enough for application-use and also affordable ($1/month per 10gb) but I feel like it’s messy and not all that flexible. Sure you can mount it to just some directories or even the entire wp-uploads directory.
ORRR you can just delete unused media sizes if you want to quickly shrink your library. I’ve seen sites go from 100k to 10k images with no design changes!
Yes, there are alternative plugins that do what WP Offload Media does, but none of them with the same respect as its development team (Delicious Brains).
8. External asset optimization
Optimizing external assets is very difficult if not impossible. These are all the files that load from somewhere other than your web server (thus “external assets”). This can be webfonts (Google fonts) or font icons (FontAwesome), images, JS scripts for Google Analytics, JS for conversion tracking (Facebook Pixel, Hotjar), JS script for affiliate (Amazon), JS library, JS script for Youtube (or Vimeo), embeds like Facebook box or Twitter, JS for social media share counts, and on and on and on.
The hardest part about this is that their servers aren’t always the fastest (no duh, a free service is not gonna dedicate all server resources to you) and their files aren’t always the lightest. You may have seen complaints from page tests about them not being browser cached for long enough, or being too big, etc. Whatever the case may be, you have little control over files that aren’t loaded on your server!
So what can we do?
Load them locally.
Load them early (aka “prefetch”).
Load them late (aka “defer”).
84. Audit all external requests (INT, MED)
Do you even know what’s loading externally from other domains? It’s funny but I see many clients unaware of all the external calls made from their site. To check: open up your Developer Tools, click on “Sources” tab and load all your site pages.
Common (unexpected) external requests:
Absolute urls – to your own page. Technically not an external request but try to use relative urls. If you’re doing for outdated SEO tactics, stop it.
Stock theme images – default images linked from the demo site (even when they exist on your site).
Old conversion scripts (Hotjar, Pixel) – that you stopped using but forgot to remove from your theme files.
Unnecessary crap – any images, CSS, JS scripts or libraries, loading for things you don’t even use.
85. Load simple assets locally (INT, MED)
Anything simple enough for you to load locally, do it.
Images, CSS, JS…copy them to your site.
86. Load webfonts locally (BEG-ADV, HIGH)
As I’ve already explained, you can load webfonts locally to reduce their speed impact.
Best if you can do it manually (and also to subset out unnecessary stuff).
Don’t use FontAwesome! (use other ways to show icons)
Btw, Swift Performance cache plugin has a cool Critical Font option to optimize for Font Awesome.
87. Load Google Analytics locally (BEG, MED)
There are tons of hacks out there. Some of them do excessive stuff like cutting down the JS file to the bare minimum or loading the GA script from public CDN (jsDelivr). Other methods are tedious hacks liking copying the GA script to your server and running cron commands to keep it updated. I think that’s fine for totally small sites without any conversion tracking. But otherwise…keep it simple and use CAOS plugin (my favorite).
Flying Analytics plugin – built by Gijo to locally-load GA. Has 3 useful settings depending on your GA use.
88. Lazy loading videos (INT, HIGH)
You can use the “lazy load iframe” feature in your cache plugin.
Do NOT lazy load any videos at the top of your homepage!
If you’re embedding videos through Youtube, Vimeo or other iframe, there are plugins that not only lazy load it but also have extra features:
Load only on user interaction – mouse move, scroll, or mobile touch. Great idea!
Lazy load sensitivity – loads the iframe once the screen gets close. Great idea!
Pseudo image – loads an IMAGE of the video player with fake play button, and only loads the real video if clicked. Very clever! (Usually only compatible with Youtube, some can do Vimeo as well.)
(Many of these can be found in Swift Performance.)
Even if you don’t have all those fancy features in your cache plugin, just being able to lazy load iframes alone is a huge difference. Another way you can manually hack things is to show a fake image of the player which then opens up a lightbox modal with the video inside. Anyway, I’m sure more native browser lazy load is soon to come.
Regarding best plugins to do the pseduo video image effect, I suggest you test on your own. Try search the WP repo for “video lazy load“.
If there’s any concern with lazy loading, I do wonder if it affects your SEO since crawlers don’t see the video loaded. Who knows, right?
89. Google Maps optimizations (BEG, HIGH)
Don’t be one of those newbies loading the Google Maps box right on your site! It slows your site down by a lot!
Put an image of the map instead, then link to Google Maps from that image or from some text under it.
Or use “lazy load iframes” option from cache plugin to delay the Google Map load.
90. Social media integrations; Facebook, Twitter, Instagram (BEG, HIGH)
Have you ever wanted to show the Facebook like box right on your page? Just don’t! It lags like hell. Will cost you a solid 1 second. If you want, put it on a specific page but not your home page or global widget!
Same goes for Twitter box.
What about an Instagram stream? For whatever reason, those have been less laggy for me. I like the Social Feed Gallery by QuadLayers.
What about Facebook Pixel? Sorry guys, I don’t have any methods yet.
Unless these boxes are your main page content….trust me, you don’t need it. It’s not worth the tremendous slowdown they cause, especially on mobile devices.
Still insist on having a social feed on your site? Maybe this Social Feed Cloudflare app can help.
91. Comments and Gravatar (INT, LOW-MED)
Comments are a problems most people don’t have…until their blogs get popular and there’s hundreds or thousands of comments. In fact, even 100 comments on one post is enough to chip away at your page speed and start making your site less fun to visit. We have a few concerns to look at and different ways of tackling them.
Which comment system to use? And how they deal with 3rd-party assets.
The built-in WordPress comments system is fast and free but loads all at once. This can be annoying if you don’t want all 500 comments (and their Gravatar) loading on one page. It’s not only a speed issue but a design issue. Of course, there are work-arounds.
On my busiest site, I put a button to [LOAD COMMENTS] on mobile, so users aren’t intimidated by a giant scrolling page on their phone.
You can also use alternative avatar systems, or cache your Gravatars (via cache plugin or specific Gravatar cache plugin).
Or not use any comment avatar at all!
I personally prefer native WordPress comment system.
Disqus is a 3rd-party commenting system that’s no longer free, but has lots of engagement features and looks nice (styled cleanly, and only loads recent comments). The big con aside from the price is that it loads 3rd-party assets on all pages even if they don’t have any comments.
The Facebook comment is also a great option and FREE. It’s fantastic for getting tons of engagement and doesn’t show all comments at once (like Disqus). It also racks up your Facebook share count number with each comment. I only don’t like it because of the external loads.
Please, no Thrive Comments! If you’re attracted to Disqus you might consider Commento but beware (you can’t migrate there natively from WordPress, yet…you have to pass through Disqus first).
92. Deferring chatboxes (BEG, MED)
Many of you have slow page loads because of your (sales/support) chatboxes. These aren’t related to your page design and shouldn’t get in the way. Luckily, they’re easy to deal with.
Manually put the code in the footer.
Defer JS – most cache plugins have this.
Lazy load JS – Swift cache has this. It’s fantastic.
93. Speeding up email forms (INT, MED)
If you’ve got newsletter forms on your site to integrate with email marketing services (Mailchimp, MailerLite, etc), you’ll notice many of them load annoying 3rd-party scripts. Some of these JS are for form security (preventing spam registrations), others are for other functions (like conversions).
Here are my tactics for dealing with them:
Don’t load email forms globally – don’t put them on every page! I also hate them from a UX point of view (annoying users). You can try just a “SIGN UP” button or link that redirects them to the newsletter page. But yeah, that might affect your conversions and take them off the page.
Use a form that doesn’t need external JS – some email services can do it.
Load the form locally – but risky if it stops working one day!
Always manual embed – instead of automated through a plugin.
Ultimately, the service you pick will determine your options. Some have JS-free options. Others require JS no matter what.
But please don’t install a performance plugin just for DNS prefetch.
A great tactic for speeding up external asset calls is to speed up their DNS wait times. What slows down external assets is usually the network latency time to send a request to the 3rd-party server. The file itself may be very small but the network time is what delays it. By putting a DNS prefetch to external domains, your server makes the HTTP request earlier during the site load so the asset loads quicker when it’s needed.
Or to get a full list – open up your browser’s Developer Tools > Sources (tab).
You should browse several pages of your site to make sure you get all the common ones.
Only prefetch the root domain/subdomain, not the entire URL.
Also not necessary to preload all domains that you see.
Be careful of ad-related domains that change on each page load. (You shouldn’t prefetch these.)
95. DNS preconnect (INT, LOW)
“Preconnect” is the lesser known brother to “prefetch”. Arghhh, here’s comes an explanation:
preload – preloads assets for the current page.
prefetch – preloads only the DNS call for the next page.
preconnect – preloads the DNS call, TLS negotiation and TCP handshake…for the next page.
Preloading shouldn’t be used as it can eat a lot of resources and doesn’t make sense for WordPress unless you know exactly why some assets need to be loaded first (and can’t be prioritized in other ways). Prefetch aka “DNS prefetch” is a safe low-resource way to preload calls, and heavily supported by browsers. It conveniently establishes the DNS connection so assets coming from external domains will be downloaded quicker when requested.
Preconnect is like prefetch but does a little more (it establishes the TLS/TCP connection as well as the DNS) but isn’t as popular for several reasons. One is because it wasn’t supported by as many browsers. Another is because there’s a simultaneous connection limit in most browsers. Ultimately, you have to decide what’s most important to preconnect, and the rest can be prefetched.
Limit preconnect only to priority connections.
Some sites do preconnect before prefetch. Others do opposite but also prefetch the preconnect-ed ones. Some also put prefetch in the same tag as the preconnects.
I probably wouldn’t preconnect more than 4 domains. Prefetch, you can do as many as you want.
I personally don’t bother with preconnect. Only some very big sites do.
It’s relatively new and I haven’t played much with it. But it looks extremely promising! The new Cloudflare Apps allows developers to create applications and services that integrate at the EDGE-level (aka “DNS”) rather than at the SOFTWARE-level (aka WordPress, php). This opens up a wide range of possibilities because:
The applications/scripts are loaded from Cloudflare servers! (Making them faster.)
It’s less work for developers. Their app can be applied to any website (not limited to any CMS, or WordPress).
Tawk.to, Facebook (chat/like/comments), social feeds, chat boxes, forms, support, media, etc.
There are so many!!!
Really incredible stuff as they don’t load anything from your server! No plugins to install or configure. Just enable from your Cloudflare account. Amazing! (This could completely change the game not only for how future applications and services are integrated with websites, but make slow websites a thing of the past.)
9. Security optimization
Hacking and cyber attacks can cause massive server performance problems if not outright interruptions. Many people have no idea how often servers get attacked because they never see the logs. I can assure you every server will get attacked several thousand times (sometimes in one hour) every month. Your site might even be attacked right now but you just don’t know it.
Securing against these attacks requires a delicate balance. You don’t want a server that lets hackers freely bombard your ports and resources. But you also don’t want a server that’s too secure and excessively auditing all traffic that it slows your users or worse (it blocks legitimate users). Of the recommendations below, follow the ones you have access to.
Servers hosting only you and/or few tenants:
Easier to secure because there are fewer sites to invite hacking and you can safely disable many ports without affecting your sites.
Harder to secure if you’re managing it yourself and lack experience.
Servers hosting many tenants:
Easier to secure if there’s admins already monitoring the server. Many common attacks already secured against.
Harder to secure if many services need to be open for different client use cases. Therefore, more sites and open services to invite hackers.
97. Shutdown unnecessary server services (ADV, HIGH)
You can think of unused services as unused phones or email accounts. They sit around eating up resources (MEMORY) and take up your time with unwanted connections (SPAM, HACKERS). Whatever you’re not using, disable it from your server!
DNS – disable if using external DNS server. (Cloudflare, DNSME, etc.)
Email – disable if using 3rd-party email. (G-Suite, MXroute, etc.)
FTP/SFTP – disable if not using.
Other proxies – like Varnish.
Many of these services are enabled by default with your server stack or control panel. You can read their documentation to get a list. For services that need to be running, you can limit their exposure to bad traffic using firewalls.
98. Server firewall configuration (ADV, HIGH)
Most default firewall configurations are set too lax to avoid causing issues. You should jump in there and block off as much as possible. Some example logic below:
Ports used by specific people (SSH, FTP) – only you or a few others. Do an IP whitelist and block the rest.
Ports used by certain country (POP3, IMAP, FTP) – if some services are only used from within one country, you can block all other countries. Be careful though as someone traveling will lose access!
Ports attacked only by certain country – if you have many attacks coming from certain countries or regions, you can ban by country or entire IP ranges.
There are many server firewalls out there. Each with their own pros and cons and recommended for different uses cases. You can read up online how others use and configure them. It’s easiest to start with the default one that comes with your stack.
99. Server brute force protection (ADV, HIGH)
Brute-force protection is like a smart firewall. It leaves services and ports open but automatically bans the obvious offenders.
It automatically bans anyone putting in the wrong authentication, or using blacklisted generic user-names, etc.
They’re easy to set and very powerful. Just be careful that they don’t block legitimate users/traffic. You can see what brute-force or DDOS protection came with your server and enable it. Maybe don’t set it so strict if you have many users on this server.
100. Brute-force protection on wp-login.php (BEG, HIGH)
The WordPress admin login page is often bombarded by bots trying random user-names and passwords to get through. While they might not get in, their constant attempts eat up lots of resources. There are several ways to prevent them, each with their pros and cons.
Server-level brute force protection – easy and efficient but can lockout legitimate users on busy servers with sites using Cloudflare. Problem is brute-force lockouts block by IP and visitors coming in through Cloudflare all share the same (proxy) IP. Sure, you can configure to pass true client IP through Cloudflare headers but this slows down page load!
Application-level brute force protection – many WordPress security plugins can do this. They secure the login page by banning users with bad credentials.
Some plugins hide the login page – moving it to a different URL. Just make sure the standard login URL is either blocked or cached to prevent visits on it from using resources.
Other plugins protect the login form by putting a captcha and banning certain robots, crawlers, devices. This can work well but might annoy or false-flag legitimate users.
Only server I know with native brute-force protection on wp-login.php is LiteSpeed. All other servers (Apache & NGINX) will have to enable it with either a security plugin or http auth.
101. HTTP authentication (BEG, MED)
Do you have specific pages being bombarded and no convenient way of blocking access to them? HTTP AUTH is a quick-and-dirty way of locking out all users. Only problem is it’s a slight hassle for legitimate users. Most guides show you how to protect the wp-admin directory but you can protect other frequently-visited ones as well.
The XML-RPC protocol allows external apps (like mobile apps), to log into your WordPress and edit content or view WooCommerce sales. Unfortunately, it’s often exploited by hackers and bots brute-forcing their way into your site.
If you don’t use it, disabling XML-RPC prevents server slowdowns caused by the thousands of XML-RPC hack requests.
If you need to leave it on, you can whitelist your IP’s (and also for Jetpack, if you use it).
103. Security plugin configuration (BEG-INT, MED)
If you don’t have access to your server, you can use security plugins. Yes, security is more efficiently run at the server level (closer to raw computing power) than at the application level (slower PHP processing)…but sometimes, it’s hard to set global security rules when you have many clients/sites and each one needs something different.
Nonetheless a software-level security plugin like WordFence is still a useful option to block attacks that the server doesn’t, and/or prevent hacked sites from doing more damage.
Most important feature of security plugins IMO is malware scanning. Scan manually or schedule during low-traffic hours. This feature doesn’t necessarily improve website speed, it detects system exploits and prevents them from using up resources (hosting spam sites or attacking other servers).
The firewall features on security plugins probably aren’t needed if you have a server firewall already. Firewalls activated at the PHP level slow all incoming requests.
The performance problem with security plugins is due to A) over-aggressively filtering all incoming traffic, and B) scanning too often. Both eat up many resources especially on large sites with many pages and visitors. I suggest not using software firewall, and also to set your malware scans to a slower speed.
104. DNS edge-level security configuration (BEG, MED)
Remember how I said that security is more efficiently done at the server level than at the application level? Well doing it at the edge level (DNS-level) can be even more efficient than at your server level since it’s using someone else’s servers. There are some performance implications between dealing with security at the edge VS on your server. You can decide what works best for your use case.
Dealing with security on your server can be more convenient since you have more control. You can optimize for your specific use. Only downside is it uses your server resources and also that you need admin skills.
Dealing with security via another server (like DNS proxy, Cloudflare) or security service (Sucuri) saves your server precious resources but might add slight load delay issues since visitors are passing through an extra proxy before reaching your web-server.
The weaker your server and server-admin skills, the more likely a security service is more efficient at blocking DDOS requests. Then again, for a smaller site you might not have so much security problems. Whatever you do, don’t try to put overly-aggressive DDOS security at both levels (DNS & server). This can cause false-positives where legit visitors are blocked because all visitors (good and bad) share the same IP when coming through a proxy.
Most people don’t have to worry about DDOS attacks, ok?
Most lower-level DDOS attacks are easily handled by your server.
The highest-level DDOS attacks are the ones that overwhelm servers (even with good security) but they cost money and concentrated effort from hackers. Unless someone is specifically targeting you, you don’t have to worry about them.
Easiest way to deal with high-level DDOS attacks is to immediately sign up with a dedicated security company like Sucuri (when it happens).
I don’t recommend paying for fancy security services that you mostly won’t need.
105. HTTPS and HTTPS redirect (BEG, LOW)
You should absolutely be using HTTPS. (It’s the only way to get the benefits of HTTP/2 protocol.)
Put 301 HTTPS redirects on your server so visitors are quickly redirected to the proper HTTPS protocol and correct domain version of your site (with or without “www”). Without these server redirects, WordPress can still do it but it takes a little longer.
Also, don’t forget to make sure all your internal urls are using HTTPS (follow step 3). Don’t rely on SSL plugins (unnecessary) or WordPress (slow) to redirect you. Set the redirects from the server!
Bonus tip: if using Cloudflare, set a page rule to do your HTTPS 301 redirects from there as well. (Even faster than from local server!)
106. Web Application Firewalls, aka “WAF” (INT, MED)
WAF are enabled through your server security stack.
The easiest way to block bots without any performance loss is manually through htaccess or global server config. But this can be too much manual work when managing many sites. Therefore it’s safer to have WAF for them.
If you’re using ModSecurity, check out these ModSecurity performance tips from Trustwave and Packt.
You may also enable a high-performance WAF through Cloudflare security rules, or 3rd-party paid security services…like Sucuri.
Most people don’t know the difference between network firewall and web application firewall (WAF). Network firewall is for opening and closing ports. WAF is for blocking bots through open ports. You have to be careful with WAF security because it can slow down your server since it checks all incoming traffic (regardless of good or bad). Due to performance reasons, I mostly avoid WAF if I can but my style of server management might not be feasible for others.
10. Bad optimization (tactics)
All the unnecessary, illogical or outdated optimization advice passed around on the internet. Listed here (along with my thoughts) in case you were curious. Some sites are slow because of their users!
Most of these tactics are bad because:
They don’t fix the root problem.
They don’t increase speed. Some make it worse.
They are outdated/irrelevant for today’s technology.
Can break your website design or functions.
Increase your server load.
Make nearly unnoticeable benefit if any at all.
Only work in limited scenarios.
Only give you better page scores, but make the user experience worse.
Their benefits don’t outweigh the disadvantages.
Bad webhosting optimizations:
107. Horizontal-scaling (adding more servers).
Scaling will never be faster than running all services locally (off one machine). Chaining servers together means your data has more proxies to jump through.
Horizontal-scaling is meant for preventing high-traffic from slowing down your base speed. It can’t speed up a low-traffic environment.
The only scaling that increases baseline performance is vertical scaling i.e. “upgrading server resources” like CPU, memory, disks, etc.
108. Buying an expensive server.
This is a bandaid way of fixing a slow setup.
The extra money you spend on hosting could easily pay for better recoding.
If your site has little traffic yet needs a $300/month server to be tolerable, just fix the code!
Expensive servers are noticeably faster for dynamic load only (admin pages, checkouts). If your site is cached effectively, it makes no difference.
109. Optimizing for speed tests and page scores.
Did you know that optimizing for high page scores can sometimes give you a slower site? (It’s true!)
110. Deploying caging tactics for low-tenant servers.
Many people read random guides and tactics (like installing CloudLinux/CageFS) for servers and think it actually helps them.
Most of those guides were written for high-tenant busy dedicated servers. And not relevant to this new age of affordable VPS with only a few sites.
Caging tactics will slow down your sites because they limit resources.
Bad theme optimizations:
111. Using overly minimal themes.
If your theme is so empty that you have to load bloated pagebuilders and extra plugins to get the desired look, you might be defeating the purpose of a lightweight theme in the first place!
Maybe consider a nice child theme or prebuilt site design for Genesis or GeneratePress.
Maybe consider Artisan Themes.
112. Switching to static CMS (instead of WordPress).
They can’t do all the fancy designs and functions that WordPress can.
Switching to static CMS actually requires more development skills!
Bad plugin optimizations:
113. Installing multiple performance plugins.
The only one you need is a cache plugin.
Do not install multiple performance plugins! (Browser cache, disable wp-embeds, CSS combine, lazy load, etc.)
Don’t install “booster” plugins for other plugins, either. They’re likely using autoloads (memory) to speed it up…but that only speeds up the specific plugin at the expense of your entire site load.
114. Using (conditional load) plugin organizers.
If you have to tell plugins not to load on pages where they aren’t used, it’s probably not a good plugin in the first place.
It’s best if you just remove or replace those plugins.
Bad image optimizations:
115. Lazy loading images.
Yes, I’m aware my belief goes against what many people think.
Sure, it gets better page scores but slows down the user experience.
Sites always look better with it off!
116. Over-compressing images.
Don’t over-do it to the point that they look ugly.
Maybe make them smaller?
Or if you lower their quality, darken them and put text on top so it’s less noticeable.
117. Excessive inline SVG’s.
It’s fine if you have like 1 or 2.
Any more than that and you’re just making your HTML bigger.
SVG’s are almost always not critical items.
AND they’re usually loaded on every page. Let them be separated requests from the HTML so they can be browser cached.
If you really want lighter weight, create a custom icon font!
118. Leaving image compression backups on the server.
If using image compression plugins, delete their backups off your server to keep it light.
If you want to keep the originals, download them to your computer.
119. Media cloud hosting service.
Did some fancy company convince you to offload your images to S3? And use their fancy CDN service to “load your images faster?”
I can assure you it’s a dumb idea. Image assets will most likely load faster from your origin server than through a slow external storage server like S3.
S3 is basically only a last-ditch effort if you run out of space on your server and don’t want to pay for an expensive server (with fast disks) elsewhere. Let me repeat, S3 is slow storage.
And it’s because that S3 is slow that those media-cloud plugins and services feel the need to add a CDN to it. Don’t let them fool you. Loading images from a slow external storage through a CDN proxy is going to be slower than loading off your origin server.
If you can, load from your local server. And if needed, use a CDN with your local server.
The only time this external storage & CDN method is ever useful is if you have heavier video files or so many images, or you want to save money, or you have so much traffic that your CDN is always warm.
I would also add that if you’re going the external storage route, you should use a more proactive push-CDN than a pull-CDN.
Bad caching optimizations.
120. Enabling every feature on cache plugins.
Don’t be the idiot breaking their site with cache plugins.
Don’t enable separate mobile caching or AMP if you don’t have it!
Don’t cache private or logged-in users unless you have to.
Don’t cache WooCommerce cart sessions (it’s almost never needed).
If you don’t understand a feature, check the documentation or ask for help.
Use only what you need. Less is more!
121. Enabling object caching when you don’t need it.
It’s only meant for dynamic pages.
If all pages are static, using object caching can slow it down.
Unnecessary object caching can also eat up memory, improperly configured object caching can serve old data.
122. Browser caching for too long.
Browser caching is usually intended for static assets that rarely change (images, CSS, JS).
Safe settings can be 1-7 days so they’re not downloaded again if the same browsers revisits within that time period.
Aggressive settings can be up to 30 days or even 1 year.
The problem is if you change the images or CSS within that time period, some users will see the old version.
123. Preloading pages.
Clever tactic of preloading pages before you click on them! (Then they appear instantly when clicked.)
Some will preload all available links. Others guess or preload only what you hover your mouse over.
There are many technical implications regarding preloading…such as extra server requests (for items not even clicked), screwing with conversion/affiliate tracking, accidental self-DDOS, can even break page design or functions because of CSS/JS loaded at unexpected times.
My biggest detraction is that they try to speed up sites by using extra server load on a server that wasn’t fast enough in the first place. Sure, it can work on a slow server or bloated site if it doesn’t get much traffic. Anyway, be careful when you use it!
Can break site designs, delay initial response, increase server load, or even slowdown your sites. The benefits aren’t even noticeable (except for silly page tests).
The benefits are better on big bloated sites, but so are the drawbacks. Just test with it on vs off. (And test with your eyes, not via page tests.)
126. Generate Critical CSS.
Unless your site actually needs it AND you’re carefully generating the critical CSS, there won’t be much benefit.
Often slows down your site load, break styling, or create FOIT/FOUT issues.
The only effective way to generate Critical CSS is to do it manually. But most people don’t have that skill and do it via automated plugin (which often includes unnecessary styles and misses necessary ones).
What’s the problem if you don’t generate critical CSS perfectly?
A) your site doesn’t look right, suffers FOUC for a little bit and then finally loads everything.
B) doesn’t look right period
C) looks right but still loads too many unnecessary styles.
D) worst case scenario, you get some combo of multiple above.
127. Inlining CSS.
Mostly dumb idea.
Intended only for page-specific CSS, like simple 1-liners that don’t need to be an extra HTTP request.
Not intended for outputting entire CSS into the HTML. This adds extra load to each page that could have been globally cached.
Will actually slow down subsequent visits since that CSS has to be re-parsed again and probably not even cached.
This tactic is only for ultra-light pages with nearly zero styling. It’s terrible for speeding up bloated pages.
128. Removing query strings for CSS/JS assts.
Maybe some page test told you to do this.
But then what happens when you do it? CSS changes take forever to show on browsers that already saw your site (since they have the old version cached).
Good job, genius. Now you’re stuck with cache-busting issues.
This tactic is already outdated since most browsers and services (like CDN) can effectively cache assets with query strings.
If you still insist on it, at least wait until you’re absolutely done with the site design. Or else design changes will take longer to show.
129. Defer CSS or JS.
Another potentially stupid idea. (Usually done by users trying to avoid “render-blocking” warnings.)
It can delay critical CSS/JS used at the top of your page (like for sliders or other content effects).
If you’re deferring and delaying CSS/JS load for critical items, your page may get higher page scores but appear slower for visitors.
FYI: some assets need to be render-blocking for a reason. It’s because they control how the content looks. For example…do you want your carousel images to load BEFORE the carousel? Or do you want your text to load before the font? NO!…because it’ll look ugly or all jangled up!
130. Cache-all using Cloudflare.
Many have tried, many have failed.
Seems like an incredible trick until you realize some function broke.
I don’t recommend even trying this unless you have a simple site (that probably won’t need it anyway).
Rocket Loader – don’t enable this! It breaks stuff.
SSL/TLS on Full (strict) = don’t use this option as it makes your SSL handshake take longer. Just use the default option! It is fine and everything will look normal with the padlock.
HSTS – leave this off! It will prevent browsers from displaying your site if you ever have SSL problems.
Cache entire page with page rules – already mentioned above.
Completely unnecessary! Doesn’t help speed at all!
PS: Cloudflare can be used without its CDN functions. You can use it for DNS-only.
133. Using Google AMP.
The main benefit of AMP in my opinion, is better syndication and SEO through Google’s search engine results.
But I think it helps only for blog and news type of sites.
AMP is not a good solution for speed. It adds more complexity to your site and often breaks functions and design. Worst of all, it doesn’t exactly help your speed and makes your site (and server) work harder to cache things.
Brute-force security too strict – blocks legitimate users.
135. Mixing server security with Cloudflare security.
Can block legitimate users since all users coming from Cloudflare share the same IP. And if hackers trigger an IP ban, many legit users will be banned!
Be careful when using Cloudflare proxy with server security.
Not usually an issue unless you’re on your own server.
To clarify: the issue is usually for logged-in users, regular public visitors usually won’t have any problems.
135. HTTP Strict Transport Security aka “HSTS”.
Dumb idea! Very little benefit but god forbid you have any random SSL issues (SSL didn’t renew or missing after migration), your site will not load.
It’s a giant risk and always causes nightmares eventually.
Don’t you ever turn this on! I scream at all clients who do this.
What’s the secret to speeding up WordPress sites?
For me, it use to be finding endless tactics and places to optimize. And it worked. I was able to drop from 4 seconds to 1 second. Then 1 second to 500ms. Then 500ms to 380ms, then painstakingly chip off every 10-20ms. Major gains at this point were only 50ms.
…but this isn’t how the real world works.
Ain’t nobody got that kind of time.
Ain’t nobody want to spend that kind of money.
Speed optimization for the real world requires intuition. You have to be able to look at a site, smell it, and know right away what it needs. So you don’t waste a bunch of hours on tactics that make no difference.
The problem with most speed optimization tactics and speed-up services:
They use a general formula that doesn’t work for every site.
They do things the easy way, not the best way.
They don’t account for the user’s workflow and content intervals.
They don’t account for the type of webhosting (and it’s limitations).
They don’t account for the user experience.
They almost never do any manual optimizations.
They only strive for A+ page scores and lower total load times…which aren’t anywhere near as important as TTFB and content paint times.
Anyway, I hope this guide helps you. Or at the very least, helps you find people who can care for your site as much as you do. Speed optimization is a masterful art combining the skillsets of web developer, server admin, UI/UX designer, and website owner who’s actually owned a high-traffic website before.
There are several reasons why you should optimize your Shopify Liquid code:
Your e-commerce site’s performance can be improved if you optimize Shopify Liquid code behind it. Better user engagement and conversion rates are possible outcomes of a website that is quick to load.
A faster-loading website is more likely to be recommended by search engines, which can increase your website’s search engine rating and result in more organic visitors.
Reduced Bounce Rates One of the most popular causes of high bounce rates is slow website performance. Reduce your website’s bounce rate by giving your users a better experience by optimize Shopify Liquid code.
Better User Experience: A faster and responsive website can give a better user experience for your visitors, making it more likely that they will return to your site in the future.
Increased Conversion Rates: A fast and responsive website can also lead to increased conversion rates, as customers are more likely to make a purchase when they have a good experience on your site.
Reduced Server Load: By optimize Shopify Liquid code, can also help reduce server load, which can lead to lower costs for your business and improved scalability for your website.
Here are steps to optimize Shopify Liquid code:
Minimize liquid logic: Use liquid logic only where necessary and avoid complex logic in your templates.
Cache liquid output: Use the cache tag to cache frequently used data and reduce the number of database queries your site makes.
Use include files: Create include files for frequently used code snippets, such as headers and footers, and include them in your templates using the include tag.
Use liquid arrays and loops efficiently: Use liquid arrays and loops to iterate over data efficiently, and avoid using multiple loops where a single loop will suffice.
Minimize the use of liquid tags: Minimize the use of liquid tags, such as case and if, in your templates and use them only where necessary.
Use variables: Use variables to store data and reduce the number of database queries your site makes.
Optimize liquid filters: Use filters such as first and last to limit the number of items returned, and use filters such as map and reduce to manipulate arrays efficiently.
Use Shopify’s built-in liquid objects: Use Shopify’s built-in liquid objects, such as product, collection, and cart, instead of custom objects to take advantage of Shopify’s optimized implementation.
Note: Before making any changes to your site’s Liquid code, it’s a good idea to backup your site and test changes in a development environment before implementing them on your live site. If you want to learn more SEE and here also.
FAQ’S
Shopify Liquid is a templating language used by the Shopify platform to build and manage e-commerce websites. It is used to create dynamic content and is an essential component of the Shopify ecosystem.
Optimize Shopify Liquid code is important because it can improve the performance of your e-commerce website. If not optimized correctly, Shopify Liquid code can slow down your website and negatively impact its performance, which can affect customer experience and lead to decreased conversions.
Shopify Liquid works by combining tags, objects, and filters to output dynamic content on your e-commerce website. Tags are used to output content and control logic, objects contain information and data, and filters modify and format outputted content.
The key components of Shopify Liquid code are tags, objects, and filters.
Some techniques for improving website performance through optimize Shopify Liquid code include minimizing HTTP requests, using Liquid tags effectively, and utilizing Shopify’s built-in optimization tools.
You can minimize the number of HTTP requests made by your website by combining files, using CSS sprites, and compressing images.
When using Liquid tags, try to limit the use of complex logic and loops, and always use the appropriate tags for the task at hand.
Shopify provides a number of built-in optimization tools, including the Shopify Theme Analyzer and a built-in image optimization tool.
Precautions to Consider While optimize Shopify Liquid code
Back up your code: Before making any changes to your Shopify Liquid code, make sure to back up your current code. This will ensure that you have a backup in case something goes wrong during the optimization process.
Test changes on a staging environment: It is important to test any changes to your Shopify Liquid code on a staging environment before making them live on your production site. This will allow you to ensure that your changes do not break any existing functionality or cause any negative effects on your website.
Avoid making drastic changes: Avoid making drastic changes to your Shopify Liquid code all at once. Instead, make small, incremental changes and test them before making more changes. This will help minimize the risk of causing any unintended consequences.
Keep an eye on page load time: Make sure to monitor your page load time after making any changes to your Shopify Liquid code. If your page load time becomes slower, it may be an indication that your optimization efforts are having a negative impact on performance.
Be mindful of code bloat: When optimizing your Shopify Liquid code, be mindful of code bloat. This occurs when code is added to your site that is not necessary and can slow down your website.
Stay up-to-date with Shopify updates: It is important to stay up-to-date with any updates from Shopify, as these updates may impact your optimization efforts. Regularly check for updates and make any necessary changes to your Shopify Liquid code to ensure that your site remains optimized.
Conclusion
Optimize Shopify Liquid code is crucial for ensuring the smooth and efficient performance of your online store. By following the best practices mentioned in this article, such as minimizing the use of Liquid tags and logic, using caching, and optimizing images, you can significantly improve the speed and user experience of your store. Additionally, keeping your code organized and well-structured can make it easier to maintain and troubleshoot in the future. Implementing these optimizations can help you provide your customers with a fast and seamless shopping experience, and ultimately increase conversions and sales for your business.
“Shopify Image Optimization: A Comprehensive Guide”
Header Outline:
Introduction
Why is Image Optimization Important for Shopify Stores?
Best Practices for Optimizing Shopify Images
Resizing Images
Compressing Images
Using the Right Image Format
Naming Images Properly
Adding Alt Text to Images
Utilizing Lazy Loading
Conclusion
Introduction:
Image optimization is crucial for the success of an online store, and Shopify store owners are no exception. Optimized images can significantly improve the page speed of a Shopify store and enhance the customer experience. In this guide, we will dive into the best practices for optimizing Shopify images and how to implement them.
Why is Image Optimization Important for Shopify Stores?
The images on a Shopify store can greatly impact the page speed, which can determine whether a customer stays on the site or leaves. Slow page speed can lead to poor customer experience and decreased conversions. On the other hand, optimized images can improve page speed, create a positive customer experience, and increase conversions.
Best Practices for Optimizing Shopify Images:
Resizing Images: Large images can slow down the page speed of a Shopify store. Resizing images to appropriate dimensions can help improve the page speed.
Compressing Images: Compressing images can reduce the file size without sacrificing image quality. This can also help improve page speed.
Using the Right Image Format: Different image formats have different compression levels and support different features. Choosing the right format can help optimize images.
Naming Images Properly: Properly naming images can improve search engine optimization (SEO) and make it easier for customers to understand what the image is about.
Adding Alt Text to Images: Alt text provides a textual description of an image for visually impaired customers and for search engines. Adding alt text to images can improve accessibility and SEO.
Utilizing Lazy Loading: Lazy loading is a technique that delays the loading of images until the customer scrolls to them. This can improve page speed and reduce data usage for customers.
Conclusion:
In conclusion, optimizing images on a Shopify store is essential for improving page speed and enhancing customer experience. By following the best practices outlined in this guide, Shopify store owners can optimize their images and improve the success of their online store. If you are not confident, buy my Shopify Speed Optimization service.
Shopify Liquid code is a powerful tool for e-commerce businesses, allowing for customizations and modifications to the website’s design and functionality. However, without proper optimization, this code can slow down the website, causing frustration for both the business and its customers. In this article, we will explore the importance of Shopify Liquid code optimization and provide tips and techniques to improve website speed and functionality.
The Importance of Shopify Liquid Code Optimization
When it comes to e-commerce, website speed and functionality are crucial. Slow loading times can lead to increased bounce rates and lost sales, while clunky functionality can lead to customer frustration and a poor user experience. Optimizing Shopify Liquid code can help to mitigate these issues and provide a smoother, faster e-commerce experience.
Techniques for Shopify Liquid Code Optimization
Minimize the use of Liquid tags: While Liquid tags are powerful, they can slow down the website if used excessively. Try to minimize the use of Liquid tags and instead opt for plain HTML and CSS whenever possible.
Minimize HTTP requests: Every time a user visits a page, their browser makes an HTTP request to the server. Minimizing these requests can help to speed up the website. This can be achieved by using CSS sprites, combining multiple CSS and JavaScript files into one, and using a content delivery network (CDN).
Use liquid variables judiciously: Liquid variables are great for storing data, but they can slow down the website if used excessively. Try to use liquid variables judiciously and cache frequently used data.
Optimize images: Large, high-quality images can slow down the website, so it is important to optimize them for the web. This can be achieved by compressing images, using appropriate image formats (such as JPEG for photographs and PNG for graphics), and resizing images to an appropriate size.
Use Liquid filters carefully: Liquid filters are powerful, but they can slow down the website if used excessively. Try to use filters carefully and cache frequently used data.
FAQ’S
Q: How do I know if my Shopify Liquid code needs optimization?
A: You can check the speed and functionality of your website using tools such as Google PageSpeed Insights, GTmetrix, and Pingdom. These tools will provide you with detailed information on areas where your code can be optimized.
Q: Is Shopify Liquid code optimization a one-time process?
A: No, Shopify Liquid code optimization is an ongoing process. As your business and website grow, it is important to continue to monitor and optimize your code to ensure the best possible user experience.
Q: Can I optimize my Shopify Liquid code myself?
A: Yes, you can optimize your Shopify Liquid code yourself with the help of online resources and tutorials. However, if you are not familiar with HTML, CSS, and JavaScript, it may be best to hire a professional to help with the optimization process.
Conclusion
In conclusion, Shopify Liquid code optimization is an essential for a faster and smoother e-commerce experience. By following the tips and techniques outlined in this article, you can ensure that your website is running at its best, providing your customers with a seamless and enjoyable online shopping experience. Remember, the key to a successful e-commerce website is a fast and functional user experience and Shopify.
Your Shopify store’s speed is one of the most crucial factors for success. Your search engine rankings will suffer, customers will leave your website, and your revenues will ultimately decline. Fortunately, there are a few actions you can take to optimize the speed of your Shopify store and make sure that every visitor is able to access your website promptly.
Why Shopify Speed Is Important?
Website performance is more crucial than ever in the current, fast-paced digital environment. Here are a few examples of why having a quick website is crucial:
User Experience: A sluggish website can irritate users and turn them away, costing the business lost sales and a damaged reputation. Search Engine Rankings: Search engines like Google prioritize websites that load quickly, and a slow website will hurt your search engine visibility and rankings. Mobile optimization: With so many people using mobile devices to access the internet, having a fast website that loads quickly on all platforms is crucial. The Effects of Big Pictures and Videos Large graphics and videos are among the main causes of sluggish website performance.
Here are some pointers for media file optimization:
Utilize a program like TinyPNG to compress photos without compromising quality. Resize your photographs to ensure that they are of the proper scale in terms of both file size and dimensions. Use a video hosting service: Instead of submitting videos to your Shopify store directly, think about using a service like YouTube or Vimeo. Utilizing Shopify’s Built-In Features for Speed Optimization There are several speed optimization tools included within Shopify that can help you boost the efficiency of your website. Some of the most significant ones are listed below:
Shopify CDN: Shopify’s content delivery network (CDN) can assist in more swiftly and effectively distributing the content of your website to visitors all around the world. By only loading photos when they are required, Shopify’s lazy loading functionality helps speed up your website. Shopify automatically minifies the code of your website to minimize page size and speed up loading. The Value of a Quick Server The hosting server for your website can have a big impact on how quickly it loads. When selecting a hosting company, seek a server that is dependable and swift to ensure that your website loads immediately for every visitor.
Conclusion By adhering to these recommendations for Shopify speed optimization, you may optimize user experience, increase website performance, and ultimately increase sales and revenue. These suggestions might assist you in creating the quick and efficient website that your customers need, regardless of whether you’re just getting started with your Shopify business or looking to improve an existing one.
These are the ten steps to starting an online business from the ground up without having prior experience.
How do you start an online business from home and with no money? Is this even possible?
The short answer is yes. Thousands of successful online businesses started with no money and today they are making thousands of dollars in revenue.
In fact, many of them have no physical presence but are operated from home with remote teams.
To start an online business you don’t need to have prior knowledge on how to run a business. Running an online business is different than managing a brick-and-mortar store.
Over the years I’ve had successes and failures but most importantly I created a framework that beginners can follow and increase their chances of establishing a successful online business on the first go.
In this complete guide, I’m going to give you the steps to follow to start a business online from scratch and from the comfort of your own home.
While it’s impossible to start a business for free, you don’t have to pay a fortune to get a business off the ground, and I’ll give you all the details.
Since you’re convinced that you want to become an online entrepreneur and start making money online (hence why you are reading this article now), I’ve added the actionable steps first but towards the end of this guide, you can learn more about how online businesses work and other useful information.
The first thing to decide is what kind of online business to start. As you’ll see below there are many options and depending on the type you choose, you’ll have different ways to monetize your business and make money.
Websites selling digital products (ebooks, online courses, etc)
Consulting / Coaching (Personal development coach, fitness coach, etc)
Selling Services (digital marketing agencies, software development, web design, etc)
(Saas) Software as a Service (online tools, subscription-based model)
Online News Publications (HuffPost, etc)
Niche Blogs (travel blogs, clothing and fashion blogs, etc)
The most popular methods of making money from your online business are:
Selling your own products (physical or digital) – Selling products directly to consumers on your own hosted website or through an online store on a third-party marketplace like eBay, Amazon, Etsy, Udemy, Flippa, etc.
Advertising Revenue – Making money by selling ad space on your website either directly to advertisers or through an online platform like Google AdSense.
Drop-Shipping – Selling physical products on your own store but shipping and handling is done by the product manufacturer or B2B provider. You get a commission every time a product is sold.
Affiliate marketing – You refer clients to the seller’s website (for either physical or digital products) and when a product is sold, you get a commission.
Revenue from consulting services – You get paid for providing consulting services online (by email, skype or other means).
Subscription-based model – You make money from people subscribing to your monthly services (for example hosting, online tools, etc)
2. Find your niche
Now that you have an idea of the different types of online businesses, the next step is to find your niche. In other words, to come up with an idea that can be transformed into an online business.
From experience, this is the most difficult step because it has a lot of uncertainty. Nobody can tell you in advance if your idea is good or not and no one can guarantee that your business will succeed or fail.
It’s a risk that all business owners have to take but this should not hold you back. The only way to find out if your idea is good is to try it and even if you fail, there are so many things to learn from failures that bring you closer to success.
How to find your niche?
How to Find Your Niche
You should understand from the beginning that you don’t have to come up with a unique idea in order to succeed online. If you can do it, then this will give you an advantage but uniqueness is not a requirement for setting up an online business.
You can take an existing idea and improve it or create something (a product, blog, service) that is better from what is already available on the Internet.
Some guidelines to help you out:
Find what are you truly passionate about
Being passionate about a topic, an activity, a hobby or a product, will help you create a good product or great content that others will find valuable and useful.
Take a few moments and think about what you like doing for fun and how would you like to spend your time if money wasn’t an issue.
Find what you are good at
Do you have any skills that you can use to help others accomplish a task, learn something or solve a problem?
Maybe you like teaching people how to fix things or you like to write good stories to educate people on different subjects.
Find what you believe you are really good and think of ways you can utilize your skills to create a product that people will be willing to pay money to get it.
Are you an expert?
Is there an area that you have the right training, qualifications, and experience to be considered an expert? This is a great candidate to explore further and find out if you can build a business around it.
The Internet is full of ‘so-called experts’ so if you are a ‘true expert’ on a topic, you will have an advantage over others.
Can you spot any gaps in the marketplace?
Are you looking for a solution to a problem and cannot find a good product or online resource to solve your problem? Can you spot any gaps in any industry that you can fill with a new product? Do you find that online content about a topic is incomplete or something that you can improve?
All these questions will help you generate ideas that can possibly help you find the one idea to turn into an online business. Before, getting too excited, the next step is to evaluate your ideas and decide if it’s good or not.
3. Evaluate your idea
Evaluating an idea means finding out if a particular idea is something that you can turn into an online business that will potentially generate profit.
Follow the steps below to evaluate the potential business success of your idea:
Do a thorough Google search
Naturally, the first thing to do is go to Google and search for keywords related to your idea.
Don’t just type in keywords that are directly related to your niche but search for broad terms and terms that are indirectly related.
Your goal at this stage is to find out what is already available in terms of websites, content, and products.
How many websites can you find on the specific topics, what type of content do they have, do they sell their own products or do they display ads?
Go beyond the first page of Google and look for the second page as well. Some businesses don’t pay the required attention to SEO and while they have good products and content, their search engine optimization techniques are not good enough to rank high on Google.
How would you rate the overall user experience when searching for this information? Can you offer something better to the users?
Search Facebook, YouTube, Instagram, Pinterest
Perform the same search on Facebook, Youtube, Instagram, and Pinterest. Try to figure out what kind of content is being published on those networks. Is it high-quality videos, is it images, articles, products? How many interactions (likes, comments) do the posts get?
Can you spot something that is missing or that it can be improved?
Perform keyword research
Evaluate your Business Ideas with Keyword Research
The term keyword research might be unknown to you at this stage but it’s an important step to find out if there is a search demand for your idea.
Through keyword research, you can find out how many people search for particular keywords on Google (and other search engines) per month.
If your chosen topic doesn’t have a decent amount of search volume, then this is a sign that people have no interest in.
Use the resources below to find out how to perform keyword research step by step.
Get to know important Google rules
Another thing to know is that for some topics Google has strict rules on what websites they show in the search results.
This can have a big impact on the success or failure of your online business because organic traffic is by far the most important form of traffic you can get and without it, your chances of online success are minimal.
For example, if your idea is around health-related topics and this includes weight loss, fitness, nutrition, exercise and any other advice or product that is generally suggested by doctors or other certified professionals, you might want to reconsider it.
Unless you are a certified and recognized doctor, Google will not show your website or products for health-related searches.
So before you continue is good to revise the most important Google rules and make sure that what you have in mind is not against any known Google guidelines or rules.
RESOURCES TO LEARN MORE ABOUT GOOGLE GUIDELINES Google Search Rates Guidelines – A comprehensive document that explains in detail what Google looks for when assessing the quality of a website.
Do a search on Amazon
Performing keyword research on Amazon
If you are considering opening up an online store selling physical products, then you need to search on Amazon and see what others are selling.
Use different keywords to search for products and also look at amazon’s best sellers to get an idea of the popular products per category.
Do a search on popular marketplaces
There are many popular marketplaces you can use to find out what products are being sold online.
Udemy – if you’re thinking of creating an online course you can search Udemy to find out how many courses there are on the chosen topic, how many students they have, their comments, ratings, content, etc.
Codecanyon – If you’re thinking of creating a software product, you can search Code Canyon to find if there are similar products and how many sales they have.
Flippa – Flippa is the most popular marketplace for buying and selling new and established online businesses. Browse through the listings and look at the provided information.
Find online business ideas on Flippa
Online businesses that are set for sale have to provide evidence of their sales and traffic and this information can be very useful for you at this stage.
Who knows, maybe you can find a business to buy and grow instead of starting from scratch.
Do an affiliate marketing search
Even if you don’t plan to follow the affiliate marketing model, you can still use the different affiliate marketing sites to find out which products are being sold, their price, the number of providers, and much more useful information.
4. Analyze your potential competitors
Once you evaluate your idea using the above techniques, the next step is to do an analysis of your potential competitors.
A potential competitor is one or two companies that are already selling products or services that are similar to what you want to sell.
For example, let’s say you decided to make an online business selling custom made parrot cages through an online store.
You already evaluated your idea and found out that there is enough demand from users, and that there is room to create a better product.
The next step is to find out more information about your potential competitors. Using different tools you can figure out how much traffic they get, which channels they use to sell their products and how much they spend on online advertising.
You can use the following tools:
SEMRUSH – To find out how much traffic they get and how much they spend on Google advertising.
Do a competitor analysis to find out how much money they spend on ads and other useful info.
SEMRUSH is a paid tool but you can register for an account and get a 7-Day Free Trial.
Facebook Ads Library – You can use the Facebook Ads Library tool to check what kind of campaigns and ads your competitors are running on both Facebook and Instagram.
Find out what types of ads your competitors run on Facebook and Instagram
5. Identify your target audience
The final step before actually setting up an online business is to identify your target audience and create buyer personas.
This step is critical because the outcome of this exercise will determine how you will approach the next steps.
What you are looking for at this stage is answers to the following questions:
Who can potentially visit your website?
Who can potentially buy your products?
What is their gender, age?
Where do they live?
What languages do they speak?
What is their education level?
What is their ethnic background?
Which social networks are the most likely to use?
Who are the online influencers of your target audience?
Which other websites are the most likely to visit?
Which online forums or groups do they use?
Getting straight answers is not always easy at this stage because you don’t have any data of your own, but nevertheless, you should do this exercise before you get started and enhance it as you go along.
Don’t forget that you can use the findings from Step 4 (competitor analysis) to create a first version of who your target audience is.
At a later stage when you set up your website and start getting traffic, it will be easier to answer these questions. You can ask your customers and community directly via surveys or analyze your social media followers using various tools.
BEFORE proceeding to the next step, you should ensure that:
You know your niche and evaluated your idea
There are enough people who are interested in your chosen niche
You made an initial decision on how you will make money from your business i.e. which model will you follow? Is it affiliate marketing, creating your own product? selling physical products?
You created an outline of your target audience and buyer personas
You know the social networks your audience is using
You have a clear idea of who your competitors are and their online marketing practices.
6. Decide on your brand name and register a domain
Once you get to this point, it’s time for the exciting part and is no other than selecting a name for your brand and registering your domain name.
Things to consider when choosing a brand name/domain name:
Find something catchy that people will remember
Keep it as short as possible
Make sure it’s easy to read, type (examples: yahoo.com, x.ai, apple.com)
Add a keyword that’s relevant to your niche (examples: teachable.com, healthline.com)
Don’t use hyphens or numbers — reading it out loud will be a nightmare
You can use different tools to check if a domain name is available but before proceeding, you also need to ensure that:
No other companies are using the same brand name on a different domain – Search for your ‘to be’ brand name of Google and look at the results. If there are other companies using the same brand name that could be a big issue and it’s better to come up with something unique.
Check all social media networks to ensure that the name (handle) is available – you don’t want to register a domain name to find out later that you need to use a different name for your Facebook or Instagram page.
Check that all variations of your domain (i.e. .com, .net, .info, etc) are available – if there is already a company that is using the .com domain, it’s not wise to register a .net domain with the same name. This will confuse both your customers and search engines.
Avoid choosing a country-specific domain – avoid registering a country-specific domain i.e. reliablesoft.co.uk unless you plan to start a local business specific for that region. It is recommended to go with a .com or .net domain.
How to register a domain name for your business
Register a Domain Name for your Business
Once you have found the perfect domain name for your business, the next step is to secure it. To do so you need to create an account with a domain name provider.
The process is very easy, all you have to do is provide your personal details, choose your desired domain name and register it.
To get started visit domain providers to register a domain name with namecheap (or you can choose the domain provider of your choice such as GoDaddy, Inmotion Hosting, etc).
PRO TIP: Make sure that you secure your brand’s reputation by registering all the different domain extensions (.com, .net).
7. Setup a website for your business
The next step is to bring your business to life by setting up your website.
If you plan to set up an eCommerce business selling physical products then you have two choices.
Start an online business using WordPress and WooCommerce.
The first choice is to set up your own self-hosted website and use WordPress and WooCommerce to create your shop and the second choice is to use a website builder like Shopify or BigCommerce.
The second choice is faster but as your business grows you will need more flexibility and customization options so it is highly recommended to start with your own WordPress / WooCommerce website.
For other types of businesses i.e niche blogs, websites selling services or digital products (like this one), Amazon affiliate websites, the best solution is to use WordPress.
WordPress is flexible and user-friendly and there are a plethora of read-made themes you can buy for less than $100 and set up a professional-looking website in minutes.
I highly recommend checking out Studio Press Themes. They have great themes that are also optimized for Search engines, something that can prove very valuable as your website grows. I use a studio press theme on this website and on many client websites.
RESOURCES TO LEARN MORE ABOUT WEBSITE SETUP How to make a website – a comprehensive guide on how to set up a WordPress website for beginners.
8. Learn what digital marketing is all about
Coming up with an idea, registering a domain name and setting up a website is one thing, promoting your business online to get traffic and make sales, it’s a totally different story.
This is where digital marketing comes to the rescue. In short, digital marketing is the process to follow to promote your business online using all available digital channels.
The most important digital marketing components are:
Website Marketing
Search Engine Marketing
Social Media Marketing
Email Marketing
Content Marketing
Video Marketing
Why is it important to have a good understanding of digital marketing?
There are two reasons why it’s important to understand what digital marketing is all about.
First, you’ll get to know how to get traffic, customers and grow your business.
Second, even if you decide to outsource some of the activities to digital marketing agencies or freelancers, you’ll know what to ask from them, how to monitor their performance, and what to expect in terms of results.
You don’t have to become a digital marketing specialist but as the CEO you need to have some basic knowledge of what digital marketing is and how it works.
9. Create a digital marketing plan
Now that you have a better idea of what digital marketing is all about, the next step is to come up with a plan.
At this stage, you don’t have to make your plan very detailed but it’s enough to outline which digital marketing channels you will use and in what order.
Some tips to help you out:
Start with Paid Ads
Paid advertising channels like Google Ads, Bing Ads, Facebook Ads, and Instagram Ads work faster than any other channel.
Getting targeted traffic from these channels is immediate but you have to pay every time someone sees (pay per view) or someone clicks (pay per click), on one of your ads.
For these channels to be profitable, you need to sell products that have a high-profit margin and optimize your paid campaigns to keep the customer acquisition costs as low as possible.
The best way to find out if you can make money by selling products or services through ads is to run pilot campaigns and analyze the results.
As a general rule of thumb, increase your ad spending as long as you make a profit from your campaigns. If you find that you’re spending more than what you can make in profit, then consider using other more-cost effective channels to find customers.
Test one channel at a time
Don’t rush into creating campaigns on all channels at once. This is not a good practice even for experienced marketers.
Start with Google Ads and then gradually add Facebook, Bing, YouTube, and Instagram to the mix.
Build brand awareness
One of your digital marketing goals should be to build brand awareness. This means spending time and money at the beginning to make your brand known to as many people as possible.
When crafting your promotion plan, you should always remember that building a community around your brand is the best way to guarantee long term success.
Having people that follow your brand on social networks, searching for your brand name on Google and signing up for your newsletter is what will generate constant growth, loyal customers and more sales.
The tools to use for this are Facebook Ads (with the objective of page likes), SEO (more on this below) and email marketing.
10. Optimize your website for Search Engines
Search engine optimization or SEO as it is widely known is by far the most important process to grow an online business.
SEO is suitable for all kinds of websites, all kinds of online businesses, and all platforms.
People use search engines on a daily basis to find answers, products, and ideas and the way to increase the visibility of a website on search engines is through SEO.
SEO will help you get more targeted traffic that will lead to more sales, build a community around your brand and establish your business as one of the leaders in your niche.
SEO is not complicated but it takes time. It may take months to a year for a new website to show up on the top positions of Google but it’s something that you need to do if you want not to be dependent on paid traffic.
The best way to get started with SEO is to follow a step-by-step approach. As you can see below, SEO has three main types: Technical SEO, On-Page SEO, and Off-Page SEO.
Types of SEO
Each component is responsible for optimizing certain aspects of your site but for maximum results, you need to work on all three.
As I frequently explain to clients, SEO is about optimizing a lot of small things on a site that together can make a big difference in organic search and traffic.
11. Create a content marketing plan and start publishing content
Content Marketing Strategy Plan
Take a moment and consider these two questions.
What do all marketing channels have in common? They all need content to run.
What do users want when using the Internet? Content to satisfy their needs.
Content can by anything from product information pages, blogs, news, gossip, how-to guides, ad copy, video, podcasts, images, infographics or pdfs.
How do you know what type of content to create to satisfy the needs of the users on any channel? The answer is through content marketing.
Content marketing is about fueling your marketing campaigns with the right type of content. It’s not a standalone channel but it’s a helper process for all other channels.
For example, when you start working on your SEO, you’ll reach a point that your website is fully optimized for search engines.
This means that you provide the right signals to search engine crawlers to help them understand what your website is all about.
So far so good but unless you have a publishing calendar to provide your users and search engines with new content, your rankings will not increase. On the contrary over time, they will decline and your traffic will drop.
It’s a tough process to follow but this is how online marketing works. It’s a continuous race to constantly produce high-quality content to differentiate your business from competitors and win both users and search engines trust.
To make sure that you’ll not lose track of what you have to do, you need to create a content marketing plan.
This can be part of your overall digital marketing plan and should include what type of content to create for each channel, when to publish it and how to measure the results.
It doesn’t have to be something complicated, an excel sheet with dates is enough to get started. What is more important at this stage is to start publishing content on a regular basis and not get stuck in planning.
In fact, from experience, this is one of the most common reasons many startups fail. They either fail to execute their plan or underestimate the cost and effort needed to provide high-quality content for all their marketing needs.
To learn more about content marketing I strongly recommend following a course (there are some great FREE courses in the list below) so as to get an idea of how to create a content marketing plan and how to correctly estimate the time and cost to run content marketing.
12. Establish your social media presence
There are many ways to utilize social media networks to grow your online business.
My recommendation is to follow these steps:
Secure your presence on ALL available social networks – You need to do this from the beginning to ensure that no other company will register your brand handle. So, make sure that you create business pages on all available networks and not just the ones you plan to use.
The most popular today are Facebook, Twitter, Instagram, Pinterest, LinkedIn, TikTok, YouTube, Vimeo, Snapchat.
Update your business information on all social networks – Besides registering on all networks, you also need to make sure that your business information is accurate and up-to-date.
For branding purposes, use the same logo and background image (cover image) on all networks. Make sure that both the logo and images are representative of your brand.
Facebook Popular Content Types
Keep your social media pages fresh – Adding fresh content to your pages is important because it is very likely that potential customers will check your FB page before making a purchase.
Having empty pages or pages with outdated content is a sign of abandonment and this is not good for establishing user trust.
In addition, when you update your social media pages regularly they will show up on the first page of Google when users search for your brand name. This is very important because you can control what users will read when doing a brand search.
There are tools like buffer, HubSpot, and others you can use to schedule your social media posts and create a social media calendar.
Use paid ads to get more followers and show your ads to potential customers – As mentioned above, one of the best ways to raise brand awareness and start making product sales is through Facebook paid ads.
You can initially use FB ads to grow your following and then run targeted campaigns to show your ads to people that match the profile of your target customer (as identified in step 5 above).
13. Grow your email list
Despite the rise of social media networks in the last decade, one of the most effective sales channels is still email.
A lot of online businesses make millions of sales per year on email alone and it’s one channel you definitely need to utilize.
Email marketing is a must for any type of online business.
Through email marketing, you get a chance to communicate, educate and inform your audience and this helps in creating a community around your brand that will eventually translate to more sales.
One of the most challenging parts of email marketing is to get people to sign-up on your email list.
People will not just sign up to your list to get another email from you unless you can provide value to them.
The best ways to grow your email list are:
Offer users an incentive to sign up – great options that worked well for us are free ebooks. Tens of people sign up to your newsletter to get our free guides.
Place the sign-up boxes above the fold and in visible places – Make sure that all your visitors can see your email sign-up boxes as soon as they visit your site on both desktop and mobile.
Use exit popups – An exit popup is shown when users try to leave your website. It does not impact their experience while browsing your site and they are very effective when it comes to email list building.
14. Optimize your website for conversions
A/B Testing Principles
One of the most common reasons many online businesses fail is the lack of conversion optimization.
Conversion optimization is the process of increasing your conversion rates without increasing your traffic. In business terms, this means lowering your customer acquisition costs.
Consider this example:
Company A spends $20 for 10 visits. Out of the 10 visits, 2 people buy a product for $40. The cost of getting a customer is $10 and the total revenue is $80.
Company B spends $20 for 10 visits. Because of conversion optimization, out of the 10 visits, 5 people buy a product for $40. The cost of getting a customer is $4 and the total revenue is $200.
With the same amount of visits, company B makes 3.5 times the profit. This is how powerful conversion optimization is but unfortunately, most business owners ignore it.
They only concentrate on increasing traffic to a website rather than increasing conversions and this is a HUGE mistake.
How does conversion optimization work?
There is no magic formula to follow and increase your conversion rates. Each website is different and there are a lot of factors that affect conversions like the price of a product, the type of product, the quality of the product, the reputation of the vendor and many others.
This is where A/B testing comes to the rescue. With A/B testing you change parts of your website and measure the effect on your traffic and conversions.
It’s not an easy task to do, you have to be careful to test the right things and measure them correctly but it’s definitely the way to go.
You can use the resources below to learn more about A/B testing and conversion optimization but in general, the most common areas to focus and optimize are:
Landing pages
Product pages
Cart and Checkout pages
Website Main menu
Website mobile pages
15. Get professional help
You cannot grow an online business alone. Even if you become an expert on entrepreneurship and digital marketing, at some time as your company grows, you’ll need the help of a dedicated team.
Depending on the size of your company and budget, you have different options:
Hire freelancers – You can find freelancers for any kind of online work on websites like UpWork, Pay Per Hour to help you with specific tasks.
Hire consultants – You can hire experienced consultants to help you create a strategy so that every activity you do is working towards your overall goal. You can then decide to implement the plan yourself or hire freelancers to help you.
Hire a digital marketing agency – a full-service digital marketing agency (like ours), can offer you all the services you need. From strategic planning to implementation so that you don’t have to worry about hiring different people and managing the different processes.
The cost of outsourcing to a freelancer or agency can vary from a few dollars per hour to hundreds of dollars per hour but what is more important is to find the right people that can deliver measurable results and not promises.
Is an online business for you?
Now that you know what it takes to start and promote an online business, you can safely decide if running an internet business is for you or not.
Some additional pointers to help you make up your mind:
Running an online business means spending the majority of your time in front of a computer monitor.
For some people, this is fun but for others is overwhelming. If you cannot stay put for a long time and prefer to work outdoors then this is not the right business for you.
Running an online business from home is a lonely business. While it is great to run your own business from the comfort of your own home, it’s not for everyone.
Skype sessions and virtual meetings don’t replace ‘real’ inter-personal communications so if you are the person that needs to talk and network with people face-to-face, the online business model may not be the best solution for you.
Competition is more than you can imagine. Anyone can start an online business. In real numbers, this translates to billions of people around the globe.
Of course, not everyone will do it for business purposes but it’s a fact that there are around 2 billion websites on the Internet today and around 3 million are eCommerce websites.
You won’t have to compete with all of them but for sure, you’ll not be alone in your niche.
Nevertheless, running your own business is a great experience and if you do things correctly and in order, there is nothing stopping you from running a profitable online business.
How much does it cost to start an online business?
The cost to start an online business can be from a few dollars to hundreds of thousands of dollars. It depends on the type of business you want to start.
Let me give you some examples:
Cost of registering a domain name for your business – $15 per year (some hosting providers give this for free).
Cost of setting up a WordPress blog – It can be as low as $2.75 per month including domain registration.
Cost of a professional WordPress theme – around $100 to get a professional and optimized theme.
Cost of setting up a self-hosted eCommerce business (WordPress and WooCommerce) – You can get a theme for $100 or a custom-made website ($2000-$10000 depending on requirements and functionality).
Cost of setting up a self-hosted eCommerce business (Shopify) – $29 – $299 per month (depending on the size of your store).
So, while you cannot start an online business with no money, the initial cost is affordable for everyone.
How much money can you make online?
The short answer is from zero to millions of dollars per year. It depends on the type of business, business model, products, profitability, and many other factors.
Yoast makes money by selling WordPress Plugins and online courses.
Syed Balkhi makes millions of dollars per year through his SaaS companies.
Patt Flynn makes money through affiliate marketing and online courses
A lot of my clients make money by selling physical products through eCommerce Stores.
The possibilities to make money with an online business are endless.
Key Learnings
Starting an online business is not impossible, even if you know nothing about businesses and entrepreneurship.
You don’t need a college or university degree but you have to be willing to work hard to learn how to become an online entrepreneur.
The ‘recipe’ is the same of all kinds of businesses:
Come up with an idea
Evaluate your idea
Decide how you will make money
Setup a website
Promote your website to get traffic and clients
For each step, there are many things to do to minimize your risks but nobody can tell you in advance if your idea will work or not.
Rather than spending your time wondering, it’s better to get your hands dirty and start testing your ideas.
Maybe you won’t succeed the first time, that’s fine. Most people fail with their first websites but those who win are those that try again.
It took me a couple of years to make my first dollar from online activities but fortunately for you, you can follow the plan outlined in this guide and start a successful online business on your first try!
Google AdSense allows bloggers and marketers to earn revenue by placing ads on their sites.
If you want to make more money, identifying niches and keywords that offer the most significant payouts is an excellent place to start.
You must be looking to monetize your website with AdSense, you’ll want to choose a niche that can generate high click-through rates and bring in substantial revenue. Here are some of the best niches for AdSense that can help you maximize your earnings.
Now here’s the deal:
With AdSense arbitrage, you can drive paid traffic to your site and get ad clicks from site visitors. Since you are sharing revenue with Google for clicks on your ads, you can buy traffic at a lower cost and remain profitable.
In this article, we will review some of the best niches and keywords that will help you rake in more revenue from ads.
Best Niches For AdSense Arbitrage
1. Insurance
Insurance tops the list as the most profitable niche for AdSense. Companies and agents operating in the insurance industry will most likely pay more money for ads and this is because they can generate a massive return on investment (ROI) for each ad click that translates into a sale.
Bloggers and websites can take advantage of content opportunities in the insurance industry. They can discuss topics such as
Health insurance
Automobile insurance
Life insurance
Travel insurance
Pet insurance
Home insurance and more
The competition for blogs and websites in the insurance niche is more intense. However, with quality articles, SEO practices, and relevant keywords, you can
Boost your page rankings
Drive a vast amount of quality traffic to your site
Ultimately enjoy higher revenue from Ads that are served to your website
Average CPC / PPC Costs for Insurance
Cost per click refers to the amount of money that advertisers in that niche are willing to pay for ads. It is also the amount of money that website owners earn each time a visitor clicks an advertisement on their site.
For insurance ads, the average cost per click may differ based on the country and location.
Based on data from WordStream, the average cost per click (CPC) for car insurance in the US is $67.39. Other insurance CPCs for the US include
Homeowners insurance – $68.70
Health insurance – $22.33
Life insurance – $41.99
The insurance industry also leads AdSense arbitrage in other regions, including the UK, Australia, and Canada.
In the UK, the average CPC cost for
Public liability insurance is $40.94
Life insurance is $50.20
Landlord insurance stands at $20.52
Car insurance is $9.34
In Australia, the average CPCs for these keywords are
Health insurance, $42.33
Life insurance, $74.28
Car insurance, $17.17
House insurance, $20.00
Canada has a similar experience. The average CPCs are
Home insurance, $31.80
Car insurance, $37.37
Liability insurance, $14.91
High Paying Keywords for Insurance
The best-paying keywords in the insurance niche involve a healthy mix of keywords with
Keywords with high CPC
Keywords with high search volumes
Bloggers should consider including a blend of these keyword categories in their blog posts.
Let us take a look at some of the expensive insurance-related keywords in the US.
Geico insurance has a CPC of $52.82
Instant auto insurance quote has a CPC of $89.27
Get auto insurance online has a CPC of $90.02
Purchase auto insurance online earns a CPC of $91.75
Auto insurance quotes online has a CPC of $82.37
Some of the most popular insurance-related keywords in the US include
Farmers Insurance with monthly search volumes of 450,000
Farm insurance with a monthly search volume of 450,000
Car insurance earns 368,000 searches every month
Travel insurance has a monthly search of 368,000
2. Online Education
Online education is another niche with high-profit potential for AdSense arbitrage.
In the past few years, online education and digital learning have witnessed massive adoption and growth. Statistics show that the e-learning market will hit over $2.6 billion by 2023 in the Latin American industry.
Students and professionals are taking advantage of the opportunity to acquire skills and qualifications. More so, there are a lot of online learning platforms offering free and paid online courses including
Udemy
Coursera
Harvard online
edX
Alison
Skillshare
LinkedIn Learning (formerly known as Lynda)
Some of these platforms pay more money to place ads on publisher sites in specific locations. Website owners can latch onto the opportunities that exist in this niche. They can write about topics related to
Free online courses
Paid online courses
Online bachelor’s and master’s degrees
E-learning programs for corporate organizations
Online college programs
They can even drill down and focus on specific subjects including
Business and entrepreneurship
Cybersecurity
Digital Marketing
Machine learning
Artificial intelligence
Arts and Crafts, and more
Average CPC / PPC Costs for Online Education
Again, data from SEMRush shows that the average CPC for the online education niche is $16.06.
High Paying Keywords for Online Education
Some of the top-paying keywords in this industry include
Online classes with a CPC of $113.30
Associate degrees online with a CPC of $46.92
Online colleges with a CPC $92.37
Online school with a CPC of $48.65
Best online colleges with a CPC of $39.95
The popular keywords in this niche include
Udemy with a monthly search volume of 550,000
College- search volume of 368,000 every month
Coursera – monthly search volume of 246,000 every month
Pluralsight – 165,000 searches every month
Training – 110,000 searches monthly
3. Marketing & Advertising
Marketing is a core aspect of any business and websites with marketing and advertising content enjoy massive readership from visitors. More so, they enjoy high revenue payouts from AdSense. These blogs provide insight into marketing strategies that can help businesses grow.
They explore topics such as
Digital Marketing
Search Engine Optimization (SEO)
Social media marketing
Email marketing
Google AdWords
Search engine marketing (SEM)
Launching a product
Traditional advertising
Advertising and public relations (PR)
Brand management
Market research
Average CPC / PPC Costs for Marketing and Advertising
In the marketing and advertising niche, the average PPC cost in the US is $8.45. In the UK, the average PPC cost is $6.50. Australia’s average CPC costs for marketing and advertising is $4.12. Canada has an average CPC cost of $3.54 for this niche.
High Paying Keywords for Marketing and Advertising
In the US, email marketing tools top the list for the highest paying keywords with a CPC of $61.81. Ecommerce SEO has a CPC of $38.55. Local internet advertising has a CPC of $40.64. The CPC for Internet marketing company stands at $27.98. SEO consulting services have a CPC of $22.42.
PR and SEO lead the pack of keywords with the highest search volume in this niche. They have monthly search volumes of 135,000. Logo design has a search volume of 110,000 per month, while advertisement has a search volume of 90,500 per month. Also, marketing has a monthly search volume of 90,500.
4. Legal
The legal niche is another goldmine for AdSense arbitrage. Legal services are essential for businesses and individuals. Whether you want to register a new business, write a will, sell a property, or resolve conflicts, you need legal advice.
Consulting and legal services offered by law firms and attorneys do not come cheap. Lawyers and attorneys pay more for ads, thereby making it one of the top-paying AdSense niches.
Legal bloggers can focus on quality posts that offer legal advice. They can explore topics such as
Advice on specific law practice areas such as business law, injury or insurance law, divorce, and child support
Step by step guides explaining what individuals should do when they have legal issues
Recent changes in legislation and legal processes
Commentary and breakdown of trending and high profile legal cases
Technological advancements in the legal industry
Advice to lawyers fresh out of law school
Upcoming legal events and more
Average CPC / PPC Costs for Legal
From the SEMRush data, the average CPC cost for the legal niche in the US is $8.68. Canada has an average CPC cost of $4.25.
Australia has an average CPC of $2.19 while the UK PPC cost stands at $1.98.
High Paying Keywords for Legal
Based on data for Moz keyword research tool, we will highlight some of the high paying keywords available for this niche.
Traductor (Legal translator) has a monthly search volume of 4,441,481 searches
Attorney – monthly search volume of 84,997 searches
Lawyer – monthly search volume of 72,682
Judge – search volume of 46,180 per month.
Barrister has a monthly search volume of 30,313 searches
Prosecutor has a monthly search volume of 30,455 searches.
5. Internet and Telecoms
The internet and telecom niche is broad and covers a wide range of topics including
Wireless technology
Mobile technology
Artificial intelligence
Machine learning
Cybersecurity
Virtual reality
Chatbots
Automation
Big data and more
Technology is evolving at a swift pace. More so, it has changed the way we live and interact with people.
Every day, there are amazing discoveries, products, apps, and tech solutions. And while some new startups are emerging, some companies are folding up.
The competition in the tech space is fierce. Companies are ready to make massive investments in ads. So this represents a lucrative niche for AdSense arbitrage.
Some of the ideas for bloggers in this space include
Tech news and predictions
Disruptions in the tech space.
Software and technology review
Gadget reviews
Software usage tips and troubleshooting
Computer and mobile repairs
Average CPC / PPC Costs for Internet and Telecoms
According to the SEMRush CPC Map tool, the average CPC for this niche is $5.80 in the US. In the UK, the average CPC is $6.25.
High Paying Keywords for Internet and Telecoms
The top-paying keywords under this niche in the UK include
Internet security firewall with a CPC of $155.13
Network firewall security with a CPC of $98.93
Firewall security – CPC of $81.13
Three mobile broadband – CPC of $37.48
Let’s take a look at the search volume for keywords in this niche.
Mobile phones have 90,500 searches every month
Internet earns 74,000 searches every month
Data protection act has a monthly search volume of 33,100
Big data has a monthly search volume of 27,100 and
Cyber Security has a monthly search volume of 22,200
6. Online Banking
The wave of technology and innovation is impacting financial institutions. Banks are investing more money in online and digital banking solutions. Customers are now banking and managing their finances from the comfort of their sofa.
They can pay bills, transfer funds, and manage transactions on their devices. While banks are closing in on the opportunities in the digital payment space, fintech companies are also enjoying a fair share of the market.
The competition in the online banking space makes it a viable niche for AdSense arbitrage.
Some of the ideas for bloggers in this space include
Online banking strategies and investment
The future of digital payments
Online payment solutions
Innovations in the online banking sector
Digital banking trends in the year 2020
The role of ATMs in the digital banking era
Online banking and its role in personal financial management
Tips for safe and secure online banking
Role of digital payments in driving business growth and more
Average CPC / PPC Costs for Online Banking
According to SEMRush data, the average CPC for the online banking niche in the US is $8.86. In Australia, the PPC cost is $6.24. The UK has a PPC cost of $3.57 while Canada has $4.25.
High Paying Keywords for Online Banking
Moz Keyword Explorer reveals the online banking-related keywords with the highest search volumes in the US. They include:
Paypal login – 1,324,668 searches
Paypal – 14,568,435 searches
Google Wallet – 192,440 searches
Online banking – 191,674 searches
Apple Pay – 196,855 searches
7. Cryptocurrency
Cryptocurrency has become a hot topic over the past few years. While many countries have become advocates of cryptocurrency, some are gradually monitoring the trend. The top cryptocurrencies include
Bitcoin Ethereum
XRP
Bitcoin Cash
Tether
Litecoin
EOS
Binance Coin
Bitcoin SV
Stellar
According to Blockchain.com, Bitcoin had an average of 250,000 daily transactions in April 2022. More so, the bitcoin market capitalization reached $600 billion dollars in June 2021.
Although this niche is still in its infancy, the future looks promising. Many cryptocurrency investments and trading firms invest in ads to promote trade.
Therefore, this niche represents an untapped potential for AdSense arbitrageurs.
Furthermore, bloggers can explore hot topics like
Investing in cryptocurrency: Risk and returns
Top cryptocurrency exchanges in 2020
The future of blockchain technology
The role of blockchain technology in education and business
Implementing blockchain banking in banks and other financial institutions
Cryptocurrency and taxation
How to make smart investments in cryptocurrency
Average CPC / PPC Costs for Cryptocurrency
The cryptocurrency niche looks promising in Australia, with an average CPC cost of $7.15. In the US, the average CPC is $7.27, while the UK has an average CPC cost of $5.37.
High Paying Keywords for Cryptocurrency
In Australia, some of the most expensive keywords for this niche include
How to buy cryptocurrency in Australia – CPC cost of $50.51
AUD bitcoin exchange – CPC cost of $ 37.22
Cheapest bitcoin exchange – CPC cost of $34
Kraken exchange – CPC costs of $32.13
Cryptocurrency trading sites with a CPC cost of $31.49
The most popular keywords include
Bitcoin price – 201,000 monthly searches
Bitcoin – 135,000 searches every month
coinmarketcap- 74,000 searches every month
BTC markets – monthly search volume of 74000
BTC – 49,500 searches every month
According to Moz Keyword Explorer, the monthly search volume for “bitcoin price” is 1,008,880.
8. Home and Garden
Home and Garden is one of the most significant niches for AdSense arbitrage. Just as the saying goes, “The home is where the heart is.” Home improvements make lives easier, better, and increase feelings of peace and security.
This niche covers everything including
Home decor and design
Garden supplies
Kitchen and dining
Pet products
Furniture and fixtures
Gardening and landscaping and more
Retail giants like Amazon, eBay, Walmart, and Ikea are cashing in on the opportunities in that space. Websites focusing on this niche can enjoy massive payouts from AdSense arbitrage.
They can focus on topics such as
Home improvement ideas in 2022
Popular house styles
DIY home improvement tips
Things you should look out for when buying a home
Home automation ideas, and more
Average CPC / PPC Costs for Home and Garden
SEMRush reveals that the home and garden niche in the US has an average CPC of $4.29. Canada enjoys an average CPC of $3.18.
High Paying Keywords for Home and Garden
Based on data from Moz keyword research tool, the popular keywords related to this niche include
Home – monthly search volume of 1,027,380
Home improvement – 175,759 searches every month
Landscaping – monthly search volume of 101,332
Garden – monthly search volume of 76,660
Home improvement loans – 21,776 searches every month
House remodeling – 7,008 monthly searches.
9. Automobile Dealership
The automobile industry is one of the world’s largest and wealthiest sectors of the global economy. Statistics reveal that the industry will hit $9 trillion by 2030.
Major players in the industry include companies involved in the design, manufacturing, and selling of cars. Also, after-sales support and part manufacturers are key success drivers in the industry.
Furthermore, automobile dealerships are the connecting piece between manufacturers and car buyers. They sell new and used vehicles to meet customer needs. Dealerships enjoy profits from sales and after-sales services.
Although very few sales happen online, online ads can drive offline conversions.
Car companies invest lots of money on advertisements. Therefore, this niche is profitable for AdSense arbitrage.
Hot blog topics in this niche include
Feature by feature comparison of cars
Car upgrades by year added features and benefits
Vehicle repairs and maintenance tips
Car and driving safety tips
Vehicle parts and functions
Car insurance policies
Local driving laws and tax laws
Features to look out for before buying a vehicle
Average CPC / PPC Costs for Automobile Dealership
Again data from SEMRush reveals that the average CPC for automobile dealerships in the US is $4.82. Canada has an average CPC of $3.18.
High Paying Keywords for Automobile Dealership
Moz keyword research tool shows that the top-performing keywords in the US include
Cargurus – 2,671,986 searches every month
Autotrader – 2,494,726 searches every month
Carmax – 1,936,982 searches every month
Carvana – 1,622,052 searches monthly
Car guru – 686,294 searches every month
Used cars – 556,941 searches every month.
10. Fitness and Health
Health and fitness have remained one of the most profitable AdSense niches for many years. Just as the saying goes, “health is wealth.”
Over the years, health experts have stressed the importance of fitness and exercise. It helps individuals maintain good physical, social, and mental well-being. More so, it improves the overall quality of life.
Because humans want to live long, this niche has a huge demand for quality informational articles. Article ideas may include
Tips for maintaining physical fitness and a healthy lifestyle
Weight loss tips for men and women
Benefits of regular physical activity
Tips for healthy eating
Health and fitness guides for gyms and instructors
Early morning workouts and fitness exercises for the elderly
Average CPC / PPC Costs for Fitness and Health
SEMRush reveals that the fitness and wellness niche in the US has an average CPC of $3.61.
High Paying Keywords for Fitness and Health
Based on data from the Moz keyword research tool, the popular keywords in this niche include
How to lose weight – 109,092 searches every month
Exercise bike – 98,360 per month
Fitness – monthly search volume of 81,414
Men’s health – monthly search volume of 51,200
Fitness blender – 46,162 searches every month
Health news – 17,939 monthly searches
Disclaimer: The CPC values enumerated in this post are based on results we acquired from the SEO tools (WordStream, Moz, and SEMRush) during the research for this write-up.
Hence, they are subject to change due to fluctuations in the SEO tools; however, the difference should be minimal.
An introduction to SEO for beginners. Learn what Search Engine Optimization is, how it works and why its a critical process for the success of any website.
Search engine optimization is important for the success of any online business. Every webmaster should understand what is SEO, how it works and the traffic potential it can generate for all website types.
SEO stands for Search engine optimization. It is a set of rules for optimizing your website so that it can achieve higher rankings in search engine’s organic results. It’s the process to follow to increase the visibility of your website in search engines and get more traffic.
SEO has two main goals. The first is to help you understand what users are searching for online so that you can create high-quality content to satisfy their intent. The second is to help you create a website that search engines can find, index, and understand its content.
In addition, following good SEO practices is a great way to increase the quality of a website by making it user-friendly, faster, and easier to navigate.
The most important SEO tasks have to do with:
Identifying what users are searching for that is related to your products and services
Creating content that will make users happy
Providing the right signals to search engine crawlers and algorithms through various SEO techniques
SEO can be considered a complete framework since the whole process has a number of rules (or guidelines), a number of stages, and a set of controls.
Why is SEO important?
In today’s competitive market, SEO marketing is more important than ever.
Search engines serve millions of users per day looking for answers to their questions or for solutions to their problems.
If you have a website, blog, or online store, SEO can help you get free targeted traffic from search engines.
SEO is important because:
The majority of search engine users (more than 70% – see graph below) are more likely to click on one of the top 5 suggestions in the search engine results pages (SERPS). To take advantage of this and gain visitors to your website or customers to your online store, your website needs to appear in one of the top positions.
SEO is not only about search engines but good SEO practices improve the user experience and usability of a website.
Users trust search engines and having a presence in the top positions for the keywords the user is searching, increases the website’s trust.
SEO is good for the social promotion of your website. People who find your website by searching Google or Bing are more likely to promote it on Facebook, Twitter, or other social media channels.
SEO is important for the smooth running of a big website. Websites with more than one author can benefit from SEO in a direct and indirect ways. Their direct benefit is an increase in organic traffic and their indirect benefit is having a common framework (checklists) to use before publishing content on the site.
SEO can put you ahead of the competition. If two websites are selling the same thing, the search engine optimized website is more likely to have more customers and make more sales.
In simpler terms, Search Engine Optimization is a way to improve your website so that it will appear closer to the top positions in the search results of Google, Yahoo, Bing, or other search engines.
When you perform a search on Google the order by which the returning results are displayed, is based on complex algorithms.
These algorithms (also known as search engine ranking factors) take into account a number of rules before they decide which webpage will be shown in the first position, second position, etc.
Optimizing your website for search engines will give you an advantage over non-optimized sites and you increase your chances of ranking higher.
Watch the video tutorial to learn what is SEO, how it works, and why it’s very important.
What are the main stages of the Search Engine Optimization process?
As I mentioned above, SEO is not a static process but rather a framework with rules and processes.
For simplicity though, SEO can be broken down into 3 main types:
SEO Overview
Technical SEO: With technical SEO you can ensure that search engines can crawl and index your website without any issues.
On-site SEO: Rules to apply to your site and content to make it search engine friendly.
Off-site SEO: Ways to promote your website or blog so that it can rank higher in search results.
Technical SEO
The first stage in the SEO process is called technical SEO. As the name implies, technical SEO has nothing to do with the actual content of a website or with website promotion methods.
It has to do with settings you need to configure to make the job of search engine crawlers easier. Usually, once you get your technical SEO correct, you may not have to deal with it again.
On the other hand, if you have problems with crawling and indexing, it can negatively impact your rankings.
To perform a technical SEO audit review and ensure that everything is working as expected, read our Technical SEO Guide.
On-site SEO
The second stage is On-Page SEO. On-Page SEO has to do primarily with the content and other elements found on a page.
Unlike technical and off-page SEO, the main focus of on-page SEO is to provide search engine crawlers with enough signals so that they can understand the meaning and context of your content.
Remember that search engines don’t read a page like a human so they are looking for signals to figure out what a page is all about.
It is at this stage that you will deal with website structure, SEO keywords, title optimizations, headings, internal links, image SEO, structured data markup, and other techniques that can send the right signals to search engines.
If followed correctly, on-page SEO will also improve the usability and credibility of a website or blog.
Note that content optimization is part of on-page SEO but sometimes this is referred to as Content SEO.
Our On-Page SEO Guide explains the different on-page SEO techniques in detail.
Off-site SEO
The third stage is Off-Page SEO.
Besides the changes, you can do to your website (on-site SEO) so that it ranks higher in the SERPs, the other way to improve your website’s ranking position is by using off-site SEO techniques.
Off-site SEO is generally known as link building but I prefer to use the term website promotion since a proper way to promote a website involves many more methods and techniques than building links.
Why is off-page SEO important? In general, when a user types a search query, search engine algorithms look into their index and try to find the best pages that can satisfy the intent of the user.
Pages that are good candidates appear in the first positions of the search results.
One of the factors to determine the position of a webpage in the results is the number of incoming links (backlinks).
Backlinks are a signal of trust and depending on where the links are coming from, they can greatly affect your ranking position.
If the links are coming from well-known and trusted sites, your ranking will be positively affected.
If they are paid links, links in article directories, link farms, or a result of an exchange, your ranking will be negatively affected.
That’s a very good question and I am sure that if you search the Internet for that phrase you will get hundreds of different answers.
Good content will get you natural links which in turn will give you high rankings and traffic.
If you try to buy links or get them the easy way, you may have temporary success and then see your website disappearing from the top pages after the next Google update.
What is the best way to learn how SEO Works?
The best way to learn how SEO works is to practice SEO.
Besides learning the different concepts and theories, the only way to find out if what you’ve learned works, is to apply the various SEO techniques on a website and monitor your rankings.
If your rankings and organic traffic are increasing, then this means that you are in the right direction. If not, you will have to revise your SEO strategy and action plan.
Resources to Learn More About SEO
How Search Engines Work – Before starting with SEO, it is important to understand how search engines work. At the end of the day, your goal with SEO is to influence search engines to ‘trust’ your website, and knowing how they actually rank websites, will help you make better decisions.
DIY SEO Tutorial – A tutorial on how to do SEO on your own. It covers both basic and advanced SEO Concepts.
SEO Checklist – A handy checklist to check that you have optimized all elements.
SEO Certifications – a list of the best SEO courses to follow and get certified.
What is the difference between SEO and Digital marketing?
Some people often ask me “Is SEO the same as Digital Marketing?” The simplest answer I can give is that SEO is one of the tools available in your Digital Marketing arsenal.
SEO can be part of your overall Digital Marketing campaign which normally includes other things like social media promotion, PPC, content strategy, etc.
Good content is still the most important success factor with or without SEO
Before closing this introduction to search engine optimization you must have very clear in your mind that SEO cannot help you if you don’t have good content.
In other words, if you try to SEO a website with not very good content your chances of succeeding (in the long term) are minimum.
On the other hand, a website with good content can do well with or without SEO. SEO will just give the website an extra boost.
Key Learnings
What is SEO? SEO is a set of rules for optimizing your website so that it can achieve higher rankings in search engines’ organic results.
Why is SEO important? The majority of search engine traffic goes to the top 5 results. With SEO your website can appear in one of the top positions for your target keywords and get visits to your website.
In this guide, you’ll learn the best SEO tips for beginners. It includes real examples and actionable advice to help you understand the basic SEO rules.
As a beginner to search engine optimization (SEO) you need to understand that there is no magic way to rank your website on the first page of Google, Bing or Yahoo.
Search engines are governed by complex algorithms and it takes a lot of time and effort to ‘convince’ them that your website or web page deserves one of the top spots.
Nevertheless, there are certain rules you can follow to optimize your website and provide the search engine bots with the necessary signals.
While the web is floated with SEO tips and advice, most of the articles talk about SEO at a theoretical level and not how SEO can be applied in practice.
In my opinion, this is why most website owners are confused and either they give up with SEO or simply do not get the expected results.
What you will read in this post is SEO advice that works.
I have tested this strategy over the years on a number of websites with remarkable results.
Google SEO Tips for Beginners
The most important SEO tips that can make a difference to your Google rankings are:
Of course, there are many other things you can do to help your website achieve better rankings, but the SEO tips presented below will give you a solid and reliable framework that is 100% safe (i.e. without taking any risks of getting a Google Penalty) and above all, it works.
In addition to the tips, I have added real examples from two web sites that I’ve been doing SEO work, to help you understand how to apply the guidelines on your own website or blog.
1. Page Titles and description
Page titles
Page titles are a very important aspect of SEO and this is why it is the first item on my list.
My findings for the last couple of months showed that page titles are more important than ever especially for Google SEO.
The most important characteristics of an optimized page title are:
Each page needs to have a unique page title that accurately describes the page’s content.
Be brief and descriptive.
Help the user understand what the page is about
Home page title: The title for your homepage can include the name of your website/business and other bits of important information like the physical location of your business or maybe a few of its main focuses or offerings.
The titles of other posts/pages of your website should accurately describe what the page is about and be attractive to the searcher.
Description
The page description meta tag is also very important. It gives users, Google, and other search engines a summary of what the page is about.
Google may choose to show what you type in the description as a snippet for your page or may decide to use a part of your page’s content.
In other words, it does not mean that what you write in the description will show in the snippet.
The guidelines for writing a good meta description are:
Always provide a unique description for all pages, posts, products of your website.
Keep the meta description length between 180-200 characters.
Avoid repeating the title in the description
Don’t add too many keywords
Try to use the description as a way to ‘advertise’ your page to the reader so that they click on your title and visit the page.
2. Permanent link structure
The permanent link structure is a term used to describe the format of URLS for pages (categories/tags) or individual posts of a web site.
It is shown in the browser address bar and in the search results (below the page title).
SEO Friendly URL
Guidelines for SEO Friendly URLs
Make Urls simple and easy to understand for search engines and users
Use hyphens ‘ – ‘ to separate the words that make up a URL
Avoid lengthy Urls with unnecessary information
Use words that describe what the page is about but avoid keyword stuffing
Examples of BAD URL structures
http://www.example.com/UK/123213/5005.html
http://www.example.com/socialmedianews
http://www.example.com/id=7&sort=A&action=70
Examples of GOOD URL structures
http://www.example.com/social-media-news
http://www.example.com/2002/12/social-media-news
3. Breadcrumb
Make sure that you have a breadcrumb trail on all your internal pages. A breadcrumb is a set of links at the top of the page that aid navigation. If you are using WordPress there are many free plugins to create a breadcrumb.
Breadcrumb Menu Example
4. Internal links
When we talk about internal links we mean links in a page that point to other pages within the website i.e. not external links.
In the example below, when you click on the link with anchor “increase the intensity” you will be redirected to a page with-in the website to find out more information on how to increase the intensity of an exercise.
Example of an Internal Link
Internal linking is a very important factor for website SEO but still many web site owners are not using it correctly. The rules to follow for internal links are simple:
Link related articles together either by using keyword anchor text or by using the full article title.
Make sure that the links are useful both for the user and easy to understand by search engines.
Don’t make links for search engines only. An internal link should help the user navigate the site better.
Do not use terms like ‘click here’ or ‘[..]’ for internal linking.
Don’t overdo it. A few internal links per page are enough (create more if really necessary)
Pro Hint: Don’t always link old posts from new posts but every couple of weeks go back and link newer posts from older posts.
It’s not an easy task to do especially if you have a lot of posts but it’s a very valuable tool for on-site SEO.
5. Text formatting and the use of H1, H2, and H3
Don’t just publish pieces of text on your website without first doing some basic formatting. This is not good for the user experience and works against your SEO efforts.
General guidelines for formatting a post or page on your website:
Use H1 tags for the title of your post
Use H2 tags for the main headings of your post.
Use BOLD and Italics to draw users attention
Don’t use H2 tags for all your headings
Write small paragraphs
Use a font size that is easy to read
When formatting your posts always have in mind the user experience. Can the user identify the main sections of your post (H2 tags) just by looking at the page? Is the text easy to read on all devices (smartphones, Apple Ipads, Android tablets, etc)?
Setting text as heading 1
6. The 404 Page
SEO is about improving the user experience and a proper 404 page contributes to that goal.
The 404 page is the page shown when a user is looking for a page on your site that doesn’t exist or mistypes a URL or follows a broken link. When the 404 page is not configured, it looks like this:
Default 404 Page
This is not useful for the user and negatively impacts the user experience.
A properly configured 404 page should:
Give some info to the user of what happened rather than displaying “Not found”
Have a design consistent with the rest of the website
Give options to the user to navigate to other pages of the site.
This is how my 404 page looks like:
Custom 404 Page
7. Image Optimization
Images are necessary to enhance the user experience but care should be taken not to create other side effects like problems with page load speed or slow response.
Importance of images in SEO
If you decide to use images, mind the following:
Use Alt Text to describe the image. You can add keywords but don’t overdo it.
Use keywords in image filenames (separated with dashes). Avoid using filenames like image1.jpg or person1.jpg. Instead, use meaningful names with dashes. For example woman-working-out.jpg
Keep all image files in a dedicated folder in your site i.e. www.mydomain.com/images/
Optimize the image size. The smaller the size of the image (in KB) the faster your website will load.
8. Page Speed
Google mentioned many times that page speed is a ranking factor and yet many webmasters don’t optimize their web sites for speed. Their aim (Google’s) is to provide the searcher with the most accurate results in the fastest possible way.
It is certain that page speed (as a ranking factor) will gain more importance in the next couple of years.
Bounce Rate and Page Speed
Fast web sites improve the user experience and it is a factor to encourage the visitor to come again. In addition, a website that loads in less than 4 seconds is more likely to:
Rank better in search results
Get more page visits per user
Get more conversions
How to tackle the page speed problem?
Remove any unnecessary plug-ins (if you are using WordPress) or javascript from your pages.
Optimize the size of your images.
Use a caching service or plug-in.
Go to http://www.webpagetest.org/ and test how many seconds it takes for your pages to load from different locations, internet speed, and browsers. The analysis report at the end will also tell you which components of your page take too long to load so that you can remove them.
Go to Google Page Speed Service to analyze your web site and get performance recommendations.
If you have a lot of images on your site and you cannot improve performance with the recommendations given by the tools mentioned above you can consider using a CDN (Content Delivery Network) service such as Cloudflare or Amazon Cloud Front
I know that tackling issues related to performance is a technical issue and sometimes it’s not easy for the average user to identify and solve the problems.
Nevertheless, it is a very important factor for SEO and should not be neglected.
9. Get Links from Other Websites
There is no way to avoid mentioning link building when we talk about SEO. The reason is simple: Off-Page SEO factors play a very critical role in the Google ranking algorithm.
I know that for beginners to SEO this is a concept difficult to understand, so let’s take it from the beginning.
What is link building and why it is very important for SEO?
Backlinks and Pagerank
When Larry Page and Sergey Brin (Google Founders), created the initial Google ranking algorithm, they were looking for a way to compare websites so that the best were shown first in the search engine results pages (SERPS).
Besides taking into account the on-page SEO factors of a page, they decided that websites that have incoming links from other websites are probably more important and popular than others, so they deserved a better ranking.
In other words, incoming links counted as ‘votes of trust’ and this had a positive effect on a website’s ranking position. The more incoming links pointing to a website the better was the ranking position.
In the beginning, this was something that could easily be manipulated. Webmasters who understood this concept started building thousands of links pointing to their websites and increased their rankings.
The problem was that some of those websites were not good quality websites and they did not actually deserve to be on the first page of Google. Over time this created a huge problem for Google that impacted the quality of their search results.
To protect their reputation and keep spam websites away, Google started adding more strict rules to their ranking algorithm and they were able to differentiate between natural and artificially created links.
The result was a success for Google. Spam and low-quality websites did not only lost their rankings but in many cases, they were removed from the Google index.
This was the time that Google penalties became more popular and words like Panda and Penguin (that’s the name given to Google ranking algorithm changes) became a nightmare for many webmasters.
To sum up this introduction to link building, you should understand 3 things:
1st -> Links are still a very important aspect of SEO.
2nd -> It’s no longer a matter of quantity (how many links are pointing to your website) but of quality (from where these links are coming).
3rd ->Natural links are good for your rankings, artificially generated links can get you into trouble.
How to approach link building (the safe way)
So, it should be clear by now that links are important, but how do you get them?
Link building is a huge topic, but I will outline below the most important elements:
Publish great content on your website that will naturally attract links
Put your content in front of other webmasters/bloggers that may potentially link to your website (Facebook and other social media channels are great promotion tools for this purpose)
Link to other websites and reach out to webmasters informing them that you added a link to their websites. If they like your website, they may return the favor – This is actually advice given by Google in one of their guides.
Publish content on other websites and add links pointing to your pages (this is also known as guest posting)
Make connections with other webmasters and let them know about your website (twitter and email are great tools to built connections with other people)
Try to get links from high-quality websites only
Get links from websites related to your niche and not any kind of website
Built your link profile gradually (any sudden changes to the number of incoming links may raise some warnings signals in the ranking algorithm)
Make sure you understand the difference between a ‘follow’ and ‘nofollow‘ link
How you approach link building for new websites is different than older websites so make sure that you use the right techniques
Use tools like SEMRUSH to analyze the link profiles of your competitors and try to learn as much as you can about their link practices
Check your link profile frequently and take action if necessary to clean your profile from unwanted links
Link Building Techniques
Link building mistakes to avoid:
Don’t buy links (avoid any sort of link building packages)
Don’t do any form of massive link building
Don’t add your link in low-quality websites
Links from comments or forums can sometimes do more harm than good (unless they are genuine and from well-trusted sources)
10. Mobile-friendly web sites
A significant number of searches performed each day are through mobile devices. Many studies over the last 6 months identified that the number of searches using smartphones is steadily increasing especially when it comes to making online purchases.
I am sure that if you take a look at your analytics data you will see a good percentage of your daily visits coming from mobile.
Mobile Usage VS Desktop Usage Statistics
It’s not in the scope of this post to go in detail into mobile SEO but there some simple steps to follow to ensure that your website is mobile-friendly.
The first thing to do is understand the difference between a mobile-friendly web site and a native Android, iPhone or Windows Mobile app. After talking with a number of webmasters I realized that many people fail with their mobile strategy because they do not understand this difference and because they have not yet realized the enormous potential of mobile markets.
A mobile-friendly web site is optimized for viewing on the mobile browser (i.e. Chrome on android or Safari on iPhone). A native android (iPhone or Windows Mobile app) is an application that can be downloaded from the mobile markets (Google Play or Apple Store). I will cover this with more details in another post but for SEO purposes you must provide a mobile-friendly version for your users coming through mobile browsers.
Update: The best way to approach Mobile SEO is to adopt a responsive website design. There are many advantages both in terms of SEO and usability.
11. User Sitemap
A sitemap is a list of all posts/pages of your website. You need 2 types of sitemaps. First, an XML sitemap to submit to Google, Bing and other search engines and second an HTML sitemap to help visitors find your content easier.
It is recommended to place a link to your user sitemap from the main menu.
XML Sitemap (for search engines)
Depending on your blogging platform you can use plugins to create and update your website’s sitemap. When viewed in the browser it looks like this:
XML Sitemap
HTML Sitemap (for Users)
The user sitemap should provide links to all (or to the most important pages of your site). It can also group posts by author, date, category, etc. Its purpose is to help the user find information on your site easier and quicker. My user sitemap looks like this:
User HTML Sitemap Example
12. Content is still king
In order for the above tips to work you need first and foremost to have good content on your web site.
Content is still king and a web site with good, original, quality content can do better in the long run (with or without SEO) than a web site optimized in SEO but with not so good content.
What is good content?
When people search on Google, Yahoo or Bing they are essentially looking for an answer to a question. Good content is a post or page that answers this question.
How do I know if my content is good?
There are two simple ways to understand if your content is useful.
First, you can check your analytics and especially the time users spent on a page. A reader will stay longer on the page if the content is good and second the number of social media shares (Facebook likes, tweets, etc.).
This is actually a very good way to understand what users want and what type of content to provide on your website or blog.
How to write good content?
There is no simple answer to this question, but the following guidelines can put you in the right direction:
Make sure that your content delivers what promised in the title. If for example, your title is “How to lose 15 pounds of fat” make sure that your post provides an accurate description (or steps) that someone can follow to achieve the desired result.
Check your text for typos, spelling and grammar mistakes.
Format your text (as explained in Tip 8 above)
Provide links within your content (where appropriate) to other pages on your site (or other sites) to get more information.
Include references from established research or studies (where appropriate) to prove that what you are saying or suggesting is correct.
Quantity VS Quality
Many people often ask me “How long (in words) should I make my posts?” You should understand that there is no single answer that fits all purposes. It greatly depends on the type of post and topic.
For example, the post you are reading now is more than 4000 words because it is a vast topic. In order to explain to someone the basic rules of SEO, I had to make the post that long.
If for example, you are writing about the benefits of black chocolate then surely you won’t have to write that much.
This is exactly where quantity vs. quality comes into place. It’s better to write a quality post without counting words rather than a long unfriendly post for the sake of providing more word count.
A couple of weeks after the release of Penguin, Google published a set of criteria for accessing the quality of a web site. Among the suggested guidelines they included some questions to ask after you finish a post, to help you determine the quality of your work.
13. Fresh Content
Having fresh content is an incentive for visitors to come back and for search engine bots to visit and crawl your website more often.
This is true when you really have something new to say about the niche or topic your covering. Avoid publishing pages with similar content just for the sake of updating your web site or blog.
14. Check your external links
External links (links in your web site pointing to other sites) are important for SEO. In general ensure that:
You are not linking to spam web sites or web sites with inappropriate content
You have no broken links i.e. links to web sites or pages that no longer exist (you can use xenu – a free tool to analyze your external links).
You are not in any way selling or exchanging links
Any links in your comments section carry the nofollow directive
15. Webmaster tools and Analytics
Google and Bing have what is called webmaster tools. This is the place to register and submit your web site to their index.
After submission, you can visit the webmaster central and get valuable information about your web site.
Although this is not directly related to SEO, when you submit your web site to Google search console and Bing webmaster tools you gain a number of advantages:
It’s a way to tell search engines about your web site (by submitting your sitemap)
It’s a way to get feedback on the number of pages indexed
It’s a way to get notified about potential problems i.e. access issues that restrict web sites from crawling your content
You can see the number of incoming and internal links.
Also, it is very important to use Google Analytics (or any other traffic analysis tool) to:
Find out how visitors find your web site (direct visits, search, referrals, etc)
How much time they spend on your pages (and on which pages)
What keywords they used
How many pages they view per visit
Bonus Tips:
Schema Markup
One of the ways to help search engines understand the context of your content is through the use of structured data markup. In simple terms, structured data is a way to annotate your content so that crawlers can index your pages better.
Although this is not officially part of the Google ranking algorithm, it is something that can improve the presentation of your pages in the search results and this means higher click-through rates and more organic traffic.
There are various schemas for almost all kinds of content (articles, videos, images, products, etc) and websites (personal, business, local business, etc).
Canonical URLs
Canonical URLs are very important for SEO. Setting a canonical URL for all your pages is a great way to:
Avoid duplicate content issues
Consolidate links to a particular page (this is useful for eCommerce websites or websites with dynamic URLS with parameters).
Tell Google the original publisher of an article in case you syndicate your content on other websites.
I have followed all the above SEO Tips, now what?
Once you have optimized your website for SEO by following ALL of the above guidelines, the next steps are:
Concentrate on improving your web site by (proving more content, whether it’s new product info, articles, services – or whatever you are trying to achieve).
Promote your web site using techniques that work and above all are safe.
If you fail with your SEO optimization your web site may not be running on its full potential but if you follow wrong promotion techniques you increase the risk of getting a penalty and completely destroy your efforts.
An optimized XML sitemap can lead to faster indexing and higher rankings. Learn what to include and exclude in your xml sitemap.
When optimizing your website for SEO, one of your goals is to provide Google the right signals so that it can index your website better. An optimized XML sitemap is one of those signals that can lead to faster indexing and higher rankings.
What is an XML Sitemap and why do you need it?
In simple terms, an XML sitemap is a file that lists all important pages of your website that search engine crawlers should know about.
Even if you don’t have a sitemap, they are still able to index your website but having a sitemap makes their job easier, and also it gives you the opportunity to let them know about pages and parts of your website they may not discover easily.
There are different kinds of sitemaps, you can submit a sitemap for your posts, images, and videos.
When is a sitemap really important?
For websites with many pages, a sitemap helps search engines discover pages that are new or updated.
For websites that don’t use good internal linking practices, a sitemap is a great way to give information to crawlers about your website pages.
For new websites that don’t have many incoming links, a sitemap will serve as a discovery tool.
How to create an XML Sitemap?
There are many ways to create an XML sitemap. Many platforms have this functionality built-in but even if they don’t, it’s easy to create one and take advantage of the benefits.
To check if your website has a sitemap you can open a new browser window and navigate to https://www.yourdomain.com/sitemap.xml.
It is necessary to understand that a sitemap is not a static file but it needs to be updated automatically when a new page is added to your website or when changes are made to existing pages.
For this reason, you should look for automated ways to create a sitemap.
For non-WordPress websites, the best way to create a sitemap is to search Google for plugins or software that are integrated to your platform and can generate sitemaps according to Google guidelines.
For WordPress websites, there are many plugins to help you. I will show you below step-by-step instructions on how to create and optimize your XML sitemap using Yoast SEO.
Watch the video tutorial to learn how to create an XML sitemap, what to include in your sitemap for maximum SEO and how to submit your sitemap to Google.
What to include in your XML sitemap for maximum SEO?
Before getting into the implementation details, it is important to understand what you should include in your XML sitemap for maximum SEO.
By default, the plugins will include all your website pages, posts, tags, archives, media, etc. but this is not what we want for SEO purposes.
The most important sitemap optimization guidelines are:
Include in your sitemap the pages (and that includes posts as well), that are important for your website. These are the pages that have high-quality content and are more likely to bring organic traffic to your website.
Exclude pages that have duplicate content. For WordPress websites, good candidates are archive pages, tag pages, and author pages.
Exclude pages with ‘thin content’. When it comes to optimizing a website for search engines, you don’t want to submit in their index pages that are of low quality. It’s not a numbers game, meaning that it’s not a matter of how many pages you have in the index but how many ‘good’ pages are in the index.
A good way to separate your ‘good pages’ from the ones that you don’t want to include in your sitemap is to either ‘no-index’ the pages or add them to a category and exclude the particular category (and pages) from the sitemap file.
Organize your sitemap into sub-sitemaps. This has the additional advantages of making sitemaps smaller and faster to process.
Submit a separate sitemap for your videos (if applicable).
Add your sitemap in robots.txt. I have explained before how to SEO your robots.txt and in addition to that, you can also add the location of your sitemap to help search engines find your sitemap file easier.
Include only URLs that Google can access. If you have pages that are blocked by robots or are behind a password-protected area, do not include those pages in the sitemap.
Make sure that your XML Sitemap includes the ‘last modification time’ field, a value that gives information to Google as to when a page was last modified. This is useful in cases where you want Google to re-index some pages of your website.
Last modification time in Sitemaps
Creating an XML Sitemap with Yoast SEO Plugin
One of the nice features of Yoast SEO is Sitemap functionality.
If you have the plugin installed and activated, the first thing to do is to ‘Enable the XML Sitemap functionality’ by going to Yoast SEO – > GENERAL – > FEATURES -> XML SITEMAPS.
Enable XML Sitemap Functionality in Yoast SEO
The next step is to configure what to include in your XML sitemap.
Click SEARCH APPEARANCE and then CONTENT TYPES.
Search Appearance Settings
For each of the content types, you need to decide if this is something you want to include in your sitemap.
If you set “Show posts in search results?” to YES, then the particular content type will be included in your sitemap, if you choose NO, it will not be included.
In most situations, you only need to include your posts, pages, and products (in the case of eCommerce websites) and exclude everything else.
Next, you need to select TAXONOMIES and do the same. In other words, you need to select which taxonomies you want to be included in your sitemap or not.
In a normal scenario, you should only include your post and product categories and exclude anything else like post tags or pages that don’t have unique content of their own.
Taxonomies in XML Sitemap
The next and final step is to go to ARCHIVES and disable Author and Date Archives.
Archives in XML Sitemap
Where is my XML Sitemap?
To view your sitemap, click SEE THE XML SITEMAP from GENERAL / FEATURES (first screenshot above), or open a new browser window and navigate to https://yourwebsite.com/sitemap_index.xml
Example of XML Sitemap
As you can in the screenshot above, the plugin created one sitemap per content type.
If you click on any of the links, you will also see that it contains info for images as well so you don’t need to create a different sitemap to submit your images to Google.
How to submit your XML sitemap to Google?
There are two ways to submit your sitemap to Google.
The first way is to add it to the robots.txt and the second way is to submit your sitemap in Google Search Console.
For best results, you can use both methods.
Add your sitemap in robots.txt
Edit your robots.txt file as explained here, and add a line at the end to include your sitemap as shown below.
Sitemap in Robots.txt
If you don’t know what is robots.txt and what does it do, read this helpful guide: How to use robots.txt
To submit your XML sitemap in Google Search Console:
Type in your sitemap filename (i.e. sitemap_index.xml) and click the SUBMIT button.
Submit Sitemap to Google Search Console
Once you do this you will see that the sitemap is Pending. Check back in a few days to see how many pages were submitted in your sitemap and how many pages are actually indexed.
You can see all the details in the COVERAGE report (under Index).
Note: It is normal that Google will not index all your pages especially if you added in the sitemap pages that are not important.
When do you need to submit an RSS Feed to Google?
Besides submitting an XML sitemap, there are cases that you can submit an RSS feed to Google.
When you have a large website with lots of pages that change frequently (for example a News website), you can make use of an RSS feed to let Google know of new additions to the website.
The RSS feed will be smaller and will only include the new pages (thus it will be processed faster) while your sitemap will include ALL your pages.
Conclusion
Having a valid XML sitemap that search engines can read is important for SEO.
Anything you can do to make their job easier and anyways you can use to give them more information about the structure and contents of your website will enhance your website’s presence in their index.
Creating an XML sitemap is easy since there are many plugins that automate the process for you.
Besides having a sitemap, if your website has a lot of content (pages, posts, etc.) and if you have new additions on a daily basis, you can also submit your RSS feed to Google (the same way as you do with a sitemap) and thus speed up indexing your new content.
Learn what a robots.txt file is and why it’s important for technical SEO.
One of the first things you need to check and optimize when working on your technical SEO is the robots.txt file. Search engine optimization (SEO) is a critical aspect of website development and maintenance. One essential factor that impacts a website’s SEO is the Robots.txt file. This file tells search engines which pages of your website they can crawl and which ones they should ignore. Understanding Robots.txt file SEO is crucial if you want to improve your website’s search engine ranking and visibility.
In this article, we’ll explore everything you need to know about Robots.txt file SEO, including what it is, how it works, and how to optimize it for better SEO results.
What is Robots.txt file SEO?
The Robots.txt file is a text file that tells search engine robots (also known as crawlers or spiders) which pages of your website to crawl and index. It serves as a set of instructions for search engines on how to interact with your website.
Robots.txt file SEO refers to the optimization of this file to improve a website’s visibility and search engine ranking. By optimizing your Robots.txt file, you can ensure that search engines crawl and index the right pages of your website, leading to better SEO results.
How does Robots.txt file SEO work?
The Robots.txt file is located in the root directory of your website. Search engine robots check this file before crawling your website. The file tells the robots which pages to crawl and which ones to ignore. If a page is not listed in the Robots.txt file, search engine robots will assume that it is okay to crawl and index that page.
By using the Robots.txt file, you can control how search engines interact with your website. You can block pages that you don’t want to be indexed, such as login pages, admin pages, or pages with duplicate content. This helps to prevent duplicate content issues and improves your website’s search engine ranking.
When visiting a website, the first thing they do is to look for and check the contents of the robots.txt file.
Depending on the rules specified in the file, they create a list of the URLs they can crawl and later index for the particular website.
The contents of a robots.txt are publicly available to the Internet. Unless protected otherwise, anyone can add view your robots.txt file so this is not the place to add content that you don’t want others to see.
What happens if you don’t have a robots.txt file? If a robots.txt file is missing, search engine crawlers assume that all publicly available pages of the particular website can be crawled and added to their index.
What happens if the robots.txt is not well-formatted? It depends on the issue. If search engines cannot understand the contents of the file because it is misconfigured, they will still access the website and ignore whatever is in robots.txt.
What happens if I accidentally block search engines from accessing my website? That’s a big problem. For starters, they will not crawl and index pages from your website and gradually they will remove any pages that are already available in their index.
Do you need a robots.txt file?
Yes, you definitely need to have a robots.txt even if you don’t want to exclude any pages or directories of your website from appearing in search engine results.
Why use a robots.txt?
The most common use cases of robots.txt are the following:
#1 – To block search engines from accessing specific pages or directories of your website. For example, look at the robots.txt below and notice the disallow rules.
Example of a robots.txt file
These statements instruct search engine crawlers not to index the specific directories. Notice that you can use an * as a wild card character.
#2 – When you have a big website, crawling and indexing can be a very resource-intensive process. Crawlers from various search engines will be trying to crawl and index your whole site and this can create serious performance problems.
In this case, you can make use of robots.txt to restrict access to certain parts of your website that are not important for SEO or rankings. This way, you not only reduce the load on your server but it makes the whole indexing process faster.
#3 – When you decide to use URL cloaking for your affiliate links. This is not the same as cloaking your content or URLs to trick users or search engines but it’s a valid process for making your affiliate links easier to manage.
Two Important things to know about robots.txt
The first thing is that any rules you add to the robots.txt are directives only. This means that it’s up to search engines to obey and follow the rules.
In most cases they do but If you have content that you don’t want to be included in their index, the best way is to password-protect the particular directory or page.
The second thing is that even if you block a page or directory in robots, it can still appear in the search results if it has links from other pages that are already index. In other words, adding a page to the robots.txt does not guarantee that it will be removed or not appear on the web.
Besides password-protecting the page or directory, another way is to use page directives. There are added to the <head> of every page and they look like the example below:
<meta name=”robots” content=”noindex”>
How does robots.txt work?
The robots file has a very simple structure. There are some predefined keyword/value combinations you can use.
The most common are: User-agent, Disallow, Allow, Crawl-delay, Sitemap.
User-agent: Specifies which crawlers should take into account the directives. You can use an * to reference all crawlers or specify the name of a crawler, see examples below.
You can view all available names and values for the user-agent directive, here.
User-agent: * – includes all crawlers. User-agent: Googlebot – instructions are for Google bot only.
Disallow: The directive that instructs a user-agent (specified above), not to crawl a URL or part of a website.
The value of disallow can be a specific file, URL, or directory. Look at the example below taken from Google support.
Example of disallow rules in robots.txt
Allow: The directive that tells explicitly which pages or subfolders can be accessed. This is applicable for the Googlebot only.
You can use the allow to give access to a specific sub-folder on your website, even though the parent directory is disallowed.
For example, you can disallow access to your Photos directory but allow access to your BMW sub-folder which is located under Photos. User-agent: * Disallow: /photos Allow: /photos/bmw/
Crawl-delay: You can specify a crawl-delay value to force search engine crawlers to wait for a specific amount of time before crawling the next page from your website. The value you enter is in milliseconds.
It should be noted that the crawl delayis not taken into account by Googlebot.
You can use Google Search Console to control the crawl budget for Google (the option is found here).
Google Crawl rate setting in Google Search Console
You can use the crawl rate in cases you have a website with thousands of pages and you don’t want to overload your server with continuous requests.
In the majority of cases, you shouldn’t make use of the crawl-delay directive.
Sitemap: The sitemap directive is supported by the major search engines including Google and it is used to specify the location of your XML Sitemap.
Even if you don’t specify the location of the XML sitemap in the robots, search engines are still able to find it.
For example, you can use this:
Sitemap: https://example.com/sitemap.xml
Important: Robots.txt is case-sensitive. This means that if you add this directive, Disallow: /File.html will not block file.html.
How to create a robots.txt?
Creating a robots.txt file is easy. All you need is a text editor (like brackets or notepad) and access to your website’s files (via FTP or control panel).
Before getting into the process of creating a robots file, the first thing to do is to check if you already have one.
The easiest way to do this is to open a new browser window and navigate to https://www.yourdomain.com/robots.txt
If you see something similar to the one below, it means that you already have a robots.txt file and you can edit the existing file instead of creating a new one. User-agent: * Allow: /
How to edit your robots.txt
Use your favorite FTP client and connect to your website’s root directory.
Robots.txt is always located in the root folder (www or public_html, depending on your server).
Download the file to your PC and open it with a text editor.
Make the necessary changes and upload the file back to your server.
How to create a new robots.txt
If you don’t already have a robots.txt then create a new .txt file using a text editor, add your directives, save it and upload it to the root directory of your website.
Important: Make sure that your file name is robots.txt and not anything else. Also, have in mind that the file name is case-sensitive so it should be all lowercase.
Where do you put robots.txt? robots.txt should always reside in the root of your website and not in any folder.
Example of a robots.txt
In a typical scenario, your robots.txt file should have the following contents: User-agent: * Allow: / Sitemap: https://example.com/sitemap.xml
This allows all bots to access your website without any blockings. It also specifies the sitemap location to make it easier for search engines to locate it.
How to test and validate your robots.txt?
While you can view the contents of your robots.txt by navigating to the robots.txt URL, the best way to test and validate it is through the robots.txt Tester tool of Google Search Console.
If everything is ok, the Test button will turn green and the label will change to ALLOWED. If there is a problem, the line that causes a disallow will be highlighted.
Robots.txt Tester Tool
A few more things to know about the robots.txt tester tool:
You can use the URL Tester (bottom of the tool) to enter a URL from your website and test if it is blocked or not.
You can make any changes to the editor and check new rules BUT in order for these to be applied to your live robots.txt, you need to EDIT your file with a text editor and upload the file to your website’s root folder (as explained above).
To inform Google that you have made changes to your robots.txt, click the SUBMIT button (from the screen above) and click the SUBMIT button again from the popup window (option 3 as shown below).
Robots.txt Submit Updates
Robots.txt and WordPress
Everything that you read so far about robots.txt is applicable to WordPress websites as well.
The only things you need to know about robots.txt and WordPress are the following:
In the past, it was recommended for WordPress websites to block access to wp-admin and wp-includes folders via robots.txt.
As of 2012 this is no longer needed since WordPress provides for a
@header( 'X-Robots-Tag: noindex' ); tag, which does the same job as adding a disallow in robots.txt.
What is a virtual robots.txt file?
WordPress by default is using a virtual robots.txt file. This means that you cannot directly edit the file or find it in the root of your directory.
The only way to view the contents of the file is to type https://www.yourdomain.com/robots.txt in your browser.
The default values of WordPress robots.txt are: User-agent: * Disallow: /wp-admin/ Allow: /wp-admin/admin-ajax.php
When you enable the “Discourage search engines from indexing this site” option under Search Engine Visibility Settings the robots.txt becomes:
Search Engine Visibility Settings WordPress
User-agent: *
Disallow: /
Which basically blocks all crawlers from accessing the website.
How do I edit robots.txt in WordPress?
Since you cannot directly edit the virtual robots.txt file provided by WordPress, the only way to edit it, is to create a new one and add it to the root directory of your website.
When a physical file is present on the root directory, the virtual WordPress file is not taken into account.
Robots.txt SEO Best Practices
Test your robots.txt and make sure that you are not blocking any parts of your website that you want to appear in search engines.
Do not block CSS or JS folders. Google during the crawling and indexing process is able to view a website like a real user and if your pages need the JS and CSS to function properly, they should not be blocked.
If you are on WordPress, there is no need to block access to your wp-admin and wp-includes folders. WordPress does a great job using the meta robots tag.
Don’t try to specify different rules per search engine bot, it can get confusing and difficult to keep up-to-date. Better use user-agent:* and provide one set of rules for all bots.
If you want to exclude pages from being indexed by search engines, better do it using in the header of each page and not through the robots.txt.
Frequently Asked Questions (FAQs):
A: Yes, optimizing your Robots.txt file can improve your website’s search engine ranking by ensuring that search engines crawl and index the right pages.
A: You should block pages with duplicate content, login pages, admin pages, and any pages that you don’t want to be indexed.
A: You can use tools like the Google Search Console to test your Robots.txt file and make sure that search engines are crawling and indexing the right pages.
Conclusion
Robots.txt file SEO is an essential aspect of website development and maintenance. By optimizing your Robots.txt file, you can ensure that search engines crawl and index the right pages of your website, leading to better SEO results. Remember to keep your Robots.txt file simple, be specific about the pages you aim to be indexed.